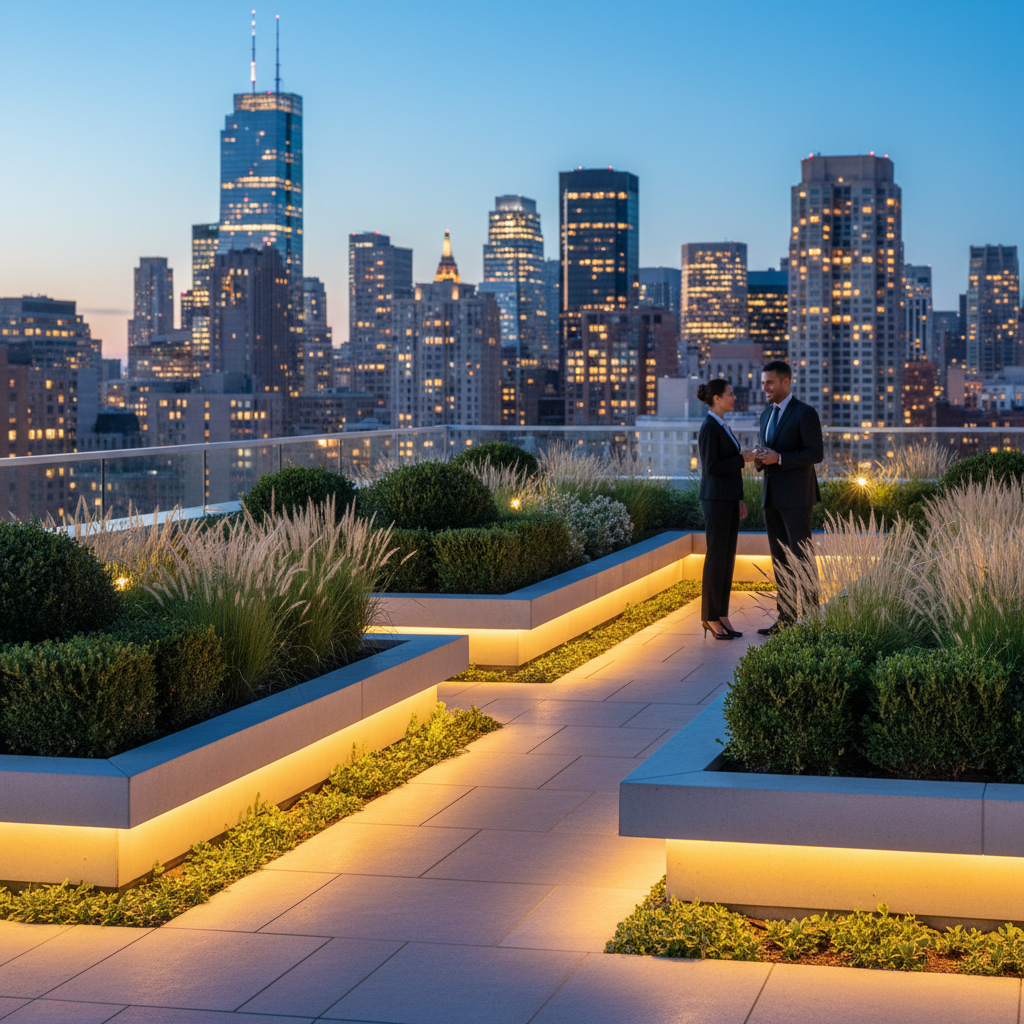
April 18, 2026 | Jane Doe

Stop New Sod From Wilting: The 2026 Deep-Soak Method

Stop New Sod From Wilting: The 2026 Deep-Soak Method

Why Your New Sod Is Failing Despite Daily Watering

To stop new sod from wilting, you must move beyond surface-level misting and implement a deep-soak strategy that saturates the top 6 inches of soil profile. This involves incremental irrigation cycles that force root architecture to penetrate deep into the sub-base, preventing evapotranspirative stress and desiccation of the turfgrass rhizomes during the critical establishment phase.

I always drill into my new crew members: if you don’t fix the soil grading and moisture profile first, every piece of high-quality sod you put in the ground is just expensive compost. I’ve seen 20-year veterans get lazy, slap down Tall Fescue or Bermuda on compacted clay, and walk away thinking a 10-minute sprinkler run will save it. It won’t. I’ve stepped onto sites where $15,000 of fresh Kentucky Bluegrass was crunchy within 72 hours because the homeowner was ‘watering every day’—but they were only wetting the blades, not the soil interface. You have to understand the physics of capillary action. If the water potential in the soil is lower than in the plant tissue, the ground will literally suck the life out of your new lawn. We don’t do ‘mow-and-blow’ shortcuts here; we do horticultural engineering. If the root flare of your grass isn’t diving into the rhizosphere within seven days, you’ve already lost the battle against wilting.

The Anatomy of the 2026 Deep-Soak Irrigation Protocol

The 2026 Deep-Soak Method relies on stratified irrigation, delivering precise volumes of water at specific intervals to maintain a hydrostatic equilibrium between the sod slab and the native soil. By utilizing smart controllers and evapotranspiration (ET) data, we ensure the root-to-soil contact remains unbroken by air pockets or hydrophobic soil conditions.

“A successful turf establishment relies less on the frequency of application and more on the depth of the wetting front; shallow watering encourages weak root systems susceptible to heat dormancy.” – Texas A&M Agrilife Extension

Most people think watering is a binary choice: on or off. In reality, it’s about infiltration rates. If you apply water faster than the soil percolation rate, you get runoff and pooling. This is why soil compaction is the enemy of irrigation. I use a penetrometer to check the psi of the ground before we even unload the pallets. If that soil is over 300 psi, your roots are hitting a brick wall. We use a deep-soak approach that starts with a heavy 1-inch saturation on day one, followed by ‘bump’ cycles—short bursts of water—to keep the crown of the grass cool without drowning the microbiome.

Establishment PhaseWatering FrequencyTarget DepthBiological Goal
Days 1-33-4 Times Daily1-2 InchesStructural Saturation
Days 4-72 Times Daily3-4 InchesRoot Migration
Days 8-14Once Daily (Early AM)5-6 InchesDeep Root Foraging
Day 15+3 Times Weekly6+ InchesDrought Resistance

How much water does new sod actually need per square foot?

During the first 72 hours, newly installed sod requires approximately 0.5 to 1 inch of water daily, applied in multiple short bursts to prevent puddling. This equates to roughly 600 gallons of water per 1,000 square feet. You must monitor the moisture sensor or use a simple soil probe to ensure the water is moving through the thatch layer and into the sub-soil. Don’t guess; measure. If the soil underneath is dry, the grass is dying.

Site Prep: The Foundation of Turf Survival

Proper site preparation involves removing debris, correcting drainage gradients, and amending the soil texture with organic matter to create a nutrient-rich seedbed for the sod. Skipping yard cleanup or failing to address soil pH results in a nutrient lockout that no amount of irrigation can fix during the establishment period.

You can’t just throw sod over existing grass or weeds. That’s a death sentence. I’ve seen ‘contractors’ try to save time by not stripping the old turf. Within a month, the decomposition gases from the old grass kill the new roots. It’s disgusting. We power-rake, we core-aerate, and we use a starter fertilizer with a high phosphorus count—check your NPK ratios, specifically looking for that middle number to be higher—to jumpstart adenosine triphosphate (ATP) production in the roots. If your landscape contractor doesn’t bring a rototiller or a Harley rake to the job site, fire them immediately.

  • Soil Test: Verify pH is between 6.2 and 7.0 for optimal nutrient uptake.
  • Grading: Ensure a 2% slope away from foundations to prevent root rot.
  • Debris Removal: Clear all rocks larger than 1 inch to prevent air pockets.
  • Rolling: Use a sod roller (half-full) to ensure capillary contact between the sod and dirt.

Can I install sod over existing grass?

No, you cannot. Installing new sod over existing lawn creates a physical barrier of dead organic matter that prevents root penetration and promotes fungal pathogens like Pythium blight. You must excavate the top 2 inches of old vegetation and till the underlying soil to create a receptive seedbed. Anything less is professional malpractice in the landscaping industry.

The Engineering of Modern Irrigation Systems

A professional irrigation system must be calibrated for head-to-head coverage, ensuring no dry spots occur in the hydro-zone during the sod establishment. This requires pressure-regulated nozzles and a hydraulic layout that accounts for friction loss across the lateral lines to maintain consistent nozzle velocity.

“Hydrostatic pressure within the plant cells is what keeps the leaf blades upright; once the turgor pressure drops, the cellular walls collapse, leading to permanent wilting point (PWP).” – Agronomy Manual v.4

I see it all the time: cheap oscillating sprinklers from the hardware store that leave ‘donuts’ of dry grass. If you’re spending thousands on landscaping, don’t use a $20 sprinkler. We install MP Rotators or high-efficiency rotors that deliver large droplets. Small droplets evaporate before they hit the ground. That’s physics. Also, check your backflow preventer. If you don’t have enough PSI at the head, your spray pattern will collapse, and you’ll have brown spots by Tuesday. It’s math, not magic. Every irrigation zone must be timed based on the slope and sun exposure of that specific micro-climate in your yard.

The 2026 Maintenance Schedule: Year One

After the initial deep-soak phase, maintenance shifts to proactive turf management, focusing on integrated pest management (IPM) and nitrogen-rich fertilization to maintain photosynthetic efficiency. You must avoid scalping the lawn during the first mow, as removing more than one-third of the leaf blade shocks the vascular system of the young turf.

Wait at least 14 days before the first mow. Check the root pull—literally grab a handful of grass and tug. If the sod lifts, it’s not ready. If it stays put, the roots have anchored. Set your mower to the highest setting. Dull blades will shred the grass, leading to brown tips and disease. Use a sharp blade. Don’t bag the clippings yet; let that nitrogen return to the soil profile. This is the long-term play. Your yard isn’t a vibrant tapestry (I hate that word); it’s a biological engine that needs the right fuel and coolant to run. Keep the thatch thin, the soil loose, and the water deep. That is how you win in 2026.

April 18, 2026 | Michael Smith

Stop New Sod From Wilting: The 2026 Deep-Soak Method

Stop New Sod From Wilting: The 2026 Deep-Soak Method

The Chemical Nightmare: Why Most Sod Fails Before the First Mow

I recently walked onto a job site where a homeowner had effectively nuked their own property. They had applied a high-nitrogen urea fertilizer during a 95-degree heatwave, followed by a shallow 10-minute sprinkle. The result was a total salt burn that sterilized the top two inches of the soil profile. We didn’t just have dead grass; we had a biological wasteland. To fix it, we had to scrape the entire lot, haul away the contaminated silt, and implement what I call the 2026 Deep-Soak Method. This isn’t just about wetting the grass; it is about managing the hydrostatic pressure and capillary action of the soil to force root depth. If you do not understand the bulk density of your soil, your new sod is just expensive compost waiting to happen. It will die.

The Physics of Water Retention in New Turf

To stop new sod from wilting, you must saturate the soil profile to a depth of six inches immediately after sod install to eliminate air pockets. This process, known as hydro-cycling, ensures that the root-to-soil contact is absolute, preventing the delicate root hairs from desiccating in the afternoon heat. Most failures happen because people water the blades, not the dirt. The blades don’t need the water; the rhizomes do.

“Successful turfgrass establishment depends on maintaining a moist environment in the top 4 to 6 inches of the soil profile to support rapid adventitious root development.” – Texas A&M AgriLife Extension

How much water does new sod need daily?

During the first 14 days, new sod requires approximately 0.25 to 0.50 inches of water per day, delivered in split applications to prevent anaerobic soil conditions. This timing prevents the evapotranspiration rate from exceeding the water uptake, which is the primary cause of turf wilting in high-sun exposure areas. You are fighting a clock. Once the edges turn brown, the vascular system of the grass is already collapsing. Don’t wait for the brown.

The 2026 Deep-Soak Method: Operational Blueprint

The 2026 method moves away from the old “water three times a day” mantra and focuses on soil moisture tension. We use a soil probe to check the moisture at the 4-inch mark. If the dirt is dry at 4 inches, you are failing. We utilize low-precipitation rate nozzles (like the MP Rotator series) to apply water slowly, allowing it to percolate rather than run off. This is critical if you have heavy clay soils with low infiltration rates.

[image_placeholder_1]

Irrigation Management by Soil Texture

Soil TypeInfiltration Rate (in/hr)Deep-Soak DurationCycle/Soak Required?
Heavy Clay0.05 – 0.1015 minsYes (4 cycles)
Sandy Loam0.50 – 1.0045 minsNo
Silt Loam0.20 – 0.3025 minsYes (2 cycles)

Notice the clay metrics. If you run your irrigation for an hour straight on clay, you are just washing your money down the storm drain. The water can’t get in. It puddles, the roots suffocate from lack of oxygen, and the sod slides off the grade. You must use cycle-and-soak settings. Period.

Step-by-Step Yard Cleanup and Sod Preparation

Proper yard cleanup is not just raking leaves; it is a structural necessity. You need to remove all thatch layers and organic debris that can create a barrier between the new sod and the mineral soil. If there is a layer of dead grass between the new sod and the dirt, the roots will never dive. They will stay in the sod mat, bake in the sun, and die in three days. I see this every week. It is amateur hour.

  • Grade Check: Ensure the soil is 1 inch below the level of hardscapes (sidewalks/patios) to account for sod thickness.
  • Soil Test: Check the pH levels. If you are below 6.0 or above 7.5, your NPK uptake will be locked out.
  • Pre-Hydration: Wet the bare dirt the night before the install. Never lay sod on bone-dry, 100-degree soil. It’s like putting a steak on a hot griddle.
  • Rolling: Use a water-filled sod roller to press the sod into the dirt. If there is air, there is death.

“A retaining wall doesn’t fail because of the stone; it fails because of the water trapped behind it. Similarly, sod doesn’t fail because of the grass; it fails because of the soil interface.” – Hardscape and Agronomy Axiom

Why is my new sod turning yellow?

Yellowing in new sod is typically a sign of nitrogen leaching from over-watering or iron chlorosis caused by high alkalinity in the local water supply. If the soil is muddy but the grass is yellow, stop watering and check the oxygen levels in the root zone. You might be drowning it. New sod needs air just as much as it needs water. Balance the pore space.

Long-Term Turf Stability

By day 21, you should be transitioning to deep, infrequent watering. This forces the roots to chase the moisture downward as the top layer dries out. If you keep the surface wet forever, the roots stay shallow. Shallow roots mean your lawn will die the first time the temperature hits 95 degrees next summer. You are training the grass. Be a tough coach. Use a sharp mower blade for the first cut and never remove more than one-third of the leaf tissue. Scalping is a death sentence for young turf. Follow the 1-inch-per-week rule. Measure it with a tuna can. Don’t guess.

April 18, 2026 | Michael Smith

3 Simple Soil Hacks to Fix 2026 Sod Rooting Issues

3 Simple Soil Hacks to Fix 2026 Sod Rooting Issues

The Foundation of Successful Sod Installation

To fix 2026 sod rooting issues, you must focus on soil de-compaction, bio-available phosphorus levels, and microbial inoculation. Ensuring a soil pH between 6.0 and 7.0 allows for optimal nutrient uptake, preventing the common failure where roots sit on top of the soil instead of penetrating the sub-grade. I once saw a homeowner who had spent five figures on high-end fescue, only to watch it turn into a yellowing crisp within three weeks. They had followed the big-box store advice and dumped high-nitrogen fertilizer on the surface in the middle of a heatwave. The nitrogen sat there, salt-burned the tender new roots, and essentially pickled the grass from the bottom up. It was a chemical nightmare that could have been avoided with a simple soil test and a basic understanding of cation exchange capacity. That is the difference between a professional sod install and a DIY disaster. You cannot just slap grass on top of hardpan clay and expect a miracle. You are building a biological engine, and the soil is the fuel system.

Why Yard Cleanup is the Secret to Root Penetration

Effective yard cleanup involves more than just raking leaves; it requires the removal of the hydrophobic layer of old organic matter that prevents water from reaching the root zone. When we talk about landscaping, we are talking about managing the interface between the plant and the earth. If you leave old thatch or construction debris under your new sod, you create air pockets. These air pockets are death traps. Roots hit air, dry out, and die. We call this ‘air pruning,’ and while it is great in a nursery pot, it is a catastrophe in your front yard. You need 100 percent soil-to-root contact. This requires a clean slate, stripped down to the bare mineral soil before any amendments are added.

“Soil testing is the only way to determine the actual nutrient needs of your lawn, as visual symptoms of nutrient deficiency often mimic those of disease or environmental stress.” – Penn State Extension Agronomy Manual

Hack 1: Bio-Inoculation with Mycorrhizae

Inoculating your soil with mycorrhizal fungi creates a symbiotic relationship that extends the root system’s reach by up to 1,000 times, significantly increasing drought resistance and nutrient absorption. These fungi attach to the sod roots and act as an auxiliary plumbing system. They can mine phosphorus from the soil that the grass roots cannot reach on their own. In the 2026 growing season, where we expect more volatile moisture shifts, this biological insurance policy is non-negotiable. Don’t just buy any bag; look for products containing Glomus intraradices. Apply this directly to the soil surface before the sod hits the ground so the roots make immediate contact upon installation.

Hack 2: Mechanical Sub-Soiling and Fracturing

Mechanical sub-soiling involves using a tiller or aerator to break the compaction layer at least 6 inches deep, ensuring that irrigation water and roots can move vertically through the soil profile. Most modern suburban yards are compacted to the density of concrete by heavy equipment during home construction. If you don’t fracture that hardpan, your sod will grow ‘pancake roots’—sideways instead of down. Deep roots are the only thing that will keep your lawn green when the irrigation system inevitably faces a mid-summer glitch. Use a core aerator to pull plugs, then top-dress with a mix of coarse sand and leaf compost to keep those channels open.

Hack 3: The Slow-Release Phosphorus Matrix

Applying a starter fertilizer with a high phosphorus (P) value—the middle number on the bag—is essential for ATP production and cellular energy transfer during the critical first 14 days of rooting. While nitrogen (N) makes the grass green, phosphorus makes the grass strong. However, you must use a slow-release granular form to prevent runoff into local waterways. We want the phosphorus to stay in the root zone, not wash into the storm drain. Aim for a 10-20-10 ratio for new installs. This provides the energy the plant needs to push through the shock of being cut, transported, and re-laid in a foreign environment.

Comparison of Soil Amendments for 2026 Sod Success

Amendment TypePrimary BenefitApplication RateBest For
BiocharCarbon sequestration/Water retention10 lbs per 1000 sq ftSandy soils
GypsumBreaks up clay/Calcium boost40 lbs per 1000 sq ftHeavy clay/Sodic soil
Humic AcidIncreases nutrient uptakeLiquid or Granular sprayAll soil types
CompostMicrobial life/Organic matter1/4 inch top-dressDepleted urban soil

How long does sod take to root in clay soil?

In heavy clay, sod install projects typically take 14 to 21 days to establish a shallow root system, but deep rooting can take a full growing season. Because clay has small pore spaces, irrigation must be managed carefully to avoid waterlogging the roots, which leads to Pythium blight and root rot. You must use the ‘tug test’—if you pull the corner of a sod piece and it resists, the roots are taking hold.

What is the best fertilizer for new sod installation?

The best fertilizer for new landscaping with sod is a starter fertilizer rich in phosphorus and potassium, specifically designed to stimulate root growth rather than top-growth. Avoid high-nitrogen ‘weed and feed’ products for the first 60 days, as these can chemically burn the new root tips and increase the plant’s water demand beyond what the immature root system can provide.

“Water movement in soil is governed by matric and gravitational forces; a saturated soil layer prevents oxygen from reaching the root zone, effectively suffocating the plant.” – Texas A&M AgriLife Extension

The 2026 Sod Installation Checklist

  • Conduct a soil pH test (target 6.5).
  • Remove all rocks, debris, and existing weeds (clean yard cleanup).
  • Till the soil to a depth of 6 inches.
  • Apply mycorrhizal inoculant to the bare earth.
  • Grade the soil away from the home foundation to prevent drainage issues.
  • Lay sod in a staggered brick pattern to minimize seam drying.
  • Roll the sod with a water-filled roller to ensure soil contact.
  • Set irrigation for 3 short cycles per day for the first 10 days.

Optimizing Irrigation for Root Depth

Proper irrigation for new sod is not about total volume; it is about frequency and timing. During the first week, you want the soil under the sod to stay consistently moist but not swampy. By week three, you should transition to deep, infrequent watering. This is the ‘tough love’ phase. By letting the top inch of soil dry out slightly, you force the roots to grow downward in search of moisture. This builds a resilient, drought-tolerant lawn. If you water every day for five minutes, you are training your lawn to be weak. It will die the first time you go on vacation. It will rot. Don’t skip the transition to deep watering. This is where the engineering of your landscaping pays off.

April 18, 2026 | Michael Smith

3 Simple Soil Hacks to Fix 2026 Sod Rooting Issues

3 Simple Soil Hacks to Fix 2026 Sod Rooting Issues

3 Simple Soil Hacks to Fix 2026 Sod Rooting Issues

I see it every spring. A homeowner spends thousands on high-quality sod, hires a crew to roll it out, and by week three, they are looking at a field of brown, crispy mats that look more like outdoor carpeting than a living lawn. When you pull up a corner of that sod, it comes right up. No roots. No connection. It is effectively dead on arrival. This is not a problem with the grass. It is a failure of the subterranean infrastructure. If you treat your soil like a platform rather than a living biological reactor, you are flushing your investment down the storm drain.

The Root of the Problem: Why Sod Fails to Knit

Sod rooting failure occurs when hydrostatic barriers or extreme soil compaction prevent primary adventitious roots from penetrating the native substrate. Without proper capillary action, the sod remains a separate layer, drying out and eventually succumbing to localized dry spot despite heavy irrigation efforts or chemical intervention.

I always drill into my new crew members: if you don’t fix the soil grading and chemistry first, every plant you put in the ground is just expensive compost. I remember a job back in 2018 where we were called to replace a failed 5,000-square-foot sod install. The previous contractor had literally laid the sod over a layer of hard-packed red clay that was so compacted you could have parked a semi-truck on it without leaving a tire mark. They had used plenty of fertilizer, but the roots were hitting that clay like it was a sheet of glass and turning sideways. That is not a lawn; that is a recipe for rot. We had to rip it all up, bring in a subsoiler, and start from the microbiology up. It was a $12,000 lesson for that homeowner because they tried to skip the yard cleanup and prep phase.

“Successful turfgrass establishment depends on the physical contact between the sod and a moist, well-prepared seedbed. Soil compaction is the single most common cause of plant failure in urban landscapes.” – Penn State Center for Turfgrass Science

Hack 1: Mechanical Fracture and the Death of the ‘Plow Pan’

Mechanical fracture involves using a core aerator or subsoil tiller to break the compacted layer, known as the plow pan, at a depth of 4 to 6 inches. This process increases the soil’s macroporosity, allowing for oxygen exchange and providing a physical pathway for new roots to migrate.

You cannot expect a tender root hair to penetrate 3,000 PSI of soil resistance. Most new construction sites are compacted by heavy machinery during the build process. This creates a literal wall. Before any sod install, you must perform a ‘shove test.’ If you cannot push a standard screwdriver six inches into the ground with one hand, your sod will fail. Don’t just till the top inch; you need to shatter the deeper layers. We use a vertical-action aerator that pulls three-inch plugs. These holes act as ‘root highways.’ When the sod goes down, those roots find the voids, dive deep, and anchor the plant against future drought. Skip this, and you are just laying a wig on a bald man. It will slide right off when the wind blows or the water runs.

Hack 2: The Biological Bridge via Mycorrhizae Integration

The biological bridge uses endomycorrhizal fungi inoculants to create a symbiotic relationship between the soil and the grass roots. These fungi extend the reach of the root system by up to 100 times, significantly increasing phosphorus uptake and water absorption during the critical first 14 days of establishment.

Most ‘yard cleanup’ is purely cosmetic—raking leaves and picking up sticks. Real cleanup involves purging the soil of anaerobic pathogens and reintroducing the good guys. In 2026, we are seeing more sterile soils due to over-reliance on synthetic ‘weed and feed’ products. These chemicals kill the soil biology. When you lay new sod, you should dust the soil surface with a high-quality mycorrhizae powder or use a liquid soil drench. This is the ‘glue’ that binds the new sod to the old earth. It forces the grass to hunt for nutrients. If the soil is biologically dead, the grass has to rely entirely on what you spray on top. That makes for a weak, pampered lawn. You want a fighter. You want a root system that goes deep because it has a fungal partner helping it mine for minerals.

How long does it take for new sod to root deep?

Under optimal conditions with a prepared soil base, you should see ‘white hair’ feeder roots within 5 to 7 days. A full structural anchor that prevents the sod from being lifted by hand typically takes 14 to 21 days, depending on the grass species and soil temperature.

Hack 3: Correcting the Cation Exchange Capacity (CEC)

Correcting the CEC involves adjusting the soil’s ability to hold and exchange vital nutrients like calcium, magnesium, and potassium through the application of pelletized gypsum or humic acid. This chemical hack ‘unlocks’ the soil, making the nutrients already present actually available to the plant.

I see guys throwing 10-10-10 fertilizer at a new lawn like they’re feeding pigeons. If your pH is off or your CEC is low, that fertilizer is just leaching into the groundwater. It’s a waste. For 2026 sod installs, we are focusing heavily on humic acid. It acts as a chelator. It grabs onto the nutrients and holds them in the root zone. If you have heavy clay, use gypsum to break the ionic bonds that keep the clay particles stuck together. It flocculates the soil, creating more ‘crumbs’ or aggregates. Better soil structure means better irrigation efficiency. You’ll use 30% less water because the soil is actually holding it instead of letting it run off the surface. It will thrive. It won’t just survive.

“A retaining wall or a landscape bed doesn’t fail because of the materials; it fails because of the hydrostatic pressure and poor drainage behind it.” – Hardscape Engineering Axiom

Can I lay sod over existing grass?

Never lay sod over existing grass. The old vegetation will die and create an anaerobic layer of decomposing organic matter that generates heat and pathogens, effectively ‘cooking’ the new sod’s root system from the bottom up and preventing any soil contact.

MaterialBenefitApplication Rate
Pelletized GypsumBreaks Clay Bonds40 lbs per 1,000 sq ft
Humic AcidIncreases Nutrient Retention1 gallon per 5,000 sq ft
MycorrhizaeBoosts Root Surface Area2 lbs per 1,000 sq ft
Coarse SandImproves Drainage/Porosity1/4 inch top-dress
  • Remove all debris, rocks larger than 1 inch, and old vegetation.
  • Test soil pH and target 6.0 to 7.0 for most turf varieties.
  • Edge all hardscapes to a depth of 2 inches for a clean sod tuck.
  • Flag all irrigation heads to avoid damage during the grading process.
  • Ensure a 1% slope away from the home foundation to prevent pooling.

Stop looking for a ‘miracle’ fertilizer. There isn’t one. The miracle is in the soil structure. If you spend your time on the prep—the grinding, the amending, the mechanical fracturing—the grass will take care of itself. If you skip it, you’re just renting a green lawn for a few weeks until the roots realize there’s nothing for them in the ground. Do the work. Test the soil. Fracture the base. That is how you build a lawn that lasts a decade instead of a season.

April 17, 2026 | Michael Smith

Why Your 2026 Irrigation Pump Loses Prime in Mid-Summer

Why Your 2026 Irrigation Pump Loses Prime in Mid-Summer

Why Your 2026 Irrigation Pump Loses Prime in Mid-Summer

The sound of a failing irrigation pump in mid-July is unmistakable. It is a high-pitched, metallic whine that signals a dry-run condition, followed by the smell of scorched mechanical seals and overheating PVC. When your system loses prime, the vacuum is broken, and your water column collapses. This isn’t just a minor technical glitch; it is a death sentence for a sod install that hasn’t yet established a three-inch root depth to survive a 95-degree afternoon.

The Physics of Vacuum Loss in High-Heat Cycles

Loss of prime in an irrigation pump occurs when air enters the suction line or the internal water temperature reaches a vapor point, breaking the vacuum. This is frequently caused by failed intake gaskets, hairline PVC fractures, or extreme thermal expansion in the pump housing during peak summer heat cycles.

I recently got called out to tear up a $30,000 patio that was sinking because the previous contractor failed to properly secure the irrigation mainline running underneath it. The pump had been losing prime for weeks. Every time the owner tried to ‘force’ a prime, the water hammer effect from the air pockets was hitting the pipe joints with over 150 PSI of force. Eventually, a coupling under the pavers shattered. The resulting leak didn’t just kill the lawn; it turned the modified gravel base into a slurry, causing the entire hardscape to settle by four inches. This is why irrigation integrity is not optional. It is civil engineering.

“Cavitation in centrifugal pumps occurs when the NPSH (Net Positive Suction Head) available is less than the NPSH required by the pump. This leads to the formation of vapor bubbles that implode, eroding the impeller surface.” – Hydraulic Institute Standards

How do I prime an irrigation pump manually?

To manually prime a pump, you must isolate the discharge side, remove the priming plug, and fill the entire pump housing and suction line with water until all air is displaced. If the water level drops immediately, your foot valve is leaking. Replace it. If it holds, but the pump loses prime again after ten minutes of operation, you have a suction-side air leak. These leaks are often microscopic. In the 2026 climate, we are seeing standard PVC cement failing at higher rates due to extreme soil expansion. I tell my crew: if you don’t see a visible bead of purple primer and heavy-duty solvent, that joint is a ticking time bomb.

The Relationship Between Yard Cleanup and Pump Health

Effective pump maintenance requires a rigorous yard cleanup protocol to ensure that organic debris does not obstruct the intake screen or foot valve. Clogged intakes increase the vacuum pressure, which can lead to cavitation and the eventual failure of the internal mechanical seal and impeller.

Debris is the enemy of hydraulic efficiency. When you neglect your fall or spring cleanup, leaf litter and decomposed organic matter migrate into your irrigation pond or well casing. This material is sucked against the intake screen. The pump has to work twice as hard to pull the same volume of water. This creates a massive drop in pressure. You might notice your rotors aren’t popping up all the way. That’s not a head problem; it’s a suction problem. Clean your screens. It is cheaper than a $1,200 motor replacement.

ComponentFailure SymptomPrimary Cause (2026 Data)Required Action
Mechanical SealDripping water at shaftDry running/Heat stressImmediate Replacement
Foot ValveWater drains back to sourceDebris/Spring failureExcavate and Replace
ImpellerLow discharge pressureCavitation/Abrasive sandRebuild Pump Wet-End
Check ValvePump won’t hold primeMineral buildupAcid flush or Replace

What causes a centrifugal pump to lose pressure?

A centrifugal pump loses pressure when the impeller cannot create a sufficient centrifugal force, usually due to air entrainment, a clogged intake, or internal wear on the wear rings. In landscaping applications, we often see this when the water table drops in mid-summer. If your suction lift is more than 20 feet, a standard centrifugal pump will struggle. You might need to move to a submersible unit or a deep-well jet pump. Physics doesn’t care about your budget. If you exceed the suction lift limit, you will lose prime every single time the sun comes out.

“Irrigation systems must be designed to account for the peak evapotranspiration rates of the local climate, ensuring that the pump capacity exceeds the maximum daily water requirement by at least 20%.” – Texas A&M AgriLife Extension

The 2026 Mid-Summer Maintenance Checklist

Do not wait for the grass to turn brown. Use this checklist to verify your system integrity before the heatwave hits.

  • Inspect the suction line joints for ‘sweating’ or salt crusting, which indicates a minor air leak.
  • Verify the pump’s amperage draw; a high draw indicates the motor is working against an obstruction.
  • Check the thermal overload protection on the control box.
  • Clean the foot valve screen every 30 days if pulling from a surface water source.
  • Check the pressure tank pre-charge to prevent pump short-cycling.

Short-cycling is another prime-killer. If your pressure tank has a ruptured bladder, the pump will turn on and off every few seconds. This constant surging creates heat. Heat expands the air trapped in the lines. Expanded air breaks the prime. It is a cycle of destruction. I see it every year. Homeowners try to save $200 on a tank and end up spending $2,000 on a pump and sod install. It is a classic case of being penny-wise and pound-foolish.

The Impact of Soil Grading on Irrigation Performance

Proper soil grading is essential for protecting irrigation infrastructure from hydrostatic pressure and ensuring that surface runoff does not contaminate the pump’s water source. Incorrect grading can lead to pipe shearing and the infiltration of silt into the suction line, destroying pump components.

When we perform a sod install, the first thing we check is the grade. If the ground is sloping toward your pump house, you’re going to have problems. Water will pool around the electrical components. Worse, the soil will stay saturated, which can cause the suction pipe to shift and crack. I once saw a brand-new irrigation system fail because the homeowner did their own yard cleanup and accidentally filled in a swale we had dug for drainage. The next heavy rain washed two inches of silt into their intake pond. The pump sucked in that silt, and within twenty minutes, the impeller was ground down to a nub. The pump didn’t just lose prime; it died. Excavation is expensive. Dirt is heavy. Do it right the first time. Dig deep. Compact your base. Use schedule 80 PVC for the suction side. It’s thicker and handles the vacuum pressure much better than the cheap schedule 40 stuff you find at the big-box stores. Stop buying engineering supplies where you buy your lightbulbs.

April 16, 2026 | Jane Doe

4 Culpeper Grass Seeding Tactics to Fix Bare Dirt in 2026

4 Culpeper Grass Seeding Tactics to Fix Bare Dirt in 2026

The scent of linseed oil usually calms me, but looking at a patchy lawn in Culpeper is like seeing a Queen Anne chair painted with neon latex. It is an insult to the craft. As I run my thumb over the rough grain of a half-finished restoration, I see the same neglect in the dirt outside my window. To fix bare dirt in Culpeper by 2026, you must prioritize mechanical thatching to clear the crust before introducing heat-tolerant Tall Fescue blends specifically rated for the Virginia Piedmont. This prevents the seed from washing away on our heavy clay slopes during spring rains. Editor’s Take: True restoration requires mechanical intervention; simply throwing seed on top of Virginia clay is a recipe for a failed investment. Success in 2026 depends on soil contact and moisture retention protocols that ignore the quick-fix marketing of big-box stores.

The friction between stone and stem

Grass seeding is not some spray-and-pray effort. It requires the same patience as waiting for a third coat of varnish to dry on a walnut table. When we talk about landscaping culpeper, we often forget that the soil here has a memory. It remembers every heavy footfall and every season of drought. The dirt becomes a sealed surface, almost like a piece of wood that has been over-polished until it no longer takes the stain. To fix this, we must look at thatching. This is the act of removing the dead organic matter that suffocates the soil. Without this step, your expensive seed is just bird food sitting on a plastic-like barrier. I have spent decades working with my hands, and I know that you cannot build a finish on a dirty surface. The same logic applies to your yard. If you want a lawn that survives the 2026 heatwaves, you need to strip away the old to make room for the new. This is where grass seeding becomes an art form rather than a chore. It is about the bond between the embryo of the plant and the mineral wealth of the earth. We are looking for a deep, resonant green, not the fleeting vibrancy of a cheap chemical fix.

Why Culpeper clay eats your grass seed

Our local geology in the Piedmont region is a stubborn apprentice. It is dense, iron-rich, and prone to compaction that would crack a lesser spade. When you engage in landscaping culpeper va, you are fighting against the natural tendency of the ground to turn into a brick. Mowing height is the first thing people get wrong. They scalp the grass, exposing the fragile soil to the sun, which then bakes the clay into a ceramic shield. A hardscapes project nearby might even change the way water flows across your yard, creating mini-canyons in your bare spots. I have watched neighbors pour money into seed only to see it wash down towards Mountain Run because they didn’t understand the topography. You need to create micro-grooves. Think of it as hand-sanding a surface before the primer. These grooves hold the seed in place. We must also discuss the necessity of grass pickup. Leaving heavy clumps of wet clippings on a recovering lawn is like leaving a wet rag on a finished sideboard. It creates rot. It breeds fungus. It kills the very thing you are trying to save. In the world of 2026, where weather patterns are becoming more erratic, the local authority comes from knowing exactly how our specific silt loam behaves under pressure.

The industry lie of the instant lawn

Most experts are lying to you about how fast grass grows. They want to sell you the dream of a green carpet in fourteen days. Real growth, the kind that lasts for generations of summers, is slow. It is rhythmic. If you are planning for 2026, you start the work now. You look at the edges where your landscaping meets your driveway. Those edges are high-stress zones where the heat from the asphalt cooks the roots. Most people ignore these margins, but a true restorer knows the edges define the piece. When you consider grass seeding, you must choose a blend that includes rhizomatous tall fescue. These varieties have a creeping habit that fills in bare spots without you having to lift a finger later. It is a self-repairing mechanism, much like a well-oiled joint in a piece of furniture that gets better with age. We see too many people opting for Kentucky 31 because it is cheap. That is the particle board of the grass world. It is coarse, it is ugly, and it clumping in a way that leaves the soil exposed. We want a fine-grained finish. We want a lawn that feels like velvet underfoot but has the structural integrity of oak.

Old ways for a new climate

The reality of 2026 is that the old rules of thumb are failing. We can no longer rely on a predictable April rain. We must engineer our success. This involves a deep understanding of soil chemistry. Have you tested your pH lately? Most Culpeper yards are too acidic, which locks away the nutrients. It is like trying to eat with your mouth sewn shut. Adding lime is the first step in the restoration. Then comes the thatching to ensure that lime actually reaches the root zone. I often tell my clients that a lawn is a living organism, not a static decoration. It breathes. It eats. It needs a grass pickup routine that removes the debris while leaving the nutrients. And do not get me started on mowing with dull blades. A dull blade tears the grass, leaving a jagged edge that turns brown and invites disease. It is no different than using a blunt chisel on a piece of cherry wood; you end up with a mess that no amount of sanding can fix. Keep your tools sharp. Respect the material. If you are struggling with a yard that looks more like a construction site than a home, it might be time to contact us to discuss a professional-grade restoration plan.

Questions from the dirt

Why does my fescue die every July? It is likely a lack of root depth. If you water shallowly every day, the roots stay near the surface where the sun can bake them. You need deep, infrequent soaking to pull those roots down into the cooler clay. Is thatching better than aerating? They serve different purposes. Thatching removes the surface debris, while aerating solves the deep compaction. In Culpeper, you usually need both to fix bare dirt properly. Can hardscapes kill my grass? Yes, through heat radiation and runoff. A stone patio acts like a radiator, pushing the soil temperature up by ten degrees. You need a buffer zone of heat-tolerant species there. Does grass pickup help new sprouts? Absolutely. New sprouts are fragile and need every bit of sunlight. If they are buried under old clippings, they will damp off and die before they ever take root. Is 2026 too late to start? No, but the window is closing if you want a mature stand of grass before the next major drought cycle hits. The best time to plant was yesterday; the second best time is now.

A lawn is a reflection of the care put into the soil. We are not just growing grass; we are restoring a piece of the Culpeper environment. Every seed is a promise to the future. Let us make sure we are making promises we can keep with proper technique and the right materials. Your yard deserves a craftsman’s touch, not a salesman’s pitch. Build something that lasts.

April 16, 2026 | Emily Clark

Is Your 2026 Sod Turning Yellow? Try These 3 Iron Fixes

Is Your 2026 Sod Turning Yellow? Try These 3 Iron Fixes

The Yellowing Autopsy: Why Your New Turf is Failing

New sod turns yellow primarily due to iron chlorosis, a physiological condition where turfgrass cannot synthesize chlorophyll because of high soil pH, root damage, or anaerobic soil conditions. Resolving this requires determining if the iron is physically absent or simply chemically locked within the soil profile.

I remember a call last July from a homeowner in a panic. He had just spent $12,000 on a high-end sod install. Two weeks later, the yard looked like a dying banana peel. He thought it needed water. He drowned it. Then he thought it needed nitrogen. He dumped a generic 29-0-5 fertilizer on it during a 95-degree heatwave. He didn’t just stress the grass; he effectively salted the earth. When I walked the site, the smell of anaerobic rot was unmistakable. The irrigation was running three times a day, keeping the soil in a permanent state of oxygen debt. This is the ‘Chemical Nightmare’ I see every season: people treating symptoms without understanding the soil chemistry. We had to perform a total yard cleanup of the dead organic matter before we could even begin the remediation. This wasn’t a water issue. It was a chemical lockout.

“A soil pH above 7.2 often renders iron insoluble to turfgrass roots, regardless of how much elemental iron is present in the soil profile.” – Agronomy Manual for Professional Turf Managers

Fix 1: The Precision of Chelated Iron Foliar Applications

Chelated iron is the only way to bypass a high-pH soil lockout in the short term. If your soil pH is over 7.0, adding granular iron oxide is a waste of money. The iron will bind to the soil particles before the roots can touch it. Instead, you need a chelated product—specifically something with EDDHA or DTPA molecules. These organic ‘claws’ wrap around the iron atom, keeping it soluble so the grass blade can absorb it directly. Spray it in the cool of the morning. Don’t mow for 24 hours. The results are usually visible within 48 to 72 hours. It is a temporary fix, but it buys you time while you fix the underlying landscaping issues. You must use a calibrated sprayer. Guesswork leads to tip burn.

How much iron should I apply to my lawn in the spring?

For most residential turf species, applying 2 to 4 ounces of liquid chelated iron per 1,000 square feet provides the necessary micronutrient boost without risking heavy metal toxicity or staining your hardscapes. Always verify the concentration of the product before mixing. High rates can cause a temporary ‘blackening’ of the leaf blade if the temperature exceeds 85 degrees Fahrenheit.

Iron TypeApplication MethodBest Soil pH RangeLongevity
Iron SulfateGranular/LiquidBelow 6.52-3 Weeks
Iron EDTAFoliar SprayBelow 7.03-4 Weeks
Iron EDDHASoil Drench/FoliarUp to 9.06-8 Weeks
Iron OxideGranularIrrelevantIneffective

Fix 2: Soil Acidification via Elemental Sulfur

You cannot fight chemistry with more water. If your 2026 sod is yellowing, it is likely because your soil is too alkaline. This is common in regions with heavy limestone or high-bicarbonate water sources. To fix this, you must lower the pH using elemental sulfur. This is not an overnight process. Soil microbes must convert the sulfur into sulfuric acid. This takes moisture and time. Apply no more than 5 lbs per 1,000 square feet in a single application to avoid burning the roots. Check your pH every six months. Aim for a 6.5. That is the ‘sweet spot’ for nutrient availability. Don’t skip the test. Guessing is for amateurs.

“In alkaline soils, iron availability is the primary limiting factor for chlorophyll production in Kentucky Bluegrass and St. Augustine varieties.” – Texas A&M AgriLife Extension

Fix 3: Core Aeration and Micronutrient Drenching

Sometimes the iron is there, but the roots can’t breathe enough to take it up. This is common with new sod installs where the soil was compacted by heavy machinery. If the soil is hard as a brick, the roots stay shallow and weak. Use a hollow-tine aerator to pull 3-inch cores. This introduces oxygen. Follow this immediately with a micronutrient drench containing humic acid. Humic acid acts as a natural chelator and helps stimulate microbial activity. It makes the soil more ‘porous’ at a microscopic level. It works. Don’t use a spike aerator. It only increases compaction.

Can I fix yellow grass by just watering more?

No. Over-watering is the fastest way to kill new sod. Excess water displaces oxygen in the soil, leading to root rot and a condition called iron chlorosis. If the soil is ‘squishy’ more than two hours after irrigation, you are drowning the plant. Transition to deep, infrequent watering cycles of 1 inch per week to encourage deep root growth. Shallow watering creates weak grass.

The Master Landscaper’s Recovery Checklist

  • Soil Test: Never apply treatments without a baseline pH and nutrient report.
  • Calibrate Sprayer: Ensure you are delivering the exact poundage required.
  • Check Drainage: Ensure no standing water is causing anaerobic conditions.
  • Sharpen Blades: Dull blades shred the grass, leading to moisture loss and yellowing.
  • Monitor Temperature: Avoid iron applications when the thermometer hits 90 degrees.

It will rot if you ignore the drainage. Modern landscaping isn’t just about the green on top. It’s about the biology underneath. If your sod is yellowing in 2026, stop reaching for the hose and start looking at the chemistry. Fix the soil, and the grass will follow. Skip the big-box store ‘quick fixes.’ They are diluted junk. Buy professional-grade chelates. Your lawn is a living system. Treat it like one.

April 16, 2026 | Michael Smith

How to Fix 2026 Soil Heave Around Your New Retaining Wall

How to Fix 2026 Soil Heave Around Your New Retaining Wall

Identifying the Visual and Structural Symptoms of 2026 Soil Heave

Soil heave around a 2026 retaining wall manifests as vertical displacement, cracked capstones, or visible leaning of the structure. This usually occurs when moisture-rich clay soils expand during freeze-thaw cycles, exerting massive lateral pressure against the back of the wall or pushing the footing upward. If you see a gap between your wall and the sod install or if the stones look like they are ‘smiling,’ the structural integrity is already compromised. I recently got called out to tear up a $30,000 wall that was sinking and tilting because the previous contractor used ‘dirt’ instead of clean stone for backfill. The hydrostatic pressure had become so intense after a heavy spring rain that the four-foot wall was bowing six inches off-center. It was a disaster that could have been avoided with $500 worth of proper drainage aggregate.

The Forensic Autopsy: Why Retaining Walls Move

A retaining wall fails when the lateral earth pressure and hydrostatic pressure exceed the gravitational resistance of the block and the friction of the base material. When water is trapped behind a wall in silty or clay-heavy soils, it freezes and expands by approximately 9% in volume. This force is relentless. It doesn’t matter how heavy your blocks are; ice will move them.

“A retaining wall doesn’t fail because of the stone; it fails because of the water trapped behind it.” – Hardscape Engineering Axiom

The failure usually starts at the base. If the landscaping crew didn’t excavate deep enough to get below the frost line or if they skipped the geotextile fabric, the native soil eventually migrates into your clean stone, clogging the drainage path and turning the backfill into a frozen sponge.

How Much Modified Stone Do I Need for a Wall Base?

Calculating the correct amount of base material requires a calculation of the trench length multiplied by the width and a minimum 6-inch depth of 2A modified crushed stone. For a standard wall, your base should be twice as wide as the block itself to distribute the weight. You must also account for the compaction factor; 2A modified stone will compact by roughly 20%, so you must order more than your raw volume calculations suggest. Don’t use pea gravel. It doesn’t lock. It rolls like ball bearings. You need angular, crushed limestone that locks together under a plate compactor.

Technical Material Comparison

Material TypeCompaction RatingDrainage CapabilityBest Use Case
2A Modified Stone95% ProctorModerateLeveling base for wall footer
AASHTO #57 StoneLow CompactionHigh (Clean)Backfill for drainage behind wall
Sandy LoamN/APoorFinal 4-inch cap for sod install
Mason SandHighVery PoorDo not use for wall structures

The Step-by-Step Remediation Process for Soil Heave

To fix a wall affected by heave, you must excavate the surcharge behind the wall to relieve the pressure and install a functional irrigation drainage system. This is not a ‘patch job’ with mortar; it is a structural intervention. First, remove the capstones and the first two courses of block. You need to get to the ‘heel’ of the wall. If the wall has tilted, you may need to deconstruct it entirely down to the base.

  • Excavate a 12-to-18-inch ‘chimney’ of space directly behind the blocks.
  • Install a 4-inch perforated HDPE pipe at the lowest possible point, daylighting it to a lower grade or a pop-up emitter.
  • Wrap the entire excavation in a non-woven geotextile fabric (class 2) to prevent soil fines from clogging the stone.
  • Backfill with #57 clean stone, not dirt.
  • Perform a yard cleanup to ensure the final grade slopes away from the wall at a 2% minimum pitch.

It is a lot of work. Do it once. Do it right.

Why Most DIY Wall Repairs Fail Within Two Years

Most DIY wall repairs fail because they focus on the aesthetic stone rather than the sub-grade engineering and soil physics. Homeowners often try to ‘brace’ the wall or fill cracks with concrete, which only creates a larger, unyielding mass for the frost heave to push against.

“Effective drainage systems must be designed to handle the peak flow of a 10-year storm event to prevent soil saturation behind gravity structures.” – Penn State Agricultural Extension

If you don’t address the irrigation runoff from your roof or gutters, your wall will become a dam. I see this constantly: a downspout dumping 500 gallons of water during a storm right into the backfill of a retaining wall. It is structural suicide. You must pipe that water away from the wall using solid PVC, not the cheap corrugated stuff that leaks.

What is the Best Soil for Backfilling a Wall?

The best material for the primary backfill of a retaining wall is AASHTO #57 clean crushed stone, while the top 4 to 6 inches should be capped with low-permeability clay-based soil to shed water away. This ‘cap’ prevents surface water from entering the drainage chimney, while the clean stone below ensures that any water that does get in can reach the footer pipe and exit. If you use a high-organic garden soil for the full backfill, it will hold moisture like a towel. That moisture is what causes the heave. After the repair, you can proceed with your sod install or planting, but keep your irrigation heads at least 3 feet away from the wall face. Excess water is the enemy of stone. Period.

Long-Term Maintenance and the Settling Period

After a major repair, the wall requires a 12-month settling period where you must monitor for any micro-shifts or drainage clogs. Check your drainage outlets after every major rain event. If no water is coming out of the pipe, the pipe is either crushed or clogged, and the pressure is building again. Keep the area clear of heavy debris during your seasonal yard cleanup. If you notice the sod install near the wall edge is constantly soggy, your grade has settled improperly, and you are inviting frost heave back for the next winter. Compaction is king. If your plate tamper didn’t make your teeth rattle when you were prepping the base, it wasn’t compacted enough. Don’t skip the details.

April 16, 2026 | Michael Smith

How to Fix 2026 Soil Heave Around Your New Retaining Wall

How to Fix 2026 Soil Heave Around Your New Retaining Wall

The Forensic Autopsy of a $30,000 Hardscape Failure

I recently got called out to tear up a $30,000 patio and retaining wall system that was sinking and tilting because the previous contractor thought he could cheat the frost line. The homeowner showed me the invoice from 2025; by early 2026, the wall had moved four inches out of plumb. The culprit wasn’t the stone quality. It was a complete failure to understand soil mechanics and hydrostatic pressure. When I dug out the backfill, I found heavy clay sitting directly against the block. No drainage, no clean stone, no hope. It was a graveyard of wasted capital. Most homeowners see a leaning wall and think they need better glue. They don’t. They need a physics lesson. Soil heave is a relentless force that treats poorly engineered walls like toys. If you’re seeing movement in your 2026 installations, you aren’t just looking at a cosmetic flaw; you’re looking at a structural emergency that will only accelerate as the freeze-thaw cycles continue.

Understanding the Physics of 2026 Soil Heave

To fix soil heave around a retaining wall, you must mitigate hydrostatic pressure and frost-susceptible soils by replacing non-porous backfill with angular clean stone and installing a dedicated drainage system. This process eliminates the water that expands when frozen, preventing the lateral force that pushes blocks out of alignment.

Soil heave occurs when water trapped in the soil voids freezes and expands by approximately 9 percent. In heavy clay soils, this expansion creates ice lenses. These lenses exert thousands of pounds of pressure per square foot. If your yard cleanup or landscaping crew didn’t install a 12-inch chimney of clean stone behind the wall, that pressure has nowhere to go but forward. This is why irrigation systems must be pressurized and checked; a slow leak near a wall in the winter is a death sentence for the masonry. We talk about ‘heave’ as a vertical movement, but in hardscaping, it is almost always lateral. You can’t fight the expansion of ice. You can only remove the water before it freezes.

“A retaining wall doesn’t fail because of the stone; it fails because of the water trapped behind it.” – Hardscape Engineering Axiom

How deep should a retaining wall base be to prevent heaving?

The base for a retaining wall must be excavated below the local frost line or, at a minimum, consist of 6 to 12 inches of compacted modified gravel (2A or 411) over a non-woven geotextile fabric. For walls over three feet, the depth must account for the angle of repose of the retained soil. In many northern climates, the frost line can reach 36 to 48 inches. While we don’t always bury the wall that deep, we must ensure the foundation is built on non-frost-susceptible material. A thin layer of sand is not a base. It is a lubricant for failure. Use a plate compactor. The machine should literally bounce off the surface when the 95 percent Standard Proctor density is achieved.

What is the best backfill for a retaining wall?

The only acceptable backfill for a structural retaining wall is #57 clean crushed stone or a similar angular, open-graded aggregate. Do not use ‘clean fill’ or ‘topsoil’ or ‘bank run gravel’ behind the units. Clean stone provides a 40 percent void space, allowing water to drop straight down to the perforated drain tile rather than sitting against the block face. If you see ‘weep holes’ that are dry after a rainstorm, your drainage is clogged or non-existent. This is often where sod install projects go wrong; contractors pile soil and sod right up to the wall, sealing off the drainage chimney and trapping moisture.

Material TypeDrainage RatingFrost SusceptibilityRecommended Use
#57 Clean StoneExcellentVery LowPrimary Backfill / Drainage Chimney
Modified Gravel (CR6/2A)ModerateLowBase Foundation (Compacted)
Heavy ClayNoneExtremely HighNever use near walls
SandGoodMediumPipe Bedding only

The Professional Remediation Process: Step-by-Step

Fixing a heaving wall requires a ‘bottom-up’ approach. You cannot simply push it back. The friction of the soil mass won’t allow it. 1. Site Assessment: Use a laser level to determine the exact degree of lean. 2. Excavation: You must dig out the soil behind the wall to a distance equal to the wall’s height. 3. Drainage Check: Locate the 4-inch perforated pipe. If it is filled with silt, it was installed without a fabric ‘sock’ or the wrong aggregate. 4. Soil Grading: Correct the yard cleanup to ensure the surface water flows away from the wall, not into the backfill. 5. Re-installation: Reset the blocks on a leveled, compacted base, using geogrid reinforcement every two courses if the wall exceeds 36 inches.

  • Call 811 before you dig to mark irrigation lines and utilities.
  • Use a non-woven geotextile to separate native soil from your clean stone.
  • Install a ‘pop-up’ emitter at the end of your drain line to prevent rodent clogs.
  • Ensure the first course of block is buried at least 10 percent of the total wall height.
  • Check the compaction every 4-inch lift of gravel.

“Soil compaction is the most overlooked phase of hardscape construction, yet it determines the lifespan of the entire structure.” – ICPI Tech Spec No. 2

I tell my crew every day: if you don’t fix the soil grading first, every plant or stone you put in the ground is just expensive compost. Irrigation management is also critical. If your 2026 sod install involves heavy watering schedules, that water will find the path of least resistance. Usually, that path is straight into the backfill of your new wall. You must coordinate your irrigation zones so they don’t saturate the structural footprint of the masonry. Deep, infrequent watering of turf grass is better for the roots and safer for your hardscapes. One inch of water per week is the standard, but it should be delivered in a way that allows the soil to dry between cycles. Saturated soil loses its shear strength, and that’s when the weight of the earth overcomes the gravity of the wall.

Don’t trust a contractor who doesn’t talk about ‘fines’ or ‘hydrostatic load.’ If they just want to ‘beautify’ your yard without discussing the 80 percent of the work that stays underground, show them the door. A wall built in 2026 should still be standing in 2056. Water wins every fight it’s invited to. Your job is to make sure it’s never invited to stay behind your wall.

April 16, 2026 | Anna Lee

3 Culpeper VA Sprinkler Adjustments to Stop 2026 Soggy Spots

3 Culpeper VA Sprinkler Adjustments to Stop 2026 Soggy Spots

The smell of WD-40 and the sound of clicking gears

I smell WD-40 and wet dirt every time I step out onto a yard that looks more like a marsh than a backyard. In Culpeper, that red clay doesn’t forgive a lazy irrigation setup. You want to stop those 2026 soggy spots? You must tighten the pressure regulators, shorten the zone run times on the shaded north side, and swap out those old spray heads for rotary nozzles that don’t dump water faster than the ground can drink. Editor’s Take: Stop drowning your grass; precision adjustments to irrigation heads and timing are the only ways to prevent drainage disasters in Virginia’s heavy soil.

The math behind the muck

Most folks think a sprinkler is just a hose with a fancy hat. It’s a hydraulic system, plain and simple. If your PSI is too high, you get mist that blows away. If it’s too low, you get a puddle right at the base of the head. That’s how you end up needing landscaping culpeper va experts to dig out the rot. Look at your nozzles. If they are spitting rather than spraying, your seals are shot. Thatching also plays a dirty role here. If you have a two-inch layer of dead grass sitting on top of the soil, the water just sits there. It never hits the roots. You are literally growing a sponge that rots your turf. You need to clear that junk out before you even think about grass seeding for the next season. A mechanical fix beats a chemical one every single day of the week.

Red clay and the Culpeper reality

If you live near the Culpeper National Cemetery or out toward Brightwood, you know the soil is basically unbaked bricks. During a typical Virginia summer, the humidity is so high that evaporation just stops. If your system is still running on a ‘set it and forget it’ timer from 1998, you are asking for trouble. Local landscaping culpeper crews see it all the time. The water runs off the slope and pools at the bottom because the clay reached its saturation point in four minutes. You need to cycle and soak. Set the zones to run for five minutes, wait an hour, then run them again. This gives the Piedmont soil time to actually breathe. Hardscapes like patios and walkways complicate this further. If your hardscapes aren’t pitched right, your sprinklers are just adding fuel to the fire, sending gallons of water straight against your foundation.

Why the standard advice is pure garbage

Every big box store tells you to water for an inch a week. That is a lie when you have a mowing schedule that keeps the grass too short. Short grass has short roots. Short roots can’t handle deep water. If you don’t have a regular grass pickup routine, the clippings add to the thatching problem, creating a waterproof barrier. It is a vicious cycle. People think they need more landscaping when they really just need to grab a wrench and adjust the arc of their spray heads. If your sprinkler is hitting the driveway more than the grass, you are paying the city of Culpeper to wash your car while you kill your lawn. I have seen folks spend thousands on new sod just to drown it because they wouldn’t spend ten minutes checking a valve.

The 2026 reality of smart irrigation

We are moving away from those old mechanical clocks that just tick-tock their way through a rainstorm. The new reality involves moisture sensors that actually talk to the dirt. If the ground is wet, the system stays off. It’s basic logic.

Is my lawn squishy because of the neighbors?

Sometimes. If they have a leak, it follows the grade. But usually, it is your own zones overlapping too much.

Can I fix a soggy spot with just sand?

No. Sand and clay make concrete. You need aeration and organic matter.

How often should I check my sprinkler heads?

Monthly. Mowers hit them, dogs chew them, and dirt clogs them.

Does taller grass help with drainage?

Yes. It creates a deeper root structure that pulls water down away from the surface.

Will a French drain fix my sprinkler issues?

It might hide the symptom, but it won’t fix the waste of water. Fix the source first.

When is the best time to seed in Culpeper?

Late August or September, but only if your irrigation isn’t creating a swamp.

Why is one zone always wet?

Check for a weeping valve. If a pebble gets stuck in the diaphragm, it never fully closes. You are essentially leaking water 24/7. To get your system back in gear, contact us and let a pro look at the guts of your irrigation setup.