The Biological Reality of a High-Performance Lawn
Most homeowners view sod as a finished product, a green carpet to be unrolled and instantly enjoyed. In the professional world of high-end landscaping, we view sod as a vulnerable biological transplant that requires a precise subterranean environment to survive the first 21 days of root initiation. If your soil chemistry is off or your drainage is compromised, that $15,000 investment will transform into a rotting, anaerobic mat of organic decay before the first mow. You cannot fix bad soil once the grass is on top of it. You have to do the work now. It is about engineering a root zone that facilitates gas exchange and nutrient uptake, not just buying the greenest pallet at the nursery.
The Apprentice Lesson: Why Grading and Soil Science Come First
I always drill into my new crew members: if you don’t fix the soil grading and chemistry first, every plant or piece of turf you put in the ground is just expensive compost. Last season, I had a junior foreman who thought he could skip the compaction test on a 5,000-square-foot install because the dirt ‘looked’ dry. We laid the sod, and the first heavy rain turned the yard into a literal marsh because the sub-base was essentially a clay bowl. We had to rip it all up, regrade the entire lot, and start over on my dime. It was a $9,000 lesson in why we never trust our eyes when we should be using a penetrometer and a transit level. Soil doesn’t lie, but it will definitely hide its flaws until the bill is paid.
The Ribbon Test: Identifying Soil Texture and Silt Ratios
The Ribbon Test determines your soil’s physical composition—sand, silt, or clay—by measuring how well a moistened soil sample holds its shape under pressure. Identifying these soil textures is critical for sod installation because it dictates your irrigation frequency and the cation exchange capacity (CEC) of your yard. To perform this, take a handful of soil, moisten it slightly, and roll it into a cigar shape. Squeeze it between your thumb and forefinger to create a ‘ribbon.’ If the ribbon breaks before it reaches one inch, you have sandy soil which requires more frequent irrigation. If it stretches beyond two inches without breaking, you are dealing with heavy clay, a recipe for root rot and fungal pathogens if not amended with expanded shale or coarse sand. Clay particles are microscopic and flat; they stack like wet playing cards, cutting off oxygen to the roots. You need pore space. Without it, the roots suffocate.
How do I know if my soil has too much clay for sod?
If your soil forms a shiny, unbreakable ribbon longer than two inches and feels sticky rather than gritty, your clay content is too high for a standard sod install. This soil compaction issue prevents deep root penetration, forcing the grass to rely on surface moisture, which makes it highly susceptible to drought stress and pythium blight. You must mechanicaly aerate or incorporate organic matter to break those ionic bonds between clay particles.
“Soil texture is the single most important physical property of the soil. It knows no substitute; it governs the water-holding capacity and the aeration of the root zone.” – USDA Natural Resources Conservation Service
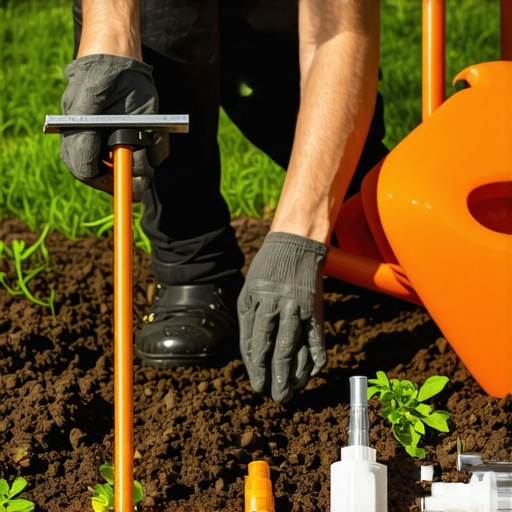
The Percolation (Perc) Test: Predicting Sub-Surface Drainage Rates
The Percolation Test measures the rate at which water moves through your soil profile, identifying potential drainage failures before the sod is laid. To execute a perc test, dig a hole 12 inches deep and 12 inches wide, fill it with water, and let it drain completely to saturate the surrounding pedology. Fill it a second time and measure how many inches the water level drops per hour. A drop of 1 to 3 inches per hour is the professional ‘goldilocks’ zone. Anything less than one inch indicates poor drainage and hydrostatic pressure buildup, which will rot sod roots in less than a week. If it drains too fast, your irrigation system won’t be able to keep up with the evapotranspiration rates. We call this ‘droughty’ soil. You fix slow drainage with French drains or sub-surface tiling; you fix fast drainage with compost tilling.
What is a good drainage rate for new grass?
For a successful sod installation, your soil should drain at a rate of 2 inches per hour. This ensures that the capillary action of the soil pulls water down into the root zone while allowing excess moisture to exit, preventing anaerobic conditions that invite grub infestations and rhizoctonia solani (brown patch). Monitoring drainage is the only way to ensure yard cleanup efforts actually result in a long-term landscaping success.
The pH and Nutrient Slurry: Balancing Soil Chemistry
A pH and Nutrient Slurry test identifies the chemical availability of Nitrogen, Phosphorus, and Potassium (NPK) to ensure the sod can actually ‘eat’ the fertilizer you apply. Most turfgrass species, including Bermuda and St. Augustine, thrive in a pH range of 6.0 to 7.0. If your soil is too acidic (below 5.5), nutrients like phosphorus become chemically locked and unavailable to the plant, regardless of how much starter fertilizer you dump on it. You are literally flushing money down the irrigation lines. Use a digital pH meter and a distilled water slurry to get an accurate reading. If you are low, you need dolomitic lime; if you are too high (alkaline), you need elemental sulfur. Do this now so the chemistry has months to stabilize before the 2026 growing season begins. It is a slow process.
| Soil Type | Drainage Rate | Required Amendment | Risk Factor |
|---|---|---|---|
| Heavy Clay | <0.5″ / hour | Expanded Shale / Gypsum | Root Rot / Fungus |
| Sandy Loam | 2.0″ – 4.0″ / hour | Organic Compost | Nutrient Leaching |
| Silts | 1.0″ – 2.0″ / hour | Aeration / Sand Mix | Compaction Cap |
“A lawn is only as healthy as the soil biology beneath it. Without proper pH balance, microbial activity ceases, leading to excessive thatch buildup and plant stress.” – Penn State Agricultural Extension
The Pre-Sod Yard Cleanup Checklist
Before you even think about ordering a single pallet for your landscaping project, you must clear the site deck. This isn’t just raking leaves; it’s a structural yard cleanup. Use this checklist to ensure your 2026 sod install has a fighting chance:
- Kill Existing Vegetation: Use a non-selective herbicide 14 days prior to any grading.
- Remove Large Debris: Any rock or wood chunk larger than 2 inches will create an air pocket that kills sod roots.
- Mechanical Aeration: Relieve compaction from construction equipment or foot traffic.
- Final Grade: Ensure a 2% slope away from the home foundation to prevent hydrostatic pressure issues.
- Irrigation Audit: Pressure-test every irrigation head to ensure 100% head-to-head coverage.
Hydrostatic Pressure and the Engineering of the Yard
Landscaping is civil engineering with a green coat of paint. If you have a retaining wall near your sod install, you must account for hydrostatic pressure. Water trapped behind a wall or under a sod layer will eventually find its way out, usually by heaving your hardscaping or turning your lawn into a bog. I’ve seen $40,000 patios buckle because the sod install next to it didn’t have a French drain to catch the surface runoff. It’s all connected. Your irrigation timing must be calibrated to the infiltration rate of your specific soil texture. Don’t be the guy who waters for 30 minutes when his soil can only absorb 10. You’re just creating a fungal nursery. Deep, infrequent watering forces roots to chase the moisture down, creating a resilient, drought-tolerant lawn. Shallow, daily watering creates a weak, lazy root system that will die the first time the temperature hits 95 degrees. Stop being a ‘mow-and-blow’ amateur and start being a land manager. The soil is your engine. Keep it tuned.
This post hits the mark on how crucial soil testing is before installing sod. I’ve seen firsthand how poor drainage and incorrect soil texture can wipe out a newly laid lawn in a matter of weeks. It makes me wonder, with so many homeowners possibly skipping these vital tests, what’s the most common mistake you see in DIY sod projects? Personally, I think people underestimate the importance of proper grading and soil amendments—thinking it’s just about aesthetics, but it’s really about building a resilient root zone. I also found the section on the Ribbon and Perc tests insightful because they’re practical and straightforward. Has anyone tried organic amendments like compost or biochar to improve soil health after the initial issues are detected? I’d love to hear about different approaches that actually work in the real world, especially in areas with dense clay or sandy soils.