Why 2026 Sod Fails Before the First Watering
Successful sod installation requires understanding that the green side up is only 10% of the equation; the soil subgrade and its ability to manage hydrostatic moisture dictate the long-term survival of your turf. If your soil chemistry or physical structure is compromised, you are essentially laying expensive carpet over a desert or a swamp. Most homeowners and ‘mow-and-blow’ contractors ignore the soil-water interface, leading to root girdling and localized dry spots that no amount of irrigation can fix.
I always drill into my new crew members: if you don’t fix the soil grading first, every plant you put in the ground is just expensive compost. I remember a job in late 2023 where a client had spent four grand on premium Kentucky Bluegrass sod, only to watch it turn into straw within three weeks. They blamed the grower. I walked onto the site, pushed a soil probe into the ground, and it hit a layer of buried construction debris and compacted heavy clay just two inches down. The roots had nowhere to go. We had to rip the whole thing up, bring in a skid steer to remediate the subgrade, and start over. That is the cost of skipping the science. You don’t just ‘plant’ sod; you engineer an environment where it can thrive.
“A retaining wall doesn’t fail because of the stone; it fails because of the water trapped behind it.” – Hardscape Engineering Axiom
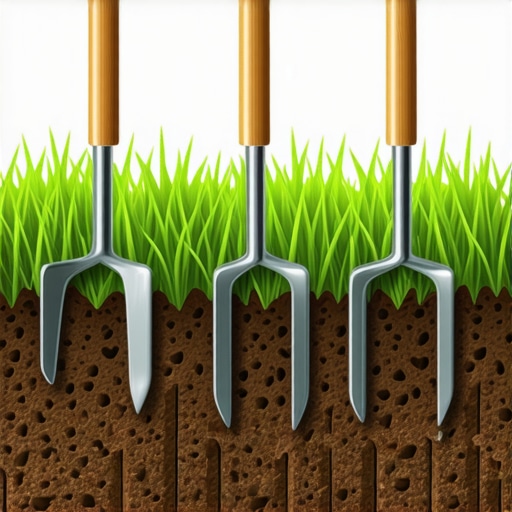
The Screwdriver Test: Measuring Soil Compaction and Porosity
The Screwdriver Test is a primary diagnostic tool used to determine soil compaction levels and root penetration potential without expensive laboratory equipment. By manually gauging the mechanical resistance of the earth, you can identify impermeable layers that will prevent 2026 sod roots from reaching the deep moisture reserves necessary for drought resistance.
How deep should a screwdriver go in healthy soil?
For a successful sod install, a standard 12-inch flathead screwdriver should slide into moist soil with moderate hand pressure to a depth of at least 6 to 8 inches. If you meet significant resistance or the tool stops at 2 inches, your bulk density is too high. This indicates a compaction layer that must be addressed via core aeration or mechanical tilling before any grass hits the ground. High compaction limits pore space, meaning oxygen cannot reach the roots and water will simply run off the surface rather than infiltrating the root zone.
The Mason Jar Soil Texture Test: Determining Water Retention
The Mason Jar Test is a quantitative method to determine your soil textural class (the ratio of sand, silt, and clay), which governs your field capacity and irrigation frequency. Understanding whether you have sandy loam or heavy clay is critical because it dictates how much water the soil can hold before it reaches permanent wilting point.
| Soil Type | Infiltration Rate (Inches/Hour) | Water Retention Capacity | 2026 Sod Risk Factor |
|---|---|---|---|
| Sand | 2.0 – 20.0 | Very Low | High (Drying out) |
| Sandy Loam | 0.6 – 2.0 | Optimal | Low (Best for Sod) |
| Silt Loam | 0.3 – 0.6 | High | Moderate (Compaction) |
| Clay | 0.01 – 0.1 | Very High | High (Root Rot) |
Can I install sod on heavy clay soil?
You can install sod on heavy clay soil, but only if you incorporate organic matter or sand to break up the plate-like structure of the clay particles. Without remediation, clay soils suffer from anaerobic conditions where water sits in the macro-pores, drowning the roots. You must ensure the soil pH is balanced (aim for 6.5) and the cation exchange capacity is optimized to allow for proper nutrient uptake alongside water absorption.
The Infiltration Rate Test: Calculating Real-World Drainage
The Infiltration Rate Test, or percolation test, measures the speed at which your landscape can process volumetric water content to prevent surface pooling and fungal pathogens. To perform this, dig a 6-inch deep hole, fill it with water, let it drain completely (to saturate the surrounding soil), then fill it again and time how long it takes for the water level to drop.
“Soil health is the foundation of all terrestrial life; without proper pore space and microbial activity, the hydrological cycle at the residential level collapses.” – USDA NRCS Agronomy Manual
How fast should water drain for new sod?
Ideally, water should drain at a rate of 1 to 2 inches per hour. If your soil takes longer than 4 hours to drain a 6-inch hole, you have a drainage crisis. You likely need a French drain or a catch basin system to move hydrostatic pressure away from the turf area. Installing sod on standing water is a death sentence for the rhizomes. It will rot. Do not skip the grading phase.
Pre-Sod Installation Soil Prep Checklist
- Site Clearing: Remove all rocks larger than 1 inch and any existing invasive species or thatch layers.
- Rough Grading: Establish a 2% slope away from the home foundation to manage surface runoff.
- Soil Amendment: Till in 2 inches of composted organic matter to a depth of 6 inches.
- Starter Fertilizer: Apply a high-phosphorus (e.g., 10-20-10) NPK ratio to encourage immediate root branching.
- Final Leveling: Use a landscaping rake to remove small depressions where water might pool.
- Roll the Subgrade: Use a water-filled roller to firm the soil; your footprints should be barely visible.
Post-Install Irrigation Logic: Moving Beyond the Timer
Managing irrigation for 2026 sod requires a shift from ‘calendar-based’ watering to ‘moisture-based’ logic, focusing on evapotranspiration (ET) rates and deep root cycling. The goal is to keep the soil-sod interface consistently moist for the first 14 days, then gradually reduce frequency while increasing duration to force the roots to chase moisture deeper into the sub-soil.
While the internet tells you to water every day, turf grass actually needs deep, infrequent watering—exactly 1 inch per week—to force roots to chase the water down. If you water for 5 minutes every morning, you develop a shallow root system that will fail during the first July heatwave. Use a tuna can or rain gauge to measure your sprinkler output. Stop guessing. The capillary action of the soil depends on you delivering enough volume to break the surface tension. If you see the sod ‘graying’ or footprints remaining in the grass, it’s already in moisture stress. Address it immediately. [{“@context”:”https://schema.org”,”@type”:”FAQPage”,”mainEntity”:[{“@type”:”Question”,”name”:”How deep should a screwdriver go in healthy soil?”,”acceptedAnswer”:{“@type”:”Answer”,”text”:”A screwdriver should penetrate 6 to 8 inches into moist soil. Resistance at shallower depths indicates high soil compaction which prevents root growth and water infiltration.”}},{“@type”:”Question”,”name”:”Can I install sod on heavy clay soil?”,”acceptedAnswer”:{“@type”:”Answer”,”text”:”Yes, but you must amend it with organic matter first. Clay has poor drainage and low oxygen levels, which can lead to root rot if not properly tilled and graded.”}}]}]
This article hits on a crucial point that often gets overlooked in DIY lawn projects—the importance of soil health before planting. I remember the first time I tried to lay sod without testing the soil, and it was a complete fail within a month. Since then, I’ve learned to run simple tests like the screwdriver and Mason Jar method to gauge soil conditions properly. It’s remarkable how much difference properly prepared soil makes for sod longevity and drought resistance. Personally, I’ve started incorporating organic matter and aeration as part of my pre-sod routine, and the results have been noticeably better. My question is, for homeowners who have very compacted clay soil, what are the most effective long-term strategies to improve soil structure beyond initial amendments? Has anyone found success with specific organic amendments or aeration schedules to sustain healthy turf over the years? Would love to hear practical insights from those who’ve managed challenging soil conditions.