The Forensic Autopsy of a Spongy Lawn
Sponginess in a lawn is rarely a sign of health; it is a symptom of a failing subsurface ecosystem where organic biomass, excessive moisture, and poor soil structure converge. When you walk across your yard and feel that unsettling ‘give’—as if you are traversing a saturated marsh rather than a stable sod install—you are likely witnessing the slow-motion collapse of your turf’s root zone. This isn’t just a cosmetic issue. It is a structural failure that leads to fungal pathogens, crown rot, and localized dry spots when the roots eventually fail to reach the actual mineral soil. I recently got called out to a property where a homeowner had spent $15,000 on a high-end sod install that was sinking because the previous contractor failed to address the 15% clay-to-silt ratio of the subsoil. They laid the sod directly over uncompacted backfill from a recent pool construction. Within three months, the yard was a series of hummocks and hollows. We had to perform a full forensic excavation, installing a network of 4-inch perforated French drains and a three-stage leveling protocol to save the investment. If you don’t fix the physics of the soil, the biology of the grass will never follow.
Diagnosing the Squish: Why Your New Sod Feels Like a Sponge
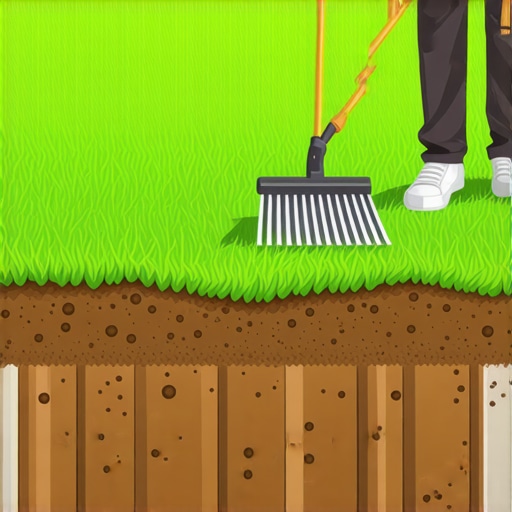
Spongy turf is caused by an accumulation of un-decomposed organic matter known as thatch, compounded by high hydrostatic pressure within the top two inches of the soil profile. This layering effect prevents proper gas exchange and forces the turf to live in a perpetual state of anaerobic stress, leading to a shallow root system. [IMAGE_PLACEHOLDER]
How do I know if my sod is too wet or just poorly leveled?
The distinction lies in the ‘rebound’ of the turf. If the ground remains indented after a step, you have a drainage and saturation issue. If it bounces back but feels soft, you are likely dealing with a thatch layer exceeding 0.5 inches or a ‘suspended water table’ where water sits in the sod layer because it cannot penetrate the compacted soil beneath. Use a soil probe or a long screwdriver to check. If the tool slides in with zero resistance for three inches and then hits a wall of hardpan clay, your leveling issues are rooted in poor site preparation during the initial landscaping phase. Don’t ignore it. It will rot.
Tactic 1: Deep Core Aeration and the Physics of Gas Exchange
Core aeration is the mechanical removal of soil cylinders to break the surface tension of the thatch layer. In a spongy lawn, you must use a professional-grade aerator capable of pulling 3.5 to 4-inch cores. This is not about ‘poking holes.’ It is about physical displacement. By removing these cores, you create a direct conduit for oxygen to reach the rhizosphere. This oxygen stimulates aerobic microbes that begin the process of breaking down the excessive lignin in the thatch layer.
“Compaction reduces the pore space between soil particles, restricting the movement of air and water to the roots, which is the primary cause of turf decline in high-traffic areas.” – Penn State Center for Turfgrass Science
You need at least 20 to 40 holes per square foot. If your machine isn’t pulling clean plugs, your soil is either too dry or too wet. Aim for the ‘moist brownie’ consistency. Anything else is a waste of time.
Tactic 2: Top-Dressing with High-Percentage Silica Sand
Top-dressing is the only way to achieve a golf-course-flush finish. While many DIYers reach for bags of topsoil or compost, these materials are too compressible for leveling. You need masonry sand or a specific 70/30 sand-to-soil mix. Sand does not compact; it provides a stable, non-shifting base that fills the voids in the turf canopy. When you apply sand after a deep aeration, the sand fills the core holes, creating ‘sand pillars’ that act as permanent drainage chimneys. This facilitates downward water movement and prevents the sponge effect from returning.
Use the following table to determine your material needs based on the severity of your lawn’s depressions:
| Material Type | Drainage Rate | Organic Content | Ideal Depth per Application |
|---|---|---|---|
| USGA Spec Sand | High (15+ in/hr) | 0% | 0.25 – 0.5 inches |
| 70/30 Sand/Soil Mix | Medium (5-10 in/hr) | 30% | 0.5 – 0.75 inches |
| Screened Topsoil | Low (1-2 in/hr) | High | Not recommended for leveling |
Tactic 3: Mechanical Vertical Mowing (Dethatching) for Biomass Control
If your lawn feels like a mattress, the biomass is the culprit. Vertical mowing, or power raking, uses steel blades to slice through the stolons and runners of the grass, physically pulling out the dead underlayer. For a lawn that is being prepped for 2026, you must be aggressive. This process will make the yard look like a disaster zone for 14 days, but it is necessary. You are removing the ‘sponge’ that holds the water. Once the thatch is thinned, your irrigation can actually reach the soil, and your leveling sand can settle into the low spots instead of sitting on top of a dead mat of grass. Do this in the early spring or early fall when growth is at its peak. Never do this in the heat of summer. You will kill the crown.
Tactic 4: Grade Correction and Sub-Surface Drainage
Sometimes the sponginess isn’t about the grass at all—it’s about the grade. If you have a low spot that stays wet for more than 24 hours after a rain, you have a drainage failure. The 2% rule is your bible here: you need a 2-foot drop for every 100 feet of run to move water effectively. If your yard cleanup doesn’t include checking the pitch of the land, your new sod install is doomed. In heavy clay environments, sand leveling won’t be enough. You may need to install a French drain using 1-inch clean wash stone and a non-woven geotextile fabric.
“Irrigation should be applied at a rate that matches the soil’s infiltration capacity to prevent runoff and ensure deep root penetration.” – Texas A&M AgriLife Extension
Avoid the cheap, corrugated pipe sold at big-box stores. It collapses. Use Triple-wall or SDR-35 PVC. It’s harder to install, but it’s a permanent fix.
How much sand do I need for leveling a 1,000 sq ft lawn?
For a standard leveling application of 0.5 inches, you will need approximately 1.5 to 2 cubic yards of sand per 1,000 square feet. Do not apply more than 0.75 inches in a single pass, or you risk smothering the turf and causing a localized die-off. It is better to do three light applications over two growing seasons than one heavy application that kills your base. Slow and steady wins the level.
The 2026 Flush Lawn Roadmap
- March 2025: Conduct a soil test and apply 811 Dig Safe if installing drainage.
- April 2025: Heavy core aeration (2 passes) followed by 0.5-inch sand top-dressing.
- June 2025: Monitor irrigation; switch to deep, infrequent watering (1 inch per week).
- September 2025: Vertical mowing and a second light sand application.
- March 2026: Final leveling touch-ups and balanced NPK fertilization (e.g., 16-4-8).
Maintaining a flush lawn requires a commitment to the ‘Deep and Infrequent’ watering philosophy. Most homeowners kill their lawns by watering for 10 minutes every night. This keeps the surface wet, encourages thatch, and results in that spongy feel. You want to force those roots down. Water deep, once or twice a week, and let the surface dry out. That’s how you build a professional-grade turf. Don’t skip the prep. Do it right once, or you’ll be doing it again in two years. That’s the reality of the dirt.