The Anatomy of Failed Turf: Why Your Sod Peels Like a Cheap Rug
You step onto your newly installed lawn and the ground shifts. You reach down, grab a handful of grass, and the entire section lifts up, exposing a dry, matted mess of roots that never bit into the earth. It is a visual and tactile failure of biological integration. For a professional, there is no sight more frustrating than seeing several thousand dollars of high-quality turf fail because the installer ignored the transition zone between the sod’s nursery soil and the property’s native subgrade. This peeling phenomenon isn’t just an aesthetic issue; it is a sign of root desiccation and anaerobic pocketing that will eventually lead to a total die-off. To fix it, you have to look past the green blades and analyze the interface of the rhizosphere.
I always drill into my new crew members: if you don’t fix the soil grading first, every plant you put in the ground is just expensive compost. I’ve seen kids who think they can just slap a roll of Kentucky Bluegrass over compacted clay and walk away. It doesn’t work that way. If the soil isn’t graded to allow for proper drainage and scarified to permit root penetration, you’re just creating a temporary green carpet that will bake in the sun and rot in the rain. We don’t build on top of the ground; we build into it. If you aren’t sweating the grading, you aren’t doing landscaping; you’re doing interior decorating with plants that are destined to die.
The Science of the Root-Locking Mechanism
To stop sod from peeling in 2026, you must establish immediate hydraulic capillary action between the sod roll and the subgrade through mechanical rolling, pH-balanced soil amendments, and deep-cycle irrigation that encourages downward geotropism of the roots into the native soil profile. This process requires more than just water; it requires the physical elimination of air pockets and the chemical stimulation of root hairs. When sod is harvested, the root system is severed. The plant is in a state of high-stress survival. To trigger ‘root-locking,’ the moisture levels must be consistent enough to prevent the crown from drying out but sparse enough in the upper half-inch of the sod to force the roots to ‘hunt’ for water in the deeper native soil. If you keep the top saturated 24/7, the roots have no biological incentive to grow downward. They stay in the sod mat, and that’s when you get peeling.
Why does new sod peel like carpet?
Peeling occurs when there is a physical or chemical barrier preventing the adventitious roots of the turfgrass from penetrating the underlying soil. This is often caused by ‘glazing,’ where a heavy clay subgrade is smoothed over by a skid-steer bucket, creating a surface as hard as a sidewalk. Other culprits include excessive thatch layers in the sod itself or a ‘soil bridge’ where the soil type of the sod is significantly different in texture from the native soil, preventing water from moving across the boundary layer. Without water movement, roots won’t follow.
“A retaining wall doesn’t fail because of the stone; it fails because of the water trapped behind it.” – Hardscape Engineering Axiom
Fix 1: Subgrade Preparation and Soil Tilth
Fixing peeling sod starts with preparing the subgrade to a depth of 4 to 6 inches using a power tiller or a Harley rake to eliminate compaction and ensure a bulk density of approximately 1.3 to 1.4 g/cm3. Most ‘mow-and-blow’ contractors skip this. They rake the surface and call it a day. To get a true root-lock, you need to break up the ‘pan layer.’ If your soil is heavy clay, you must incorporate organic matter or calcined clay to improve pore space. We are looking for a balance of macro-pores for drainage and micro-pores for water retention. This is where you perform your yard cleanup—removing every stone larger than a nickel and every bit of debris. Any foreign object left under the sod creates an air pocket. Air pockets kill roots. Period. You should also check your pH. Turf grass generally thrives in the 6.0 to 7.0 range. If you’re at a 5.0, your phosphorus—the primary nutrient for root development—is chemically locked away from the plant. No amount of watering will fix a chemical lockout.
Fix 2: The Mechanical Hydraulic Bond
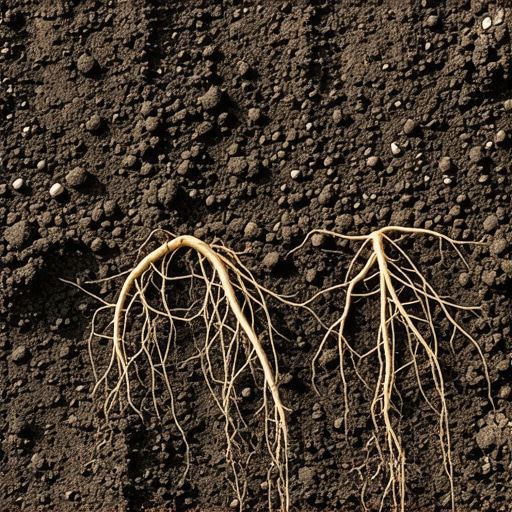
The mechanical bond is achieved by using a water-filled lawn roller (approximately 200-300 lbs) immediately after laying the sod to force the root zone into direct physical contact with the prepared subgrade. This is not about leveling the lawn; it is about eliminating the ‘death zone’—the thin layer of air between the sod and the earth. Roots cannot grow through air. By rolling the sod, you are effectively ‘stapling’ it to the ground. This also initiates capillary action. Think of the sod and the earth like two sponges. If they aren’t touching tightly, water won’t move from one to the other. Once rolled, the sod should feel firm underfoot, not spongy. If you can still see the seams between the rolls, you haven’t rolled enough or you haven’t tight-tucked the edges. Every seam is a potential site for moisture loss and peeling. [image_placeholder_1]
Fix 3: The Geotropic Irrigation Strategy
Geotropic irrigation involves a tapering schedule that moves from frequent, shallow watering in the first 72 hours to deep, infrequent applications by day 14 to force roots to descend into the subgrade. Most homeowners fail here. They either under-water and the sod turns into parchment, or they over-water for three weeks straight, essentially drowning the roots and encouraging Pythium blight. During the first week, you want the soil to be moist, not muddy. By week two, you skip a day. This ‘drought stress’ is intentional. When the upper layer dries slightly, the plant’s hormonal response (auxins) signals the roots to grow deeper to find the water table. This is the ‘lock.’ If the roots stay in the top inch, the sod will peel next summer the moment the temperature hits 90 degrees. You need those roots 4 to 6 inches deep to survive a 2026 heatwave.
How much modified gravel do I need for a patio base?
While often asked during landscaping overhauls, the rule of thumb for any hardscape adjacent to your sod is a minimum of 4 to 6 inches of compacted 21A or 3/4-inch minus gravel. If you don’t have a solid base, the drainage from your patio will wash out the subgrade of your new sod, leading to sinking and, you guessed it, peeling near the edges. Always slope your base 1/8 inch per foot away from the house to manage hydrostatic pressure.
| Soil Component | Ideal Range | Impact on Root-Locking |
|---|---|---|
| Soil pH | 6.2 – 6.8 | Maximizes Phosphorus availability for root growth. |
| Bulk Density | 1.3 – 1.5 g/cm3 | Allows for oxygen exchange and root penetration. |
| Organic Matter | 3% – 5% | Improves Cation Exchange Capacity (CEC) and moisture retention. |
| Phosphorus (P) | High | The primary engine for initial root branching. |
“The success of any turfgrass stand is 90% dependent on the physical properties of the soil at the time of installation.” – Penn State Agricultural Extension
Zero-Peel Installation Checklist
- Confirm 811 utility markings are complete before any subgrade excavation.
- Remove all existing vegetation and thatch using a sod cutter; do not just till it in.
- Scarify the subgrade to a depth of 4 inches to break surface tension.
- Apply a high-phosphorus ‘starter’ fertilizer (e.g., 10-20-10) to the bare soil.
- Lay sod in a staggered, brick-like pattern to minimize long seams.
- Roll with a 250lb roller within 30 minutes of laying the first roll.
- Perform a ‘pull test’ on day 10; you should feel significant resistance.
How long does it take for sod to root in 2026?
In optimal conditions (temperatures between 60-75°F), you should see ‘white-hair’ roots emerging within 3 to 5 days. Full structural integration, where the sod cannot be lifted by hand, typically takes 14 to 21 days. If you can still lift the corners after three weeks, your irrigation is likely too frequent or your subgrade is too compacted.
I really appreciate how this article dives into the science behind root-locking and the importance of proper soil prep. It’s easy to get excited about laying sod but neglect the groundwork, which can lead to issues like peeling. During my last project, I especially saw the benefits of using a water-filled roller immediately after installation. It makes a huge difference in ensuring the sod makes good contact with the soil. One challenge I’ve encountered is maintaining the right moisture levels during the initial weeks, especially in hot, dry climates. I’ve started using moisture sensors to monitor soil hydration more precisely, which helps optimize root growth and prevent those pesky air pockets. Have others found effective ways to keep the soil consistently moist without overwatering? I’d love to hear tips for different weather conditions, especially during peak summer months.