
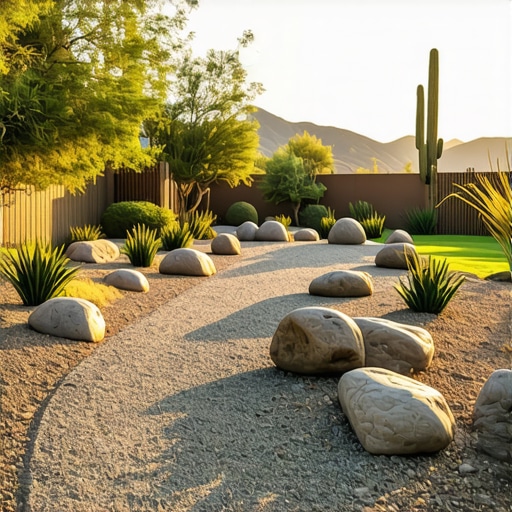
The Engineering Reality of Modern Xeriscaping
Replacing grass with stone beds requires a systematic removal of the top 3-4 inches of organic matter to reach a stable subgrade and prevent organic decomposition from undermining the final grade. Most homeowners think xeriscaping is a weekend DIY project involving a few bags of river rock and some plastic sheeting, but if you do not understand the hydrostatic pressure of the soil or the thermal mass of the stones, you are building a future maintenance nightmare. As a veteran in this industry, I have spent decades fixing what the mow-and-blow crews leave behind. A real landscaping project is about managing water, heat, and soil biology, not just making a yard look different for a month.
The Hardscape Autopsy: Why Your Last Project Failed
I recently got called out to tear up a $30,000 patio that was sinking because the previous contractor failed to realize they were building on expansive clay. They did not excavate deep enough to clear the root zone of the original sod install, and as the old grass roots rotted, the soil collapsed. The stone bed on top became a wavy, weed-filled mess within eighteen months. We had to excavate 20 tons of material just to reach a stable base. This is the cost of skipping the engineering phase. If you do not fix the soil grading first, every plant or stone you put in the ground is just expensive compost. It will shift. It will fail. Don’t skip the compaction phase.
“A retaining wall doesn’t fail because of the stone; it fails because of the water trapped behind it.” – Hardscape Engineering Axiom
The Science of Soil Preparation and Drainage
Successful yard cleanup for a xeriscape conversion starts with a transit level and a shovel. You must establish a minimum 1 percent slope, or 1 inch of drop for every 10 feet of distance, away from any structural foundation. If the water has nowhere to go, it will sit under your stone bed, saturate the sub-base, and cause the stones to sink into the mud. We call this silt migration. To prevent this, we use non-woven geotextile fabrics. These are not the cheap black plastics you find at big-box stores. Those plastics trap water and kill the soil microbiology. A professional-grade geotextile allows water to pass through while keeping the silt from mixing with your clean stone.
How much modified gravel do I need for a patio base?
To calculate the material needed for a stable base, multiply the square footage by the desired depth in feet, then divide by 27 to get cubic yards, finally multiplying by 1.5 to account for the 20 percent compaction rate required for structural stability. Most landscaping projects require a 4-inch base of 21A or 57 stone for non-vehicular traffic areas. This base must be compacted in 2-inch lifts using a vibratory plate compactor. If the tamper does not literally bounce off the ground, you are not done. High-density compaction is the only thing standing between your stone bed and a future of ruts and puddles.
| Material Type | Drainage Rating | Heat Retention | Recommended Depth |
|---|---|---|---|
| Crushed Granite | High | Moderate | 3 Inches |
| River Rock | Medium | High | 4 Inches |
| Pea Gravel | Low | Low | 2 Inches |
| Lava Rock | High | Extreme | 3 Inches |
Managing Irrigation and Thermal Mass
Converting a traditional lawn to stone changes the micro-climate of your property. Stone acts as a thermal mass, absorbing solar radiation during the day and radiating it back at night. This can fry the root systems of native plants if you do not adjust your irrigation strategy. You cannot simply leave your old pop-up sprayers in place. They will hit the stones, cause evaporation, and never reach the plants. We convert these zones to pressure-compensated drip lines. These lines deliver water directly to the root flare, minimizing waste and preventing the salt buildup often seen on the surface of decorative stones.
Do I need a permit for xeriscaping?
In many municipalities, any project that alters the permeable surface area of your yard by more than 25 percent requires a drainage permit or an erosion control plan. You must check with your local zoning office and call 811 before you dig. Striking a gas line or a fiber-optic cable will turn a budget-friendly sod install replacement into a legal and financial catastrophe. Many HOAs also have specific lists of approved stone colors to prevent high-reflectivity stones from creating glare issues for neighbors. Ignoring these codes is a recipe for a lien on your house.
“Soil compaction is the single most important factor in long-term structural landscape stability.” – ICPI Tech Spec 2
Step-by-Step Xeriscape Installation Checklist
- Call 811 to mark all underground utilities and irrigation lines.
- Excavate 4 inches of soil, including all grass, roots, and organic debris.
- Grade the sub-base to ensure a 1-2 percent slope away from the house.
- Compact the subgrade with a vibratory plate until 95 percent density is achieved.
- Install 6-ounce non-woven geotextile fabric with a 12-inch overlap at seams.
- Secure commercial-grade steel or heavy-duty poly edging with 10-inch spikes.
- Spread your selected stone to a depth of 3 inches, ensuring even coverage.
- Convert existing irrigation heads to low-flow drip manifolds.
The choice of stone is not just aesthetic. Angular stones like crushed granite lock together through friction, making them much more stable for walking paths. Round stones like river rock or pea gravel will roll underfoot like ball bearings. If you have a slope greater than 5 percent, never use round stone. It will wash away in the first heavy rain. Use a 2-inch to 4-inch fractured stone that can grip the fabric and stay in place. Maintenance in year one is about monitoring the edges for silt intrusion and ensuring the drip lines are not being buried too deep by shifting rocks. After the first season, the bed should be stable. It is not no-maintenance, but it is low-maintenance engineering at its best.