The Engineering of Sandy Soil Sod Installation
Laying sod over sandy soil requires a deep understanding of soil physics and hydraulic conductivity because sand lacks the organic glue needed to hold moisture and nutrients. To achieve instant growth, you must modify the soil profile by increasing its Cation Exchange Capacity (CEC) and ensuring the root zone is biologically active before the first pallet of grass arrives. Most contractors fail because they treat sand as a finished surface rather than a drainage-heavy substrate that requires chemical and structural intervention.
The Apprentice Lesson: Why Grading and Soil Prep Matter Most
I always drill into my new crew members: if you don’t fix the soil grading first, every plant you put in the ground is just expensive compost. I remember a job in a coastal development where a homeowner tried to lay 5,000 square feet of St. Augustine directly onto raw, sugary white sand. Within three weeks, the grass was desiccated. The water was bypassing the roots entirely, moving vertically through the sand at a rate the irrigation system couldn’t match. We had to rip it all out, excavate four inches of sand, and haul in a custom loam-compost blend. It was a $12,000 mistake they could have avoided with a simple soil test. Sand is a sieve. If you don’t give it some ‘backbone’ with organic matter, your sod is essentially on life support from day one.
How do you prepare sandy soil for sod?
To prepare sandy soil for sod, you must incorporate 2-3 inches of organic compost or heavy topsoil into the top 6 inches of the existing sand to improve moisture retention. After mechanical tilling, the area must be graded for a 1-2% slope to prevent localized puddling and then compacted with a water-filled roller to provide a firm planting bed for the sod roots.
“Sandy soils have low water-holding capacity and high infiltration rates, which necessitates frequent, light applications of water to maintain turfgrass health during the establishment phase.” – Texas A&M AgriLife Extension
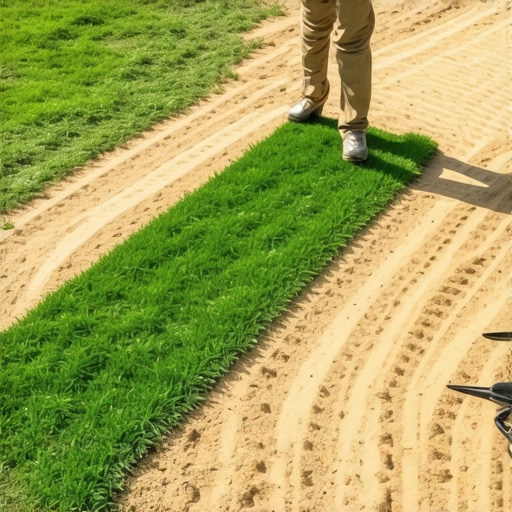
The Yard Cleanup and Site Preparation Phase
Site preparation is 80% of the labor in a professional sod install. You cannot just rake the sand and call it a day. You must remove every trace of existing vegetation, including deep-rooted weeds like nutsedge or crabgrass that thrive in sandy environments. This isn’t just about aesthetics; it’s about eliminating competition for limited resources. Once the yard cleanup is done, you need to address the pH level. Sandy soils are often acidic. If your soil test comes back below 6.0, you need to apply pelletized lime at a rate determined by your specific buffer pH. This chemical adjustment ensures that when you finally apply your starter fertilizer, the nutrients are actually bioavailable to the grass roots rather than being locked up in the soil chemistry.
[IMAGE_PLACEHOLDER]
The Physics of Soil Amendments: Improving the CEC
Cation Exchange Capacity is the soil’s ability to hold onto positively charged nutrients like Potassium, Calcium, and Magnesium. Pure sand has a CEC near zero. Without amendments, your fertilizer will simply leach into the groundwater. I recommend a heavy application of humic acid and a high-quality compost. This creates a microbial ‘bridge’ between the sterile sand and the living sod. Use a power tiller to blend these materials. You are looking for a ‘salt and pepper’ look where the dark organic matter is thoroughly integrated into the light sand. Don’t leave a layer of compost sitting on top of the sand; this creates a physical barrier called a ‘perched water table’ that can actually rot the roots in high-heat scenarios.
Material Comparison for Sandy Soil Modification
| Amendment Type | Retention Benefit | Cost Factor | Recommended Depth |
|---|---|---|---|
| Composted Manure | High – Excellent Microbes | Moderate | 2-3 Inches |
| Sphagnum Peat Moss | Very High – Moisture Focus | High | 1-2 Inches |
| Screened Topsoil (Loam) | Moderate – Structural Focus | Low | 3-4 Inches |
| Humic Acid (Granular) | Chemical – High CEC | Low | Top-dress Only |
The Irrigation System Audit
Irrigation in sandy soil is a different beast than in clay. In clay, you worry about runoff. In sand, you worry about deep percolation beyond the root zone. Before the sod goes down, you must perform a ‘catch can test’ on your irrigation system. You need to know exactly how many inches of water your heads are putting out per hour. For new sod on sand, you aren’t looking for deep, infrequent watering yet. You need short, frequent cycles to keep the top 2 inches of the soil profile constantly moist. If your irrigation heads are clogged or have poor head-to-head coverage, the sand will develop dry spots that will kill the sod in 48 hours during a summer install.
“A retaining wall doesn’t fail because of the stone; it fails because of the water trapped behind it, just as turf fails not from the heat, but from the inability of the soil to hold the water provided to it.” – Hardscape and Agronomy Engineering Axiom
Step-by-Step Sod Installation Protocol
- Moisten the Sub-Grade: Never lay sod on hot, dry sand. It will suck the moisture right out of the roots. Lightly mist the ground before laying each row.
- Stagger the Joints: Lay the sod in a brick-work pattern. This prevents long seams where water can channel and erode the sand underneath.
- Tuck the Edges: Use a sharp machete or sod knife to cut around irrigation heads and landscape beds. Gaps lead to air-pockets that dry out the edges.
- The Rolling Mandate: Once laid, use a 200-300 lb water roller over the entire area. This is non-negotiable. You must eliminate air pockets between the sod’s root mat and the sandy sub-grade.
- Starter Fertilizer: Use a high-phosphorus (the middle number, e.g., 10-20-10) starter fertilizer to encourage immediate root branching.
How often should you water new sod in sandy soil?
New sod on sandy soil requires irrigation 3 to 4 times per day for the first 10-14 days. Each cycle should last 10-15 minutes, ensuring the soil remains saturated but not flooded. After the roots have knit into the sand (checked by a gentle tug test), gradually reduce frequency while increasing duration to encourage deep root growth.
Managing the 14-Day Critical Window
The first two weeks are a war against evaporation. In sandy soils, the heat from the sun can bake the sand to temperatures exceeding 120 degrees Fahrenheit. If the sod dries out once, the roots may go dormant or die. Watch for ‘blue-gray’ tints in the grass or curling blades. These are signs of localized dry spots. If you see this, hand-water those areas immediately. Do not mow the grass until it is at least 3.5 to 4 inches tall. When you do mow, use a high setting. Scalping new sod on sandy soil is a death sentence because it removes the shade that keeps the soil cool. Keeping the blades long helps the soil retain moisture through natural shading.
The Long-Term Maintenance Schedule
Once the sod is established, your job isn’t over. Sandy soils require a consistent fertilization schedule because nutrients leach so quickly. I recommend spoon-feeding the lawn with liquid nutrients or using slow-release granular products every 6 weeks. Every spring, top-dress the lawn with 1/4 inch of finely screened compost. This continues to build the organic horizon of the soil, eventually turning that sandy waste into a rich, resilient turf base. It takes time. Don’t rush the process. Soil biology is a marathon, not a sprint. Keep your blades sharp, your irrigation calibrated, and your soil tests current. That is the only way to beat the sand in the long run.
Comments are closed.