3 Simple Soil Hacks to Fix 2026 Sod Rooting Issues
I see it every spring. A homeowner spends thousands on high-quality sod, hires a crew to roll it out, and by week three, they are looking at a field of brown, crispy mats that look more like outdoor carpeting than a living lawn. When you pull up a corner of that sod, it comes right up. No roots. No connection. It is effectively dead on arrival. This is not a problem with the grass. It is a failure of the subterranean infrastructure. If you treat your soil like a platform rather than a living biological reactor, you are flushing your investment down the storm drain.
The Root of the Problem: Why Sod Fails to Knit
Sod rooting failure occurs when hydrostatic barriers or extreme soil compaction prevent primary adventitious roots from penetrating the native substrate. Without proper capillary action, the sod remains a separate layer, drying out and eventually succumbing to localized dry spot despite heavy irrigation efforts or chemical intervention.
I always drill into my new crew members: if you don’t fix the soil grading and chemistry first, every plant you put in the ground is just expensive compost. I remember a job back in 2018 where we were called to replace a failed 5,000-square-foot sod install. The previous contractor had literally laid the sod over a layer of hard-packed red clay that was so compacted you could have parked a semi-truck on it without leaving a tire mark. They had used plenty of fertilizer, but the roots were hitting that clay like it was a sheet of glass and turning sideways. That is not a lawn; that is a recipe for rot. We had to rip it all up, bring in a subsoiler, and start from the microbiology up. It was a $12,000 lesson for that homeowner because they tried to skip the yard cleanup and prep phase.
“Successful turfgrass establishment depends on the physical contact between the sod and a moist, well-prepared seedbed. Soil compaction is the single most common cause of plant failure in urban landscapes.” – Penn State Center for Turfgrass Science
Hack 1: Mechanical Fracture and the Death of the ‘Plow Pan’
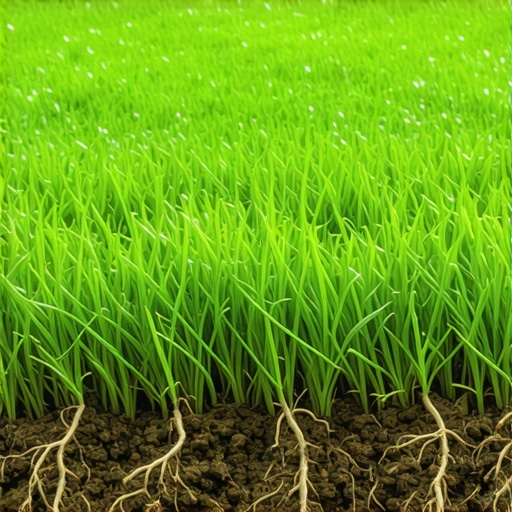
Mechanical fracture involves using a core aerator or subsoil tiller to break the compacted layer, known as the plow pan, at a depth of 4 to 6 inches. This process increases the soil’s macroporosity, allowing for oxygen exchange and providing a physical pathway for new roots to migrate.
You cannot expect a tender root hair to penetrate 3,000 PSI of soil resistance. Most new construction sites are compacted by heavy machinery during the build process. This creates a literal wall. Before any sod install, you must perform a ‘shove test.’ If you cannot push a standard screwdriver six inches into the ground with one hand, your sod will fail. Don’t just till the top inch; you need to shatter the deeper layers. We use a vertical-action aerator that pulls three-inch plugs. These holes act as ‘root highways.’ When the sod goes down, those roots find the voids, dive deep, and anchor the plant against future drought. Skip this, and you are just laying a wig on a bald man. It will slide right off when the wind blows or the water runs.
Hack 2: The Biological Bridge via Mycorrhizae Integration
The biological bridge uses endomycorrhizal fungi inoculants to create a symbiotic relationship between the soil and the grass roots. These fungi extend the reach of the root system by up to 100 times, significantly increasing phosphorus uptake and water absorption during the critical first 14 days of establishment.
Most ‘yard cleanup’ is purely cosmetic—raking leaves and picking up sticks. Real cleanup involves purging the soil of anaerobic pathogens and reintroducing the good guys. In 2026, we are seeing more sterile soils due to over-reliance on synthetic ‘weed and feed’ products. These chemicals kill the soil biology. When you lay new sod, you should dust the soil surface with a high-quality mycorrhizae powder or use a liquid soil drench. This is the ‘glue’ that binds the new sod to the old earth. It forces the grass to hunt for nutrients. If the soil is biologically dead, the grass has to rely entirely on what you spray on top. That makes for a weak, pampered lawn. You want a fighter. You want a root system that goes deep because it has a fungal partner helping it mine for minerals.
How long does it take for new sod to root deep?
Under optimal conditions with a prepared soil base, you should see ‘white hair’ feeder roots within 5 to 7 days. A full structural anchor that prevents the sod from being lifted by hand typically takes 14 to 21 days, depending on the grass species and soil temperature.
Hack 3: Correcting the Cation Exchange Capacity (CEC)
Correcting the CEC involves adjusting the soil’s ability to hold and exchange vital nutrients like calcium, magnesium, and potassium through the application of pelletized gypsum or humic acid. This chemical hack ‘unlocks’ the soil, making the nutrients already present actually available to the plant.
I see guys throwing 10-10-10 fertilizer at a new lawn like they’re feeding pigeons. If your pH is off or your CEC is low, that fertilizer is just leaching into the groundwater. It’s a waste. For 2026 sod installs, we are focusing heavily on humic acid. It acts as a chelator. It grabs onto the nutrients and holds them in the root zone. If you have heavy clay, use gypsum to break the ionic bonds that keep the clay particles stuck together. It flocculates the soil, creating more ‘crumbs’ or aggregates. Better soil structure means better irrigation efficiency. You’ll use 30% less water because the soil is actually holding it instead of letting it run off the surface. It will thrive. It won’t just survive.
“A retaining wall or a landscape bed doesn’t fail because of the materials; it fails because of the hydrostatic pressure and poor drainage behind it.” – Hardscape Engineering Axiom
Can I lay sod over existing grass?
Never lay sod over existing grass. The old vegetation will die and create an anaerobic layer of decomposing organic matter that generates heat and pathogens, effectively ‘cooking’ the new sod’s root system from the bottom up and preventing any soil contact.
| Material | Benefit | Application Rate |
|---|---|---|
| Pelletized Gypsum | Breaks Clay Bonds | 40 lbs per 1,000 sq ft |
| Humic Acid | Increases Nutrient Retention | 1 gallon per 5,000 sq ft |
| Mycorrhizae | Boosts Root Surface Area | 2 lbs per 1,000 sq ft |
| Coarse Sand | Improves Drainage/Porosity | 1/4 inch top-dress |
- Remove all debris, rocks larger than 1 inch, and old vegetation.
- Test soil pH and target 6.0 to 7.0 for most turf varieties.
- Edge all hardscapes to a depth of 2 inches for a clean sod tuck.
- Flag all irrigation heads to avoid damage during the grading process.
- Ensure a 1% slope away from the home foundation to prevent pooling.
Stop looking for a ‘miracle’ fertilizer. There isn’t one. The miracle is in the soil structure. If you spend your time on the prep—the grinding, the amending, the mechanical fracturing—the grass will take care of itself. If you skip it, you’re just renting a green lawn for a few weeks until the roots realize there’s nothing for them in the ground. Do the work. Test the soil. Fracture the base. That is how you build a lawn that lasts a decade instead of a season.