The Forensic Autopsy of a Failed Irrigation Zone
The first sign of a dead irrigation zone isn’t usually a dry patch of grass; it is the silence of a valve box that should be humming. When a single zone fails to trigger while the rest of the system operates, you are looking at a localized failure, most likely the electrical heart of the valve. Replacing a 2026 solenoid is the surgical fix for a system that has lost its pulse due to electrical resistance or mechanical seizure.
I always drill into my new crew members: if you don’t fix the soil grading first, every plant you put in the ground is just expensive compost, but if you don’t master the irrigation diagnostics, that expensive sod install is dead within fourteen days of the contract signing. I remember a green apprentice who spent six hours digging up a main line looking for a clog, only to find out the solenoid had a blown coil. He didn’t check the ohms. He didn’t listen for the click. He just started digging. We don’t do that. We diagnose with math and physics before we touch a shovel.
How to Identify a Failed Irrigation Solenoid
A failed solenoid is diagnosed by testing electrical continuity and mechanical resistance within the valve assembly to determine if the 24V AC signal is successfully actuating the plunger. If the multimeter reads outside the 20 to 60 ohm range, the coil is compromised and requires immediate replacement.
When a zone stays dry despite the controller saying it’s active, the solenoid is the primary suspect. This component is an electromagnet. When the controller sends 24 volts down the wire, it creates a magnetic field that pulls a metal plunger up. This opens a small bleed port, dropping the pressure above the internal diaphragm, which then allows the main flow of water to push the diaphragm up and head out to your rotors or spray heads. If that plunger is stuck due to grit, or if the copper windings in the coil have melted together, the valve stays shut. You can have 80 PSI of city water pressure sitting behind that valve, but it won’t budge if the solenoid is dead.
“A retaining wall doesn’t fail because of the stone; it fails because of the water trapped behind it.” – Hardscape Engineering Axiom
The same logic applies to irrigation. The system fails not because of the pipes, but because of the management of pressure. A dead zone leads to localized drought stress. For a fresh sod install, this is a death sentence. Within 48 hours, the root desiccation begins. The grass turns a dull blue-gray, then transitions to a straw-like brown. This isn’t just a yard cleanup issue; it is a structural failure of your landscape’s life support system.
How much resistance should a 2026 solenoid have?
For a standard 24V AC solenoid like the 2026 model, you should see between 20 and 60 ohms of resistance. An infinite reading on your multimeter indicates a broken wire or a completely burnt-out coil (an open circuit). A reading near zero indicates a short circuit. If you get a reading in the 40-ohm range but the valve still won’t open, the issue is mechanical—likely a piece of debris or a swollen seal in the plunger housing.
Can I replace just the solenoid without digging up the valve?
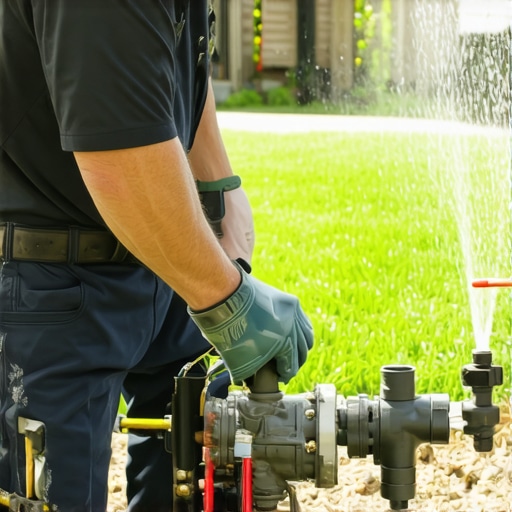
Yes, you can replace the solenoid without excavating the entire valve body, provided the threads on the valve bonnet are not stripped or cracked. This is a top-side repair that involves unscrewing the old component and splicing in the new wires using waterproof grease caps. It is the most efficient way to restore function to a dead zone without disturbing the surrounding soil or mulch.
[IMAGE_PLACEHOLDER]
Step-by-Step Solenoid Replacement Protocol
Replacing a solenoid requires surgical precision to avoid getting dirt into the valve diaphragm. Any grit that enters the valve during this process will prevent it from closing, leading to a zone that never turns off. We call this a “weeping valve,” and it is the fastest way to rot out the root system of your landscaping and spike your water bill.
| Step | Action | Critical Requirement |
|---|---|---|
| 1 | Power Down | Turn off the controller and the main water supply. |
| 2 | Clean Area | Clear all mud and debris from around the valve bonnet. |
| 3 | Disconnect Wires | Cut the old wires and remove the waterproof connectors. |
| 4 | Unthread Solenoid | Turn counter-clockwise; do not use pliers unless stuck. |
| 5 | Inspect Plunger | Check for silt or grit in the discharge port. |
| 6 | Install New Unit | Hand-tighten only; do not over-torque the plastic threads. |
| 7 | Wire Connection | Use UL-listed grease caps for waterproof sealing. |
The 2026 solenoid is a workhorse, but it is sensitive to heat and moisture infiltration. When you are wiring the new unit, do not use standard electrical tape. You must use waterproof wire nuts, specifically grease-filled ones. Standard wire nuts will corrode within one season in a damp valve box. Corrosion increases resistance, which drops the voltage, and eventually, the solenoid won’t have enough magnetic force to lift the plunger. It will hum, but it won’t open.
The Interaction Between Irrigation and Soil Health
A dead zone doesn’t just kill grass; it destroys soil microbiology. When soil dries out completely, the beneficial fungi and bacteria that facilitate nutrient uptake go dormant or die. When you finally fix the irrigation and drench the area, you often face a surge in opportunistic pathogens like Pythium or Rhizoctonia, especially in heavy clay soils common in suburban developments. This is why a simple solenoid fix often needs to be followed by a light application of humic acid or sea kelp to jumpstart the soil biology.
“Soil compaction and poor drainage are the primary drivers of irrigation inefficiency in residential landscapes.” – Texas A&M AgriLife Extension
If you are dealing with a yard cleanup after a long period of system neglect, check the valve boxes first. Silt accumulation in the box can bury the valves, leading to premature wire failure. A clean valve box is the hallmark of a professional landscape. If your valves are buried in six inches of mud, your solenoids are living on borrowed time.
Technical Troubleshooting Checklist
- Check the controller for a “Fuse” or “Error” message on the specific zone.
- Verify 24-28V AC output at the controller terminals for that zone.
- Test the solenoid resistance with a multimeter at the valve box.
- Inspect the common wire connection; a loose common wire will kill multiple zones.
- Manually bleed the valve by turning the solenoid a quarter turn to check for mechanical water flow.
- Flush the main line if you find sand or debris inside the solenoid housing.
Precision irrigation is not a luxury; it is a necessity for modern landscaping. A single 2026 solenoid is a five-dollar part that protects a five-thousand-dollar sod installation. Don’t be the guy who ignores the dry patch until it’s a dirt patch. Buy a multimeter, learn the ohm readings, and keep your system pressurized. It is the difference between a high-performance yard and a failing landscape. Soil doesn’t lie. If the water isn’t there, the biology fails. Period.
Comments are closed.