The Engineering of a Dry-Laid Flagstone Path: Why Mortar-Free is the Future of Residential Landscaping
Most homeowners assume that if they want a permanent walkway, they need a concrete truck and a pallet of mortar. They are wrong. In fact, in many climates, a rigid mortar joint is a death sentence for your hardscaping. I recently got called out to tear up a $30,000 patio that was sinking because the previous contractor used a thick mortar bed on top of uncompacted silt. Within two winters, the freeze-thaw cycle turned that expensive stone into a jagged, dangerous mess of cracked cement and loose rock. The hydrostatic pressure had nowhere to go, so it blew the joints apart from the inside out. If you want a path that lasts until 2050, you build it to move. You build it dry.
Why Dry-Laid Flagstone Systems Outperform Mortar in Variable Climates
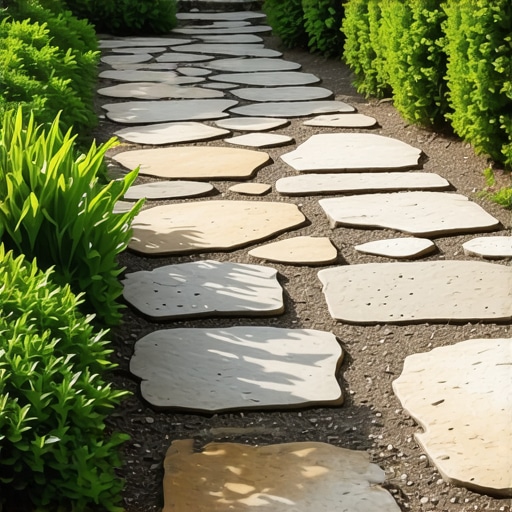
A dry-laid flagstone path utilizes a flexible base of compacted modified gravel and sand or stone screenings to allow for natural ground movement and drainage. Unlike rigid mortar, which cracks under freeze-thaw cycles, dry-laid systems manage hydrostatic pressure and remain structurally sound for decades without routine maintenance. This is the gold standard for modern landscaping.
“A retaining wall doesn’t fail because of the stone; it fails because of the water trapped behind it. The same logic applies to walkways; if the water cannot migrate through the system, the system will fail.” – Hardscape Engineering Axiom
When you skip the mortar, you aren’t being cheap. You are being smart. You are creating a permeable surface that works with your irrigation system rather than against it. When we perform a yard cleanup or a sod install, we look at the grading of the entire property. A mortar path acts like a dam. A dry-laid path acts like a filter. It allows the soil microbiology to breathe while providing a 12,000 PSI surface for foot traffic.
How much modified gravel do I need for a patio base?
To calculate your base material, multiply the square footage of your path by the depth of the base (minimum 4 inches for foot traffic) and divide by 27 to get cubic yards. For a 100-square-foot path, you need roughly 1.5 tons of 21A or CR-6 modified gravel. Do not guess. If your base is thin, your stone will shift. It is physics.
| Material Layer | Recommended Thickness | Purpose | Compaction Required |
|---|---|---|---|
| Sub-grade Soil | N/A | Structural Foundation | 95% Proctor Density |
| Geotextile Fabric | N/A | Separation of Fines | No |
| Modified Gravel (21A) | 4-6 Inches | Load Bearing & Drainage | Yes (Vibratory Plate) |
| Bedding Sand/Screenings | 1 Inch | Levelling Plane | Hand Tamped |
| Flagstone (Natural) | 1.5-2 Inches | Wear Surface | No |
The Ground-Up Build: Step-by-Step Engineering
Before you touch a shovel, you must understand your soil. If you have heavy clay, you need more drainage. If you have sandy loam, you have it easy. Landscaping isn’t about aesthetics; it’s about civil engineering on a micro-scale. Start by excavating 8 inches deep. This isn’t a suggestion. If you just lay stone on top of the grass, you are making expensive compost.
What is the best base material for a flagstone path?
The best base is a well-graded aggregate like 21A or CR-6. This material contains both 1-inch stones and fine dust. When compacted, the different sizes lock together to create a solid, yet permeable, platform. Do not use pea gravel; it acts like ball bearings and will never stabilize.
- Mark the path: Use marking paint and transit levels to ensure a 2% slope away from the house.
- Excavate: Remove all organic matter. Roots will rot and cause voids.
- Lay Geotextile: Use a non-woven fabric. This prevents your expensive gravel from sinking into the mud.
- Compact in lifts: Add 2 inches of gravel, wet it, and use a plate compactor. The tamper should literally bounce off the surface when it’s ready.
- Screeding: Lay 1 inch of coarse sand. Use a straight board to make it perfectly flat.
“Proper compaction of the sub-grade is essential to prevent differential settlement in flexible pavements, especially in areas prone to high moisture retention.” – ICPI Technical Manual
The Physics of Stone Selection and Placement
Don’t buy flagstone from a big-box store. It’s usually too thin. You want “Stand-up” flagstone that is at least 1.5 to 2 inches thick. Thinner stone will snap under the weight of a wheelbarrow or even a heavy footfall. When laying the stone, keep your joints between 1 and 3 inches. Any wider and you’re just inviting weeds. This is where your yard cleanup becomes permanent—by out-competing the weeds with structural density.
As you set each stone, use a dead-blow rubber mallet. It shouldn’t rock. If it rocks, take it up, add a handful of sand to the low spot, and reset it. It is tedious. Do it anyway. A single loose stone will eventually cause the stones around it to migrate. Think of it like a jigsaw puzzle where the pieces are held by friction and gravity.
Finishing with Polymeric Sand vs. Stone Dust
In 2026, the standard for dry-laid paths is high-performance polymeric sand. This is a mix of graded sand and binders that harden when wetted. It stays flexible enough to handle ground shift but hard enough to prevent ants and weeds from colonizing your joints. It is the bridge between the rigidity of mortar and the mess of loose dirt.
Clean the stones thoroughly before applying. If the stones are damp, the polymer will haze the surface. It is a nightmare to remove. Once the joints are filled, use a leaf blower to remove excess dust, then mist it lightly. Do not flood it. You want to activate the chemical bond, not wash it away. This final step seals your landscaping project and protects your sod install from erosion runoff.
How do I maintain a mortar-free path?
Maintenance is minimal. Once a year, check the joints. If the polymeric sand has receded, add more. Ensure your irrigation heads aren’t spraying directly into the joints for hours at a time, as constant high-pressure water can eventually degrade the binder. Otherwise, just sweep it. It will last longer than your roof.