Fix Leaky Sprinkler Valves with a $12 Replacement Diaphragm
I always drill into my new crew members: if you do not fix the soil grading first, every plant you put in the ground is just expensive compost. This technical wisdom applies double to irrigation systems. Irrigation is the lifeblood of a high-end landscape, yet it is the most neglected component until a swamp forms in the middle of a $20,000 sod install. I have seen homeowners spend thousands on yard cleanup and new plantings, only to let a $12 rubber component rot out, leading to hydrostatic pressure issues that undermine their retaining walls. A leaky valve is not a nuisance; it is a systemic failure of your property drainage and hydration balance. If you see water weeping from a sprinkler head when the system is off, you have a valve seat failure. It is that simple.
The Diagnostic Process for Leaky Irrigation Valves
To identify if a leaky sprinkler valve requires a replacement diaphragm, look for constant weeping at the lowest sprinkler head in a zone, which indicates the internal seal has failed to close against the valve seat due to debris or rubber fatigue from high water pressure.
When a valve fails to shut off completely, it is usually because the EPDM rubber diaphragm inside the valve body has lost its elasticity or has been punctured by a microscopic grain of sand. This is called ‘weeping.’ It is a slow, silent killer of turf. In heavy clay soils, this constant moisture creates anaerobic conditions. The roots of your turf grass will literally drown. They need oxygen as much as they need water. When you see a persistent wet spot around a head, do not blame the head. The head is just the exit point. The valve is the culprit. Most residential systems run on 50 to 80 PSI. That pressure is held back by a piece of rubber thinner than a nickel. It is a marvel of engineering, but it has a shelf life.
“Irrigation efficiency is dictated by the mechanical precision of the control valves; even a minor diaphragm deformity can lead to significant subsurface soil saturation and anaerobic conditions.” – Irrigation Association Technical Manual
How much does it cost to fix a leaky sprinkler valve?
A professional irrigation technician will charge between $150 and $300 to replace a single valve. However, if the valve body is intact, the internal diaphragm costs roughly $12 to $25. This allows for a ‘top-down’ repair without cutting the PVC pipe or disturbing the root systems of nearby landscaping. It is a surgical fix rather than a demolition job. You save on labor and material costs while maintaining the integrity of the original manifold.
The Forensic Autopsy: Why Diaphragms Fail
We see two primary failure modes in my firm. First is the ‘water hammer’ effect. This occurs when valves snap shut too quickly, sending a shockwave back through the pipe. This can stretch the rubber until it develops micro-tears. Second is mineral calcification. If your well water is high in calcium or iron, these minerals build up on the valve seat. It prevents the diaphragm from making a flush seal. It is like trying to close a door with a pebble in the frame. The result is a constant flow of water that ruins your yard cleanup efforts and wastes thousands of gallons of water per month.
| Failure Symptom | Primary Cause | Repair Required |
|---|---|---|
| Weeping Head | Worn Diaphragm Seat | Diaphragm Replacement |
| Valve Won’t Open | Solenoid Coil Failure | Solenoid Replacement |
| Stuck Valve | Debris in Bonnet | Valve Flushing |
| Leaking at Top | Cracked Bonnet | Valve Top Replacement |
Can I replace a sprinkler valve diaphragm without digging?
Yes, you can often perform a top-access repair if the valve is housed in a standard irrigation box. By unscrewing the bonnet (the top cover), you can access the internal spring and diaphragm. This avoids the need to excavate the entire manifold, which is critical if you have spent money on a professional sod install. You do not want to hack up new turf to fix a simple mechanical seal. Just ensure the water main is off before you start, or you will have a geyser in your face.
Step-by-Step Restoration of the Valve Seal
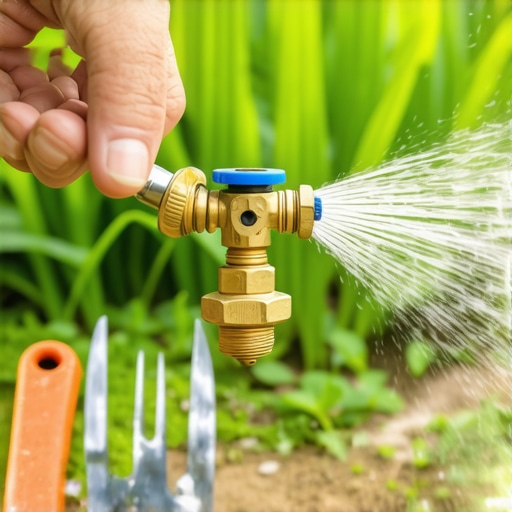
First, find your main irrigation shut-off. This is usually near the water meter. Shut it down. Relieve the pressure by manually opening the bleed screw on the valve. Use a screwdriver to remove the four to six screws holding the bonnet in place. Be careful. There is a high-tension spring inside. Hold it down as you remove the last screw. Take the old diaphragm out and inspect the valve seat. If there is a scratch on the plastic seat, the new rubber will not help. You will need a new valve. If it is clean, drop the new diaphragm in. It must be an exact OEM match. Generic parts are trash. Put the spring back, align the bonnet, and tighten the screws in a star pattern. Like lug nuts on a truck. It ensures even pressure.
“The most common cause of valve failure in residential irrigation systems is the degradation of the internal rubber diaphragm due to high chlorine content and thermal expansion cycles.” – University of California Agriculture and Natural Resources
- Inventory your valves: Note the brand and model (Rain Bird, Hunter, Irritrol).
- Debris Check: Flush the lateral line before installing the new diaphragm.
- Spring Tension: Always replace the spring with the one provided in the kit.
- Screw Torque: Do not over-tighten; you will crack the plastic housing.
- Test Run: Turn on the water slowly to avoid a pressure surge.
Landscape maintenance is about prevention. If your valves are over ten years old, they are on borrowed time. I tell my clients to replace all diaphragms during a major yard cleanup. It is cheap insurance. You do not want to wait until your lawn is a marsh. It will rot. The $12 part is your line of defense against a $2,000 sod replacement bill. Do not skip this. Precision matters in the dirt.