The Anatomy of a Failed Pond Liner
To patch a rubber pond liner effectively, you must identify the puncture, clean the surface with a solvent-based primer, and apply a heavy-duty EPDM patch or butyl tape. These methods ensure a chemical bond that withstands the hydrostatic pressure of the water column and prevents future structural failure.
I recently got called out to tear up a $30,000 pond and patio install that was sinking because the previous contractor failed to account for soil saturation. The homeowner thought they had a slow leak; in reality, they had a sieve. The previous installer used cheap 20-mil PVC from a big-box store and didn’t even bother with underlayment. One sharp piece of shale and a few years of freeze-thaw cycles were all it took to compromise the entire system. It was a mess. The soil had turned into a slurry, undermining the stone bridge and the irrigation lines nearby. This is what happens when you treat landscaping like a weekend craft project instead of civil engineering. If you don’t fix the source of the leak and the soil grading first, every patch you apply is just a temporary Band-Aid on a sucking chest wound.
“A retaining wall doesn’t fail because of the stone; it fails because of the water trapped behind it.” – Hardscape Engineering Axiom
How do I find a hole in a pond liner?
Finding a leak in a 45-mil EPDM liner requires patience and a basic understanding of physics. First, turn off your pump to rule out irrigation leaks or waterfall splashes. Let the water level drop until it stops. Where the water stops is the height of your leak. If the pond drains completely, the hole is at the bottom. Use a small amount of milk or specialized pond dye near the edge of the water; the dye will be sucked toward the puncture. Do not ignore the edges. Often, during a heavy yard cleanup, a rake or a shovel can catch the liner edge, pulling it down and allowing water to escape over the top. This isn’t a leak; it’s a grading issue.
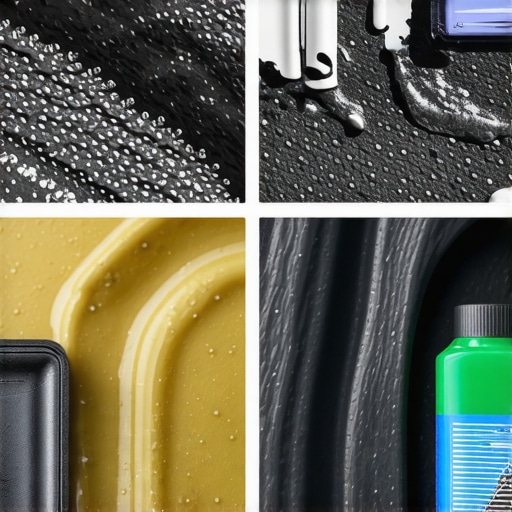
Method 1: The Cold-Applied EPDM Patch
The cold-applied method relies on a chemical reaction called vulcanization. You aren’t just gluing a piece of rubber over another; you are fusing them at a molecular level. First, you must scrub the area. Not a quick wipe, but a deep scrub with a stiff brush and a cleaner like MEK (Methyl Ethyl Ketone). This removes the ‘bloom’ or the white powder used in the manufacturing process of rubber liners. If that powder stays, the patch will fail. Period.
Once the area is raw, apply a quick-prime adhesive. Wait until it is tacky—not wet. Apply the EPDM tape or patch. You must use a weighted steel roller. Apply at least 15 PSI of pressure from the center outward to evacuate every microscopic air bubble. If you leave air, the expansion of that air during the summer heat will pop the patch right off. It will rot. Don’t skip the primer. It is the most critical step in the entire landscaping repair process.
[IMAGE_PLACEHOLDER]
How much modified gravel do I need for a patio base?
While often asked during pond repairs, the answer depends on the soil. For a standard pond-side patio, you need 4 to 6 inches of compacted 21A or 3/4-inch modified gravel. This ensures the sod install around the pond doesn’t shift the soil and put undue stress on the liner. Compaction is key. The tamper should literally bounce off the compacted base when it’s ready.
Method 2: Heat Welding for PVC and TPO Membranes
Heat welding is the only way to repair PVC or TPO liners permanently. Unlike EPDM, which is a thermoset rubber, PVC is thermoplastic. This means it can be melted and reformed. You use a high-temperature heat gun and a silicone roller. You are aiming for a temperature of roughly 800 degrees Fahrenheit. If you go too hot, you burn the plastic, making it brittle. If you go too cold, the bond is purely mechanical and will fail under pressure.
| Patch Method | Material Compatibility | Longevity Expectancy | Specialized Tools Required |
|---|---|---|---|
| EPDM Tape | EPDM Rubber Only | 15-20 Years | Steel Roller, Primer |
| Heat Welding | PVC, TPO, HDPE | Lifetime of Liner | Heat Gun, Silicone Roller |
| Butyl Sealant | All Membranes | 2-5 Years | Caulking Gun |
Professional installers prefer this for large-scale landscaping projects because it creates a seam that is actually stronger than the original material. However, most homeowners lack the equipment. If you have a PVC liner and it’s leaking, you might be better off replacing it with 45-mil EPDM. PVC is the hallmark of a ‘mow-and-blow’ contractor who doesn’t understand long-term durability.
“Proper surface preparation for EPDM vulcanization requires the removal of all surface bloom and oxidation to ensure a monolithic bond.” – Agricultural Extension Technical Bulletin
Method 3: Specialized Underwater Sealants
Sometimes you can’t drain the pond. Maybe you have expensive koi or a complex sod install right to the water’s edge that you don’t want to disturb. In these cases, you use a specialized polyether or cyanoacrylate-based sealant. These are designed to cure in the presence of moisture. This is an emergency fix. It is not a 20-year solution.
- Step 1: Identify the puncture using the dye method.
- Step 2: Use an underwater scrub pad to clear algae from the site.
- Step 3: Apply the sealant directly to the puncture in a circular motion.
- Step 4: Press a piece of scrap liner into the sealant.
- Step 5: Hold firm for 120 seconds to allow initial tack.
How long does a pond liner patch last?
A properly executed vulcanized EPDM patch will last as long as the liner itself, typically 20 to 25 years. A heat-welded PVC seam is also a permanent fix. However, any repair that uses simple silicone or ‘waterproof’ tape from a hardware store will likely fail within 6 to 12 months. The hydrostatic pressure and UV degradation are too intense for consumer-grade adhesives. If you want it to last, use professional-grade materials.
The Long-Term Maintenance Schedule
Once patched, you must protect the liner. Exposure to UV light is the primary killer of rubber. Ensure your yard cleanup includes checking that stones or mulch still cover the edges of the liner. UV radiation breaks down the carbon black in the EPDM, leading to micro-cracking and brittleness. Also, check your irrigation settings. Over-watering the areas surrounding the pond can increase external pressure, leading to ‘beaching’ where the liner floats up because of the water trapped underneath. This ruins the landscaping aesthetic and can cause new tears.