The Forensic Autopsy: Why Your Concrete is Failing
Concrete cracking is rarely a surface problem; it is a structural failure caused by sub-grade instability, hydrostatic pressure, and improper soil compaction during the initial install. When a walkway starts to spiderweb or heave, you aren’t just looking at a cosmetic blemish, you are looking at the result of physics winning a battle against poor engineering. Most homeowners see a crack and reach for a tube of caulk, but without addressing the movement beneath the slab, that patch will fail within a single freeze-thaw cycle. I recently got called out to tear up a $30,000 patio and walkway system that was sinking and cracking because the previous contractor skipped the most basic step: they didn’t account for the heavy clay soil’s expansion. They laid concrete over four inches of uncompacted ‘crusher run’ and walked away with the check. Two years later, the entire system was a liability. Don’t be that homeowner. If you want to fix cracking 2026 concrete walkways, you have to stop thinking like a painter and start thinking like a civil engineer.
“A concrete slab is only as good as the dirt it sits on. Soil movement is the primary cause of structural failure in residential hardscapes.” – ICPI Hardscape Engineering Manual
How do I know if my concrete crack is structural?
Structural concrete cracks are typically wider than 1/8 inch, show signs of vertical displacement (heaving), or run entirely through the slab thickness, indicating sub-base failure. If one side of the crack is higher than the other, your base has settled or the soil has expanded unevenly. This requires more than just a filler; it requires stabilization. Before you even touch the concrete, look at your irrigation system. I’ve seen countless walkways destroyed because a buried lateral line was leaking, saturating the sub-base until it turned into a slurry. You can’t fix the stone if the ground is soup.
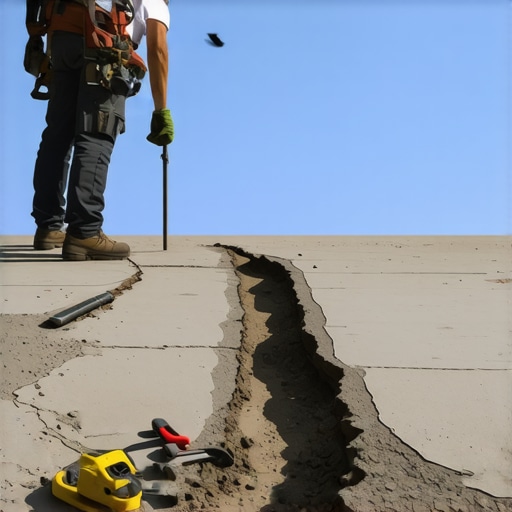
Step 1: Excavation and Sub-Base Stabilization
Repairing a walkway begins with remediating the foundation by removing compromised material and installing a non-frost-susceptible base to prevent future movement. You need to dig out the soil along the edges of the crack to see what’s happening. If you find pockets of organic matter—rotting roots or old mulch—that’s your culprit. Organic matter decomposes and leaves voids. You must excavate at least 6-8 inches down. Replace that junk with #57 washed stone or a modified 2A gravel. Use a plate compactor. A hand tamper isn’t enough for 2026 standards; the machine should literally bounce off the ground when you’ve hit 95% compaction. If the ground doesn’t ring like a bell when you hit it, it’s not ready.
What is the best material for a concrete walkway base?
The industry standard for a stable walkway base is compacted 2A modified gravel or 3/4-inch crushed stone, providing a rigid foundation that allows for proper drainage. This prevents the ‘pumping’ action where water trapped under the slab forces fines out, creating a void. Look at this comparison of base materials:
| Material Type | Compaction Rating | Drainage Ability | Best Use Case |
|---|---|---|---|
| Bank Run Sand | Low | High | Leveling only, avoid for heavy slabs |
| Crushed Stone (#57) | High | Superior | Wet areas with high hydrostatic pressure |
| 2A Modified Gravel | Excellent | Moderate | Standard residential walkways and drives |
| Recycled Concrete | Variable | Low | Budget projects, prone to settling |
Step 2: Structural Stitching and High-PSI Infill
Once the base is stabilized, you must mechanically link the separated sections of concrete using carbon fiber stitches or rebar dowels to prevent further independent movement. If you just pour new concrete into a crack, the two slabs will continue to move at different rates, and the new crack will form within months. I tell my crew: ‘Stitch it or lose it.’ You use an angle grinder with a diamond blade to cut horizontal channels across the crack. Lay in carbon fiber staples and bed them in high-strength epoxy resin. This creates a bridge. For the infill, skip the premixed bags at the big-box stores that test at 2,500 PSI. You want a high-early strength mix that hits at least 4,000 PSI, reinforced with polypropylene fibers to reduce plastic shrinkage.
“Hydrostatic pressure is the silent killer of hardscapes; without a path for water to escape, the weight of the earth will move even the heaviest reinforced concrete.” – Agricultural Extension Engineering Bulletin
Don’t forget the expansion joints. Concrete expands and contracts with the temperature. If your walkway cracked in the middle of a long run, it’s probably because the original installer didn’t put in enough control joints. You are basically creating a ‘planned’ crack. Use a saw to cut a joint every 5 to 8 feet. This gives the slab a place to breathe without shattering your repair work.
Step 3: Landscape Integration and Drainage Correction
The final step is to protect the repair by grading the surrounding landscape and installing sod to prevent soil erosion from undermining the new base. This is where yard cleanup becomes a technical necessity, not just an aesthetic one. If your lawn is higher than your walkway, water will pool against the concrete. You need a positive grade—at least a 2% slope away from the hardscape. This is where a fresh sod install comes in. Sod acts as a biological filter and anchor. It stabilizes the soil instantly, preventing the ‘washout’ that often happens with seed and straw. If the area is prone to heavy runoff, consider a French drain or a dry creek bed parallel to the walkway.
How do I stop water from cracking my new concrete?
To stop water damage, you must divert downspouts at least 5 feet away from the walkway and ensure the soil grading directs surface runoff into a designated drainage area or irrigation swale. If you have an automatic sprinkler system, check the head alignment. I’ve seen $5,000 repair jobs ruined because a rogue sprinkler head was blasting water directly into an expansion joint for three hours a day. It’s basic biology and physics: water enters, soil expands, concrete cracks. Keep the water moving away, and your walkway will last twenty years. It won’t happen by accident. You have to engineer the path of least resistance.
Checklist for a Permanent Concrete Repair:
- Locate and repair any leaking irrigation lines near the slab.
- Excavate down to stable sub-soil (remove all organics).
- Install a minimum of 4 inches of compacted aggregate base.
- Mechanical stitching of the crack using epoxy and staples.
- Cut new control joints to manage thermal expansion.
- Apply a silane-siloxane penetrating sealer to prevent salt and water ingress.
- Re-grade the yard and install sod to ensure drainage flow.
Does new sod help prevent concrete cracking?
Yes, new sod installation provides immediate soil stabilization and moisture regulation, which prevents the soil shrinkage and swelling cycles that lead to concrete walkway failure. By maintaining a consistent moisture level in the ground and preventing erosion, sod acts as a protective buffer for the hardscape’s foundation. It’s the finishing touch that ensures your engineering work isn’t undone by the next heavy rainstorm. Don’t skip the grading. Don’t skip the compaction. Do it right once, or do it over every two years. The choice is yours.