
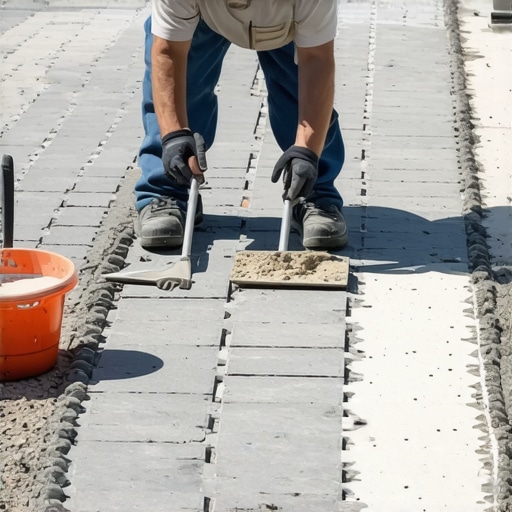
The Hardscape Autopsy: Why Your Pavement is Failing
I recently got called out to tear up a $30,000 patio that was sinking because the previous contractor thought he could skip the compaction step on a heavy clay subgrade. The owner was distraught. They saw a surface problem, but I saw a structural catastrophe. When I pulled the first stone, the bedding sand was a saturated, anaerobic mess. The base underneath wasn’t even modified stone; it was just pit-run gravel thrown over uncompacted topsoil. It was a textbook case of base-layer failure. If you don’t fix the drainage and the structural integrity of the base, you are just throwing money into a hole in the ground. Hardscaping is not about the stones you see; it is about the engineering you don’t see.
The Professional Method to Fix Sinking Pavers in 2026
To fix sinking pavers, you must identify the cause of settlement, remove the affected units, and rebuild the base using high-density 3/4-inch minus crushed stone followed by a regulated 1-inch layer of ASTM-C33 bedding sand. Simply adding more sand to the surface will not resolve underlying hydrostatic pressure or sub-grade compaction issues. It requires a forensic approach to soil stabilization.
“A retaining wall doesn’t fail because of the stone; it fails because of the water trapped behind it.” – Hardscape Engineering Axiom
Why Do Pavers Sink in the First Place?
Settlement occurs due to three main factors: poor compaction, improper base material, or water infiltration. When water sits beneath your pavers, it turns your sub-base into a slurry. In cold climates, this leads to frost heave. In wet climates, it leads to piping, where the sand is physically washed out from under the stones. You cannot fight physics with a bag of play sand from a big-box store. You need angular aggregates that lock together under pressure. Most DIY fixes fail because they use rounded pea gravel or fine play sand. These materials act like tiny ball bearings, allowing the pavers to shift and slide rather than stay locked in a monolithic structure. It is basic civil engineering. If the base moves, the surface moves. Period.
The Materials Matrix: Choosing the Right Base
| Material Type | Primary Purpose | Compaction Rating | Drainage Capability | ||||
|---|---|---|---|---|---|---|---|
| 3/4″ Modified Stone | Structural Sub-Base | High (98% Proctor) | Moderate | ||||
| ASTM-C33 Sand | Bedding Layer | Moderate | High | Polymeric Sand | Joint Stabilization | N/A | Low (Water Resistant) |
| Geotextile Fabric | Soil Separation | N/A | High |
Essential Tools for a Professional Sand Reset
- Plate Compactor (Minimum 3,000 lbs centrifugal force)
- 1-inch OD Steel Screed Pipes
- Dead Blow Mallet (Avoid rubber mallets that leave black marks)
- Levelling String Lines and Transit Level
- High-Flow Leaf Blower (For polymeric sand cleanup)
- Diamond Blade Wet Saw
How much modified gravel do I need for a patio base?
Calculating your base material requires measuring the square footage and multiplying by the desired depth, typically 4 to 6 inches for walkways and 8 to 12 inches for driveways, then dividing by 27 to get cubic yards. You must account for a 20 percent compaction factor when ordering stone. Never guess. Under-ordering leads to weak spots where the crew tries to stretch the material too thin. It will fail. Every time. I have seen 4-inch bases settle 2 inches because the contractor didn’t account for the air gaps in the loose stone. You need to hit 95 to 98 percent Proctor density to ensure that patio doesn’t move for the next twenty years.
Step-by-Step Forensic Repair Process
First, remove the sinking pavers and at least two rows of stable pavers around the perimeter of the failure. This prevents creating a hinge point in the repair. Next, excavate the failed bedding sand. Do not reuse it. Check the stone base below. If it is soft or contains organic matter, dig it out. Install a non-woven geotextile fabric to separate the sub-grade from your new stone. This is a critical step many skip. It prevents soil migration. Add your 3/4-inch minus crushed stone in 2-inch lifts. Run the plate compactor over each lift at least four times. The compactor should literally bounce off the compacted base when it is ready. If it feels soft, keep going. Once the base is solid, lay your screed pipes and spread the ASTM-C33 sand. Screed it flat. Do not walk on it. Replace the pavers, sweep in your polymeric sand, and vibrate the pavers with the plate compactor (use a protective mat) to set them into the sand. This is the only way to lock the pavers. Without vibration, the pavers are just sitting on top of the sand, not in it.
“Proper base preparation is the single most critical factor in the longevity of any segmental pavement system.” – Interlocking Concrete Pavement Institute (ICPI) Manual
How do I prevent weeds from growing in paver joints?
The only way to prevent weeds is to maintain the integrity of the polymeric sand joints and ensure the base is free of organic material. Weeds do not usually grow from the bottom up; they grow from the top down when windblown seeds land in empty or failed joints. If you see weeds, your sand has failed. It is not the plant’s fault. It is the maintenance schedule. You must keep those joints full. A high-quality polymeric sand uses specialized polymers that harden when activated by water, creating a barrier that resists erosion and seed germination. If you use cheap sand, it will wash out in the first heavy rain. Then the weeds move in. It is a predictable cycle of neglect.
The Contrarian Truth About Drainage
While the internet tells you to water every day to keep things clean, water is actually the enemy of your hardscape. You want to move water away from the patio as fast as possible. This means a minimum 1 percent slope. That is a 1-inch drop for every 10 feet of run. If your patio is dead level, it is a ticking time bomb. Standing water seeps into the joints, saturates the base, and destroys the compaction you worked so hard to achieve. Every yard cleanup or landscaping project should start with a transit level. If the grade is wrong, the project is wrong. Do not skip the pitch. It is the difference between a patio that lasts 5 years and one that lasts 50. I have walked away from jobs where the homeowner refused to let me adjust the grade. My reputation is worth more than a quick check for a job I know will fail.