
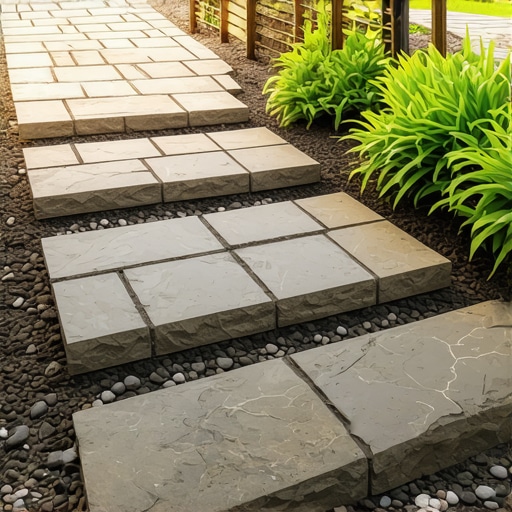
The Forensic Autopsy of a Sinking Step: Why Your Hardscape is Failing
Sinking paver steps are caused by the failure of the sub-base compaction, hydrostatic pressure from poor drainage, or the migration of fines through the soil profile. To fix these 2026-standard installations, you must excavate the affected area, replace the base with ASTM D2940 modified gravel, and ensure a 98% Proctor density through mechanical compaction. I recently got called out to tear up a $30,000 patio that was sinking because the previous contractor thought 2 inches of pea gravel was a ‘stable base.’ It wasn’t. The entire structure was leaning 4 inches toward the foundation, funneling water directly into the client’s basement. When we pulled up the pavers, the soil underneath was a literal soup of anaerobic mud. This wasn’t just a cosmetic issue; it was a structural liability. If you don’t understand the physics of soil load-bearing capacity, you’re not a landscaper; you’re just moving dirt around until it fails. Most ‘mow-and-blow’ outfits will just throw some sand in the cracks and call it a day. That lasts one season. If you want a repair that survives the 2026 freeze-thaw cycles, you have to look at the microscopic reality of the soil. We are talking about particle size distribution and the way water molecules wedge between silt and clay. It’s physics, not gardening.
“A retaining wall or step system doesn’t fail because of the stone; it fails because of the water trapped behind it.” – Hardscape Engineering Axiom
Step 1: Evaluating the Sub-Grade and Correcting Drainage Mechanics
Successful paver leveling begins with excavation to the undisturbed sub-soil and the installation of a geotextile fabric to prevent soil migration. You need to dig out the old, failed base and inspect the soil plasticity to determine if further soil stabilization is required before laying the new foundation. You need to get down to the ‘hard-pan.’ If you see organic matter, rotting roots, or dark, spongy soil, keep digging. If you leave that organic material there, it will rot. Your steps will sink again. It is that simple. During this phase, you must evaluate your irrigation lines. Often, we find a slow leak in a 1-inch lateral line that has been saturating the base for months, turning the modified gravel into a slurry. If your irrigation heads are spraying directly onto the step risers, you are asking for efflorescence and base erosion. Move the heads. Furthermore, consider the yard cleanup aspect; if you have leaf litter or mulch buildup against the steps, it traps moisture, accelerating the breakdown of polymeric sand joints. You need a clean, dry environment for the structure to remain stable.
How much modified gravel do I need for a patio base?
For most residential paver steps, you require a minimum of 6 to 8 inches of compacted 21A modified gravel, which usually equates to roughly 1 ton of material per 50 square feet at a 4-inch depth. Always factor in a 20% compaction loss when ordering your aggregates from the quarry. Don’t eyeball it. Use a calculator.
Step 2: Rebuilding the Foundation with Modified Gravel and Compaction
The foundation layer must consist of 3/4-inch minus crushed stone applied in 2-inch lifts, with each lift receiving multiple passes of a vibratory plate compactor to reach maximum structural density. This process ensures the interlocking of aggregate particles, creating a load-bearing surface that resists frost heave and settling. The tamper should literally bounce off the compacted base when you’re done. If the plate compactor is still sinking into the gravel, you haven’t reached the necessary PSI. Most DIYers and cheap contractors skip the lifts. They throw 6 inches of gravel in a hole and run the machine over the top. The bottom 4 inches stay loose. Within two years, that loose gravel settles, and your steps are crooked again. You must be methodical. Use a transit level or a laser level to check your pitch. You want a 1-inch drop for every 8 feet of run to ensure surface drainage moves away from the home. This is especially critical when you’re integrating the steps into a sod install. If the water pools at the base of the steps on the new grass, it will kill the root system and create a muddy mess that undermines the bottom step.
| Material Type | Drainage Rating | Compaction Rating | 2026 Recommended Use |
|---|---|---|---|
| 21A (Crushed Concrete/Stone) | High | 98% Proctor | Primary Structural Base |
| #57 Stone (Clean) | Maximum | Moderate | Drainage Behind Walls |
| Masonry Sand | Medium | Low | 1-inch Setting Bed Only |
| Pea Gravel | High | Zero | Decorative Mulch (Never Base) |
Step 3: Precision Setting and Polymeric Sand Stabilization
The final stage involves screeding a 1-inch bed of coarse sand, setting the paver units with a dead-blow hammer, and sweeping in high-performance polymeric sand to lock the joints against weed growth and insect infestation. The polymeric sand acts as a flexible bridge that allows for minor thermal expansion while preventing lateral movement of the pavers.
“Proper joint stabilization is the difference between a hardscape that lasts 5 years and one that lasts 25 years.” – ICPI Tech Spec #2
Before you sweep in that sand, ensure the pavers are bone dry. If there is even a hint of moisture, the polymers will activate on the surface of the stone, leaving a white, hazy film that is a nightmare to remove. Once the joints are filled, use a leaf blower to remove excess dust, then mist the area lightly. Don’t flood it. You want to activate the glue through the entire depth of the joint, not just the top 1/8th of an inch. After the repair, your yard cleanup should include checking these joints annually. If the sand washes out, replace it immediately. It is the only thing keeping the ‘interlock’ in your interlocking pavers.
Why do my pavers keep shifting every spring?
Pavers shift during the freeze-thaw cycle when water enters the sub-base and expands as it turns to ice, a process known as frost heave. This is almost always caused by using non-compactable materials like rounded pea gravel or failing to provide a perforated drain pipe to whisk water away from the structure. If your base is well-draining and densely compacted, there is no water to freeze, and therefore, no movement.
- Excavation depth: Minimum 10 inches below grade.
- Geotextile: Use non-woven 4oz fabric.
- Compaction: 4-5 passes per 2-inch lift.
- Edge Restraint: Use heavy-duty plastic or concrete curb.
- Sand Type: Use ASTM C33 washed concrete sand for the bedding layer.