
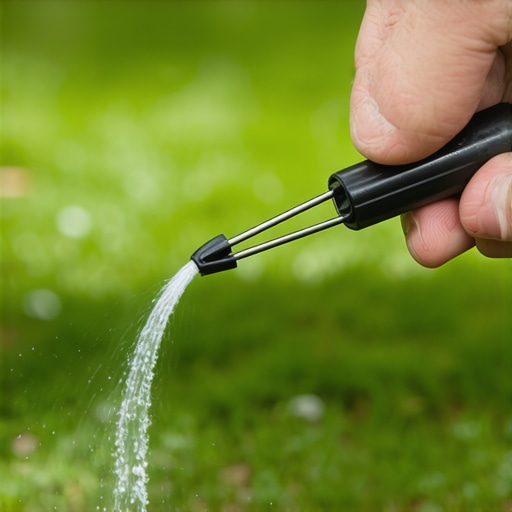
How to Clean Clogged Sprinkler Nozzles with a Simple Safety Pin
A failing sprinkler nozzle is the primary cause of localized dry spots and costly sod replacement. When a system loses distribution uniformity, your turf grass suffers from uneven water application, leading to crown hydration issues or root desiccation. Diagnosing a clogged nozzle requires more than a casual glance; it requires an understanding of hydraulic pressure and mineral accumulation.
The Anatomy of an Irrigation Failure
Clogged sprinkler nozzles occur when physical debris or mineral scale restricts the flow of water through the nozzle’s precise orifice, resulting in distorted spray patterns or complete blockage. To fix this, you must de-pressurize the zone, remove the nozzle, and clear the obstruction using a safety pin or similar fine-gauge wire.
I always drill into my new crew members: if you don’t fix the soil grading and irrigation delivery first, every plant you put in the ground is just expensive compost. Last summer, I saw a homeowner lose three pallets of brand-new Bermuda sod because they assumed their automatic controller was doing the job. In reality, half their spray heads were jammed with calcium deposits and fine silt from a recent water main break. They didn’t check the nozzles; they just saw the brown patches and turned up the run-time. They ended up drowning half the lawn while the rest baked. This is why we treat irrigation as a surgical discipline, not a ‘set and forget’ convenience. If the nozzle isn’t hitting its specified arc with a clean sheet of water, the system is failing.
“Irrigation system efficiency is not just about the controller; it is determined by the distribution uniformity of the individual emission devices.” – Texas A&M AgriLife Extension
The Forensic Autopsy of a Clogged Head
When you see a ‘donut’ pattern in your grass—where the grass is green near the head but brown two feet away—you are looking at a distribution failure. Usually, a small piece of grit is lodged in the nozzle orifice. Even a grain of sand can disrupt the pressure-regulated flow, dropping your PSI at the head and ruining the spray radius. We aren’t just looking for total blockages; we are looking for ‘fingering’ in the spray pattern. If the water isn’t a solid, atomized fan, the nozzle is compromised.
Why Do Sprinkler Nozzles Clog?
Nozzles don’t just clog from the outside. In most residential systems, the debris comes from within the lateral lines. This happens after a pipe repair, from root intrusion in old PVC, or from the natural buildup of ‘biofilm’ and mineral scale in the pipe walls. If you have hard water, calcium carbonate will eventually build up around the tiny 1/32-inch openings of a high-efficiency nozzle.
| Debris Type | Origin Point | Impact on Turf | Required Tool |
|---|---|---|---|
| Mineral Scale | Hard Water/Calcium | Reduced flow; poor radius | Safety Pin/Vinegar Soak |
| Fine Silt/Sand | Well Water/Pipe Break | Distorted spray pattern | Safety Pin/Flush-out |
| Organic Matter | Algae/Biofilm | Complete blockage | Manual Scrub/Filter Clean |
| Insect Debris | Spiders/Ants | Intermittent flow | Compressed Air/Safety Pin |
Step-by-Step Guide: The Safety Pin Method
Before you go buying a whole new set of Hunter or Rain Bird nozzles, try this manual remediation. It takes five minutes and costs nothing. [image_placeholder_1]
- Identify the Zone: Manually trigger the zone from the controller to locate the failing heads. Mark them with a flag or a stick.
- De-pressurize: Turn the zone off. Never work on a head under full 40-50 PSI pressure unless you want a face full of grit.
- Lift the Riser: Pull the pop-up riser up manually. Most pro-grade heads have a spring tension that is manageable. Use a ‘clamping’ tool or hold it firmly.
- Unscrew the Nozzle: Turn the nozzle counter-clockwise. Be careful not to lose the internal filter screen located inside the riser.
- The Safety Pin Insertion: Hold the nozzle up to the light. Locate the obstruction. Insert the safety pin into the orifice and gently wiggle it to break up the mineral scale or push back the grit.
- Rinse and Flush: Before putting the nozzle back, turn the zone on for 10 seconds without the nozzle. This ‘blows out’ any remaining debris in the lateral line.
- Reinstall: Screw the nozzle back on, adjust the arc, and test.
How much modified gravel do I need for a patio base?
While irrigation is about water delivery, the sub-base of any landscape project—be it sod or stone—requires engineering. For a standard patio, you need 4-6 inches of compacted 2A modified stone. If your irrigation leaks near a hardscape, it can saturate this base, causing the stone to shift and the patio to heave. Always ensure your sprinkler heads are at least 6 inches away from any hardscape edge to prevent hydrostatic pressure buildup under the pavers.
The Irrigation Maintenance Checklist
- Check for ‘weeping’ at the base of the riser, indicating a worn wiper seal.
- Ensure all nozzles are ‘matched precipitation rate’ (MPR) to avoid over-watering zones.
- Clear grass growth from around the head to prevent ‘capture’ of the pop-up.
- Inspect the internal filter screens every spring before the first heat wave.
- Verify that the head is perfectly vertical; a 5-degree tilt can reduce coverage by 20%.
“Soil compaction and poor irrigation uniformity are the two leading causes of ornamental plant failure in the urban landscape.” – Penn State Extension
The Micro-Engineering of the Safety Pin
Why a safety pin? A safety pin is made of hardened steel and has a tapered point that allows you to feel the resistance of the debris without gouging the plastic of the nozzle. Using a knife or a flathead screwdriver will often widen the orifice. Once you widen that orifice by even a fraction of a millimeter, you’ve changed the flow rate (GPM) of that head. This creates a ‘hot spot’ in the zone where one head is dumping more water than the others. Precision is everything. Don’t be a hack. Don’t ruin the nozzle’s engineering just because you’re in a hurry.
How do I know if my sprinkler nozzle is clogged?
The easiest way to tell is the ‘Visual Arc Test.’ A healthy nozzle produces a consistent, translucent sheet of water. If you see gaps in the spray, or if the water is ‘drooling’ out of the side of the head, you have an internal obstruction. Another sign is a dry spot in a lawn that is otherwise receiving regular water. Use a soil probe; if the soil is bone-dry 4 inches down, that nozzle isn’t doing its job. Fix it before the sod dies. Replacing sod costs dollars; cleaning a nozzle costs cents. Do the math.