
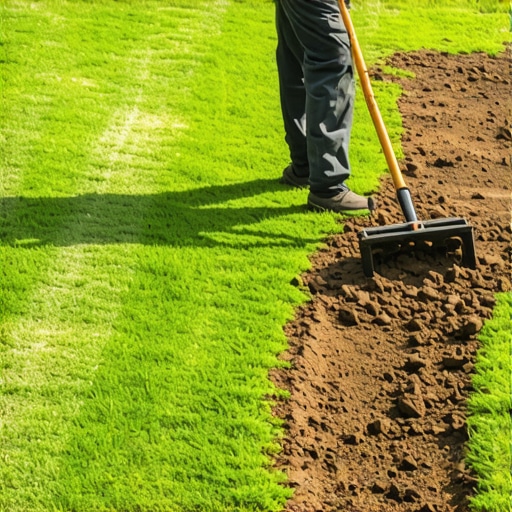
Why Soil Compaction is the Foundation of Every Sod Project
Proper soil compaction ensures your sod remains level by eliminating air pockets that lead to uneven settling and spongey turf. We target a 85-90% compaction rate to balance structural integrity with pore space for oxygen and water infiltration, preventing the drainage failures common in amateur yard cleanups.
I always drill into my new crew members: if you don’t fix the soil grading first, every plant you put in the ground is just expensive compost. I have seen too many rookies toss $5,000 worth of Kentucky Bluegrass onto a surface that looks like the surface of the moon and then wonder why the yard looks like a swamp three months later. Sod is not a rug you just throw down to hide your mistakes; it is a living biological system that requires a foundation of civil engineering. If the subgrade is soft, your mower will create ruts, the water will pool, and you will be back out here in two years ripping it all out. Don’t skip the prep.
How deep should topsoil be for new sod?
For a professional sod install, you need a minimum of 4 to 6 inches of high-quality loam topsoil. This depth provides enough space for deep root penetration, which is critical for drought resistance and nutrient uptake in high-traffic landscaping environments.
“A retaining wall doesn’t fail because of the stone; it fails because of the water trapped behind it.” – Hardscape Engineering Axiom
The Science of Soil Density and Pore Space
The mechanical compaction of soil involves reducing the volume of air within the soil matrix to increase its bulk density. When we talk about soil tamping secrets, we are really talking about the Proctor curve—the relationship between moisture content and dry density. If the soil is too dry, the friction between particles prevents them from settling. If it is too wet, you are trying to compress water, which is impossible. You need that ‘sweet spot’ of moisture where the soil holds its shape when squeezed but does not leak water. This ensures that when you run a roller over the yard, you are actually structuralizing the earth, not just making mud.
| Compaction Method | Equipment Type | Soil Suitability | Target PSI |
|---|---|---|---|
| Hand Tamping | 10×10 Cast Iron Tamp | Tight Corners/Edges | 12-15 PSI |
| Water Rolling | Polyethylene Drum | Sandy Loam/Topsoil | 5-8 PSI |
| Vibratory Plate | Gas-Powered Compactor | Subgrade/Base Clay | 3,000+ lbs Force |
The Ground-Up Build: A Step-by-Step Installation Protocol
First, clear the site of all debris. This is more than just a yard cleanup; it is a forensic excavation. Remove every rock larger than a golf ball and every piece of old root. Any organic matter left under the sod will rot. When it rots, it leaves a void. When there is a void, your lawn sinks. Use a non-selective herbicide two weeks prior to ensure no invasive rhizomes survive to pierce through your new turf.
How do I level a yard before laying sod?
Leveling a yard requires a grading rake and a transit level to ensure a 1% to 2% slope away from the home foundation. Use screed pipes for small areas to ensure a flat plane, then utilize a water-filled roller to identify and fill low spots before the final lay.
- Call 811 for utility marking before any excavation.
- Rough grade the subsoil to address irrigation drainage.
- Amend soil with organic compost to reach a pH of 6.0 to 7.0.
- Tamp the amended soil in 2-inch lifts to prevent deep settling.
- Water the bare soil lightly to reveal hidden depressions.
- Fine-grade the surface with a landscape rake.
“Soil structure is the arrangement of soil particles into aggregates. Over-compaction destroys these aggregates, leading to anaerobic conditions that kill turf roots.” – Agronomy Manual 101
Managing Hydrostatic Pressure and Irrigation
In landscaping, water is either your best friend or your worst enemy. During a sod install, your irrigation system must be tested before the first piece of turf hits the ground. Check for lateral line leaks that could wash out your perfectly tamped soil. If you have heavy clay soil, you must be careful not to over-tamp. Clay particles are microscopic and flat; if you pack them too tight, you create an impermeable shelf. The water will sit on top, the roots will drown, and the sod will slide. It will rot. Use a core aerator once the sod is established if you suspect the base was packed too hard.
What is the best time of year to install sod?
The ideal window for sod install is during the early fall or late spring when temperatures are moderate. This allows the root system to establish in the tamped soil without the stress of extreme heat or frozen ground, ensuring a higher survival rate for the turfgrass.
Maintenance after the install is just as technical. You need to keep the soil moisture at field capacity for the first 14 days. Do not walk on it. Every footprint on fresh, wet sod creates a permanent divot in your tamped base. This is where the engineering meets patience. After three weeks, reduce watering frequency but increase duration. This forces the roots to chase the moisture down into the compacted subgrade, creating a mechanical bond that makes the lawn resilient. Don’t skip this. A lawn is only as good as the dirt it is built on.