
The Forensic Autopsy of a Decades-Old Leaf Mat
When you walk onto a property that has been neglected for ten years, you aren’t just looking at a mess; you are looking at a biological failure. I recently got called out to tear up a $30,000 patio that was sinking because the previous contractor ignored the massive accumulation of organic debris at the property’s edge. That leaf mold had turned into a 6-inch thick anaerobic sponge. It held thousands of gallons of water right against the base-layer, liquefying the modified stone and causing the entire structure to tilt. This wasn’t a ‘cleanup’ job; it was a civil engineering recovery. Ten years of leaves creates a dense, hydrophobic layer of partially decomposed matter that chokes the soil and traps moisture where it doesn’t belong. It rots foundations. It kills root flares. It destroys grading. You can’t just rake this away with a plastic tool from a big-box store. You need to understand the chemistry of what is happening under that grey, slimy mat. [image_placeholder]
Removing 10 Years of Leaf Mold and Restoring Soil Health
To remove 10 years of leaf mold, you must mechanically scrape the anaerobic layer using a stiff-tine rake or skid-steer, then neutralize the soil pH with calcitic lime. This process eliminates the moisture-trapping sponge that prevents turfgrass respiration and leads to hydrostatic pressure issues near hardscapes or home foundations. Most homeowners think leaf mold is ‘natural fertilizer.’ It isn’t. In these quantities, it is a suffocating blanket that harbors pathogens and sequesters nitrogen, making it unavailable for your grass or shrubs. We call this nitrogen immobilization. The microbes are so busy trying to break down the carbon-heavy leaves that they steal every bit of nitrogen from the surrounding soil. Your plants starve while they drown. It is a slow-motion disaster for your landscaping.
“Excessive organic accumulation against a structure creates a moisture bridge that bypasses traditional damp-proofing and can lead to structural timber rot or masonry failure.” – International Masonry Institute
The Mechanical Process: Manual vs. Mechanical Remediation
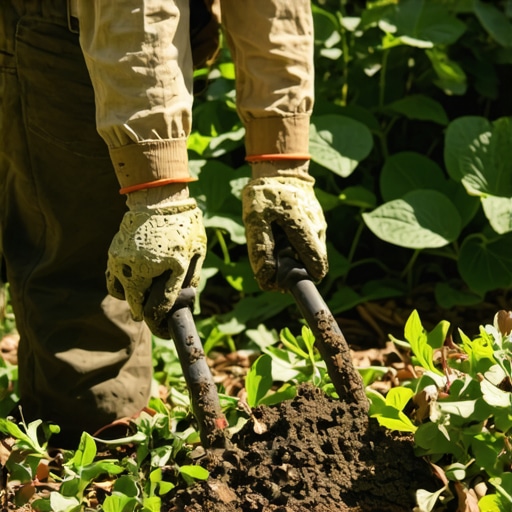
If you have an afternoon, you need to be realistic about the volume. Ten years of leaves over a 2,000 square foot area can weigh several tons when wet. Do not use a leaf blower. It is useless against compressed mold. You need a specialized approach based on the thickness of the mat and the underlying soil type, like the heavy red clay we deal with here in the Southeast. Clay doesn’t drain, so that mold layer is likely sitting on a pool of stagnant water. You must use a pitchfork to break the surface tension of the mat first. Break it into manageable chunks. Then, use a heavy-duty bow rake to pull the material away from the base of any trees. If you see the root flare is covered, you are in a race against time. Trunk rot is inevitable when moisture is trapped against the bark for years. Stop. Check the flare. Move on.
| Equipment Type | Effort Level | Primary Use Case | Expected Result |
|---|---|---|---|
| Steel Bow Rake | High | Precision removal near tree root flares | Clears debris without damaging bark |
| Power Rake (Dethatcher) | Medium | Breaking up 2-4 inch layers | Pulverizes matted material for easier haul-off |
| Skid-Steer (Bobcat) | Low | Mass excavation of 6+ inch mats | Fastest removal; requires regrading afterward |
| Stiff-Tine Pitchfork | High | Aerating the anaerobic mat | Allows oxygen to reach the soil surface |
How much modified gravel do I need for a patio base?
If your leaf mold removal reveals a sinking patio or walkway, you must calculate the replacement base material accurately. For a standard residential patio, you need a minimum of 6 inches of compacted 21A or CR-6 modified gravel. To calculate the volume, multiply the square footage by the depth (0.5 feet) and divide by 27 to get cubic yards. Never skimp on this. If you don’t excavate the organic silt left behind by the mold, your new base will fail. Water will find the path of least resistance. It will sit in that silt. It will heave your pavers during the first freeze. Do it right or do it twice. There is no middle ground in hardscaping.
Can I lay sod directly over old leaf mold?
Absolutely not. Laying sod install over a layer of leaf mold is a death sentence for the grass. The roots of the new sod will hit that anaerobic layer and stop. They cannot penetrate the dense mat, and the lack of oxygen will cause root rot within weeks. You must strip the area down to the mineral soil, till in a high-phosphorus starter fertilizer, and ensure the soil pH is between 6.0 and 7.0. If you are in a region with acidic soil, you will need a heavy application of lime. Once the soil is prepped and the grade is set for irrigation runoff, then and only then do you lay the sod. Every piece must have direct contact with the prepared soil. No air pockets. No debris.
“Soil oxygen levels must remain above 10% for healthy root development; dense organic mats can drop this to near zero, leading to the rapid proliferation of anaerobic pathogens.” – NC State University Extension
The Yard Cleanup Checklist for Heavy Neglect
- Identify the Drip Line: Clear all debris at least 3 feet beyond the canopy of any specimen trees to prevent fungal infections.
- Check the Grading: Use a transit level to ensure the soil slopes away from the house at a minimum of 2% grade (1/4 inch per foot).
- Assess the Irrigation: Inspect all sprinkler heads for clogs caused by decomposing organic matter. Flush the lines.
- Apply Soil Amendments: Based on a soil test, add sulfur or lime to correct the pH imbalance caused by the decaying tannins in the leaves.
- Core Aeration: Once the mold is removed, perform a deep-core aeration to relieve the compaction caused by years of snow-weight on the debris.
Restoring the Nitrogen Cycle and Managing Irrigation
After a decade of neglect, your soil is likely sterile or dominated by the wrong kind of fungi. To fix this, you need to jumpstart the nitrogen cycle. Use a slow-release granular fertilizer with a high nitrogen count to compensate for what the mold stole. But be careful. If you over-fertilize, you’ll burn the remaining root systems. It is about balance. Once the yard is clear, your irrigation strategy must change. You aren’t watering a sponge anymore; you are watering the soil. Most people water too much and too shallow. You need one inch of water per week, delivered in two deep sessions. This forces the roots to grow down deep to find the moisture. It makes the plants resilient. If you keep the surface wet, you’re just inviting the mold to come back. Don’t be that homeowner. Keep the surface dry and the roots wet. This is fundamental biology. Ignore it at your own peril.
Final Steps for Long-Term Prevention
Once you have finished the yard cleanup, do not let the cycle repeat. Install a French drain if you notice water pooling in the areas where the mold was thickest. Hydrostatic pressure is a silent killer of retaining walls and foundations. If you don’t provide a path for the water, it will make its own. Use a 4-inch perforated pipe wrapped in a filter sock, buried in clean #57 stone. This ensures that even if a few leaves accumulate, the water can still escape. Landscaping is 10% planting and 90% water management. If you manage the water, the plants will take care of themselves. If you don’t, you’ll be calling me back in another ten years to dig you out of another hole. Use a professional-grade steel rake every fall. Don’t wait. One afternoon of work every year prevents a week of excavation every decade. It is that simple. Don’t be lazy with your soil. It is the only foundation that actually matters.