
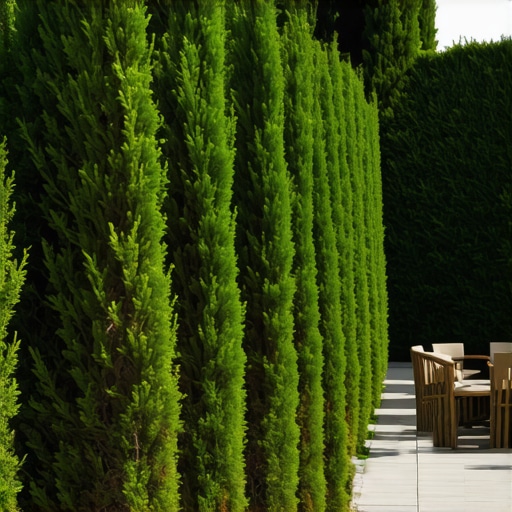
Professional Strategies for Creating a Natural Privacy Screen Using Layered Evergreens
I always drill into my new crew members: if you don’t fix the soil grading first, every plant you put in the ground is just expensive compost. I have spent twenty years remediating yards where some ‘contractor’ threw thirty Green Giants into a trench with zero regard for drainage or root flare depth. They collect their check and leave, while the homeowner is left with $5,000 worth of brown, needle-dropping skeletons six months later. Creating a privacy screen is not about planting a straight line of trees; it is about building a biological wall that can handle wind, snow load, and pathogens. If you want a screen that lasts thirty years instead of three, you have to stop thinking like a gardener and start thinking like a civil engineer with a microscope.
The Engineering of Layered Evergreen Privacy Screens
The core principle of a layered evergreen screen involves staggering diverse species like Thuja plicata and Picea abies to create a multi-dimensional barrier. This approach prevents monoculture collapse, ensures 100% visual density, and facilitates better airflow to reduce the risk of fungal needle cast and spider mite infestations common in crowded single rows.
When we talk about layered screens, we are talking about depth. A single row of arborvitae is a gamble. If one tree catches Bagworm or develops root rot from a low spot in the yard, the gap in your ‘wall’ is permanent and glaring. By staggering two or even three rows, you create a backup system. You use the tallest, most vigorous growers in the back and mid-sized, denser species in the front. This fills the ’empty leg’ look that older evergreens often develop as they shade out their own lower branches. We are looking for an overlap of at least 30 percent between the canopies of the front and back rows.
How far apart should I plant privacy trees?
For a staggered double row, plant your primary trees 8 to 12 feet apart on center, with the second row offset by 4 to 6 feet to fill the gaps. This spacing allows for lateral branch development and critical air circulation, which prevents the micro-climates that harbor pathogens like Cercospora needle blight. Never crowd them for instant gratification; a crowded tree is a stressed tree.
“Proper planting depth is the single most important factor in the survival of a newly planted tree. Planting too deep leads to root suffocation and trunk girdling, which are the leading causes of tree failure in urban landscapes.” – Penn State Extension Horticulture Manual
Soil Physics and Site Preparation
Before the first landscaping crew touches a shovel, we run a soil test. I am looking for pH levels between 5.5 and 6.5 for most conifers. If your soil is heavy red clay or compacted urban fill, you are dealing with a drainage nightmare. Evergreens hate ‘wet feet.’ If that root ball sits in a bathtub of stagnant water because the clay won’t let it drain, the roots will go anaerobic and rot in weeks. We often have to install a French drain or re-grade the entire perimeter to ensure hydrostatic pressure does not build up behind the planting line.
A critical part of the process is yard cleanup and clearing. You cannot just dig a hole in the middle of a weed patch. We strip the existing turf—usually a failed sod install from a previous owner—and expose the native soil. We look for the root flare on every tree. That is the point where the trunk widens at the base. If that flare is buried under even two inches of soil or mulch, the tree is on a countdown to death. It will rot. We use a high-torque auger for the holes, but then we hand-dig the sides to avoid ‘glazing’ the clay, which creates an impenetrable wall for new feeder roots.
| Species Name | Growth Rate (Annual) | Mature Height | Best Use Case |
|---|---|---|---|
| Green Giant Arborvitae | 3 – 5 Feet | 40 – 60 Feet | Fast back-row screening |
| Norway Spruce | 2 – 3 Feet | 50 – 70 Feet | Windbreak and heavy snow loads |
| Cryptomeria Radicans | 1 – 2 Feet | 30 – 40 Feet | Narrow spaces and acidic soil |
| Nellie R. Stevens Holly | 1 Foot | 15 – 25 Feet | Front-layer evergreen texture |
What is the best evergreen for a fast-growing screen?
The Green Giant Arborvitae is the industry standard for fast-growing screens due to its deer resistance and rapid vertical growth of up to 3 feet per year. However, it must be paired with Norway Spruce or Leyland Cypress in a staggered pattern to provide structural diversity and long-term wind resistance.
The Irrigation and Hydration Protocol
If you think a sprinkler hitting the needles is watering a tree, you are wrong. Evergreens need deep, infrequent watering at the root zone to force the root system to chase moisture down into the subsoil. We install drip irrigation systems with pressure-compensating emitters. This delivers water directly to the soil, keeping the foliage dry and preventing the fungal outbreaks that occur when you use an oscillating sprinkler. During the first two years, that tree needs roughly 10 gallons of water per inch of trunk diameter every week. No exceptions.
“Evergreen screens should be planted in multiple rows to mitigate wind load and prevent total loss from species-specific pathogens, ensuring the landscape remains functional for decades.” – University of Tennessee Agricultural Institute
Mulching is the final, and most abused, step. I see ‘mulch volcanoes’ every day—heaps of dyed wood chips piled six inches high against the trunk. This is a death sentence. It traps moisture against the bark, inviting borers and fungal rot. We use a two-inch layer of aged arborist wood chips, kept three inches away from the trunk flare. This regulates soil temperature and breaks down slowly to feed the soil microbiology. Don’t skip this. The mulch protects the irrigation lines from UV degradation and prevents the soil from crusting over.
- Call 811 to mark all underground utilities before excavating.
- Check soil pH and adjust with elemental sulfur if it is above 7.0.
- Ensure the planting hole is twice as wide as the root ball but no deeper.
- Remove all burlap and wire cages from the top third of the root ball.
- Install a dedicated drip zone for the screen to avoid overwatering the lawn.
A natural privacy screen is a living investment. It requires the same level of engineering as a retaining wall. You are managing weight, wind shear, and biological health. When the wind picks up in February and your screen doesn’t budge, or when your neighbor puts in a pool and you can’t see or hear a thing, you will realize why we don’t do things the cheap way. Build it for the next generation, not just for next month.