
Why Most Wood Retaining Walls Fail Before Their Time
Building a durable retaining wall with wood beams requires heavy-duty pressure-treated timbers (UC4B rating), a compacted gravel base, and a robust drainage system to prevent hydrostatic pressure. You must integrate deadman anchors to resist soil weight and ensure the wall remains plumb over time. It is not just about stacking wood; it is about engineering against gravity and moisture.
I recently got called out to tear up a $30,000 patio that was sinking because the previous contractor thought 4×4 landscape timbers from a big-box store were sufficient for a four-foot grade change. They weren’t. Within three years, the wall had bowed six inches, and the soil behind it was a soupy mess of anaerobic mud. The wood was already showing signs of fungal decay because it wasn’t rated for heavy soil contact. We had to excavate 40 tons of material just to fix a mistake that could have been avoided with a $500 investment in proper drainage and the right timber grade. This is the reality of hardscaping: if you don’t respect the physics of water and soil, your project is just expensive compost. Don’t be that guy. Do it right the first time or don’t do it at all.
The Engineering Logic of Timber Walls
Timber walls are often dismissed as inferior to segmental concrete blocks, but when built with 6×6 pressure-treated Douglas Fir or Southern Yellow Pine, they can last 20 to 25 years. The secret is not in the wood itself, but in the environment you create for that wood. Soil is a living, moving mass that exerts lateral pressure. When that soil gets saturated with water, that pressure doubles. This is called hydrostatic pressure. Without a way for that water to escape, even the thickest timber will eventually snap or lean. You need to understand the NPK of your soil even in hardscaping—nitrogen levels can actually accelerate the decay of certain wood treatments if the soil is directly against the timber without a moisture barrier. I always tell my crew: we aren’t building a wall; we are building a drainage system that happens to have a wooden face.
“A retaining wall doesn’t fail because of the stone; it fails because of the water trapped behind it.” – Hardscape Engineering Axiom
How much modified gravel do I need for a patio base?
To calculate the amount of modified gravel (2A or 2B) for your retaining wall base, multiply the length of the trench by the width (usually 18-24 inches) and the depth (minimum 6 inches). Divide the total cubic feet by 27 to get cubic yards, then multiply by 1.5 to account for compaction density. Always order 10% extra for settling.
Material Selection: UC4B or Bust
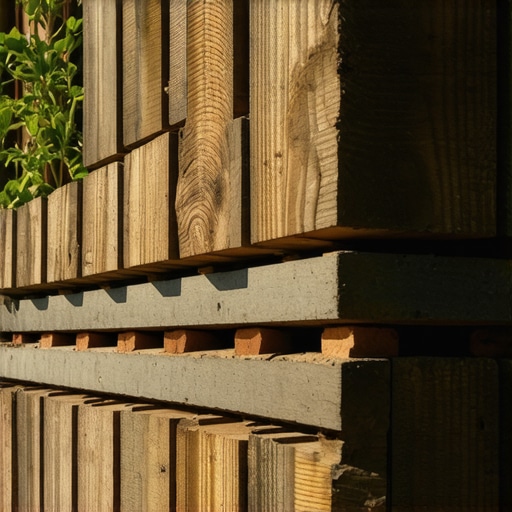
When selecting your beams, ignore anything labeled ‘landscape timber’ that is rounded on two sides. Those are garbage. You need 6×6 or 8×8 square-cut timbers. Look specifically for the AWPA (American Wood Protection Association) stamp. You want a UC4B rating, which is designed for Heavy Duty Ground Contact. Anything less will rot within a decade in damp soil. [image_placeholder_1] This wood is pressure-treated with copper-based preservatives that are toxic to the fungi that eat cellulose. If you are building near a vegetable garden, you might consider a liner, but for structural integrity, these chemicals are non-negotiable. Don’t buy your materials at a retail store where the wood has been sitting in the sun warping for three months. Go to a real lumber yard that services contractors.
| Feature | Retail Grade (UC3) | Professional Grade (UC4B) | Engineering Impact |
|---|---|---|---|
| Dimension | 4×4 or Rounded | 6×6 or 8×8 Square | Higher shear strength |
| Chemical Retention | 0.15 – 0.25 lbs/cf | 0.60 lbs/cf | Resists rot 3x longer |
| Best Use | Garden Edging | Structural Retaining | Safety and longevity |
| Soil Contact | Occasional | Permanent Burial | Structural Necessity |
The Foundation: Compaction and Leveling
The first course of wood is the most important. If it is 1% off-level, the top of your wall will be 5 inches out of plumb. You must excavate a trench that is twice as wide as your timber. Fill this with 6 inches of 3/4-inch crushed modified stone. Do not use pea gravel; it acts like ball bearings and won’t compact. Use a plate compactor until the stone literally bounces the machine back at you. That is the sound of a solid base. Place your first course of timbers and use a 4-foot level. Use a sledgehammer to seat them. If you skip the compaction, the weight of the wall and the freeze-thaw cycles of the soil will heave your wall out of the ground. This is especially critical if you are planning a sod install or landscaping immediately after, as settling will ruin your finish grade.
“Soil compaction is the single most critical factor in the longevity of any tiered structure. Without 95% Proctor density, the structure is destined for failure.” – Agricultural Extension Engineering Manual
How long do wood retaining walls last?
A professionally installed timber retaining wall using UC4B pressure-treated 6×6 beams and proper French drain systems typically lasts 20 to 25 years. Longevity depends heavily on soil pH, drainage efficiency, and the absence of hydrostatic pressure buildup behind the wall structure.
The Drainage Protocol
Water is the enemy. Behind your wall, you must install a 4-inch perforated HDPE pipe (a French drain). This pipe should be wrapped in a geotextile fabric sock to prevent silt from clogging it. Cover the pipe with at least 12 inches of 3/4-inch clean stone (no fines). This creates a ‘chimney’ that allows water to drop straight down to the pipe and exit through weep holes or out the side of the wall. Without this, the water stays in the soil, the soil turns to heavy mud, and the wall bows. If you are doing a yard cleanup or irrigation repair nearby, ensure your sprinkler heads aren’t spraying directly onto the wall backfill. Excess water from an overactive irrigation system is a leading cause of premature wall failure.
Anchoring with Deadmen
For any wall over 2 feet high, you need deadman anchors. A ‘deadman’ is a timber placed perpendicular to the wall, extending back into the hillside. It usually has a cross-member attached to the end, forming a ‘T’ shape. This anchor uses the weight of the soil itself to hold the wall face in place. Space these every 6 to 8 feet on the third or fourth course. Secure every timber to the one below it using 10-inch galvanized timber screws or 3/8-inch rebar spikes. Drive the rebar through pre-drilled holes. It is physical labor that requires a heavy-duty rotary hammer or a massive sledgehammer. If you don’t sweat during this part, you aren’t doing it right.
- Excavate: Clear the area and dig a trench 12 inches deep.
- Base: Add 6 inches of crushed stone and compact to 95% density.
- First Course: Level and bury at least half of the first timber for ‘toe-in’ stability.
- Drainage: Lay perforated pipe and backfill with clean gravel (not dirt).
- Stagger: Always stagger your joints like a brick wall; never have vertical seams lining up.
- Anchors: Install deadmen every 8 feet on walls taller than 24 inches.
- Filter Fabric: Use professional-grade geotextile between the gravel and the soil to prevent mixing.
Integration with Your Landscape
Once the wall is structural, you can focus on the aesthetics. A wall creates a tiered level that is perfect for a sod install. However, ensure your irrigation lines are set back at least 3 feet from the wall face. You do not want a broken lateral line pumping 10 gallons of water per minute into your wall’s backfill. When performing a yard cleanup, check the weep holes for clogs. If you see water pooling at the base of the wall instead of coming through the drainage points, your pipe is likely clogged. Fix it immediately. A well-built wall should be the backbone of your yard, providing the structural integrity needed for healthy plant growth and proper landscaping drainage. If you treat it like a civil engineering project, it will serve you for decades. If you treat it like a weekend DIY hobby, you’ll be rebuilding it in five years. Don’t skip the gravel. Don’t skip the drainage. Don’t skip the UC4B timbers. Ground-up construction is the only way to win.”,”image”:{“imagePrompt”:”A professional cross-section diagram of a timber retaining wall showing 6×6 pressure-treated beams, a 4-inch perforated drainage pipe, a gravel backfill chimney, a geotextile fabric layer, and a deadman anchor extending into the soil bank.”,”imageTitle”:”Structural Engineering of a Timber Retaining Wall”,”imageAlt”:”Diagram of a wood retaining wall with drainage and deadman anchors”},”categoryId”:0,”postTime”:””} bricks.