
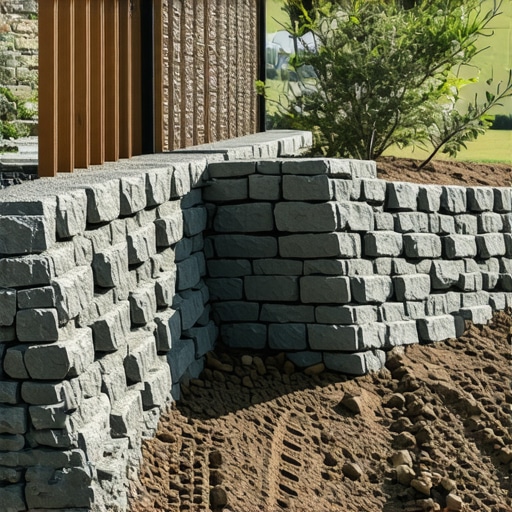
The Visual Anatomy of a Failing Structural Wall
You notice it first as a hairline fracture in the mortar or a slight tilt that wasn’t there last summer. Then comes the squelch of saturated soil at the base and the visible bowing of the central courses. A leaning retaining wall is not merely an aesthetic grievance; it is a structural emergency caused by the relentless physics of gravity and fluid dynamics. If you don’t address the root cause, the entire mass will eventually succumb to a catastrophic collapse. It will rot your property value. Don’t skip the diagnosis.
The $30,000 Hardscape Autopsy
I recently got called out to tear up a $30,000 wall and patio that was sinking and leaning at a 15-degree angle. The homeowner was devastated. The previous contractor had used the wrong backfill—straight native clay—which turned into a heavy, hydraulic mess the moment it rained. They didn’t install a single foot of drainage pipe. I had to tell the client that their expensive investment was essentially a ticking time bomb. We spent two weeks excavating, hauling out five-ton loads of saturated mud, and starting from the virgin subgrade. This is the reality of hiring hacks who don’t understand civil engineering principles.
Why Your Retaining Wall is Leaning and How to Support It
A leaning retaining wall is typically caused by hydrostatic pressure, poor soil compaction, or inadequate drainage systems that fail to divert water away from the structure. To support it, you must excavate the backfill, install perforated drainage pipes, and replace heavy soil with clean angular stone to reduce lateral force.
“A retaining wall doesn’t fail because of the stone; it fails because of the water trapped behind it.” – Hardscape Engineering Axiom
The Science of Hydrostatic Pressure and Soil Mechanics
The primary enemy of any landscaping structure is water. When soil behind a wall becomes saturated, it gains immense weight and exerts lateral pressure. In many regions, the soil is heavy clay. Clay holds water like a sponge, expanding and exerting hundreds of pounds of PSI against your block or stone. Without a clear path for that water to escape, the wall becomes a dam. But dams are built to hold water; retaining walls are built to hold soil. When you combine this with the freeze-thaw cycles seen in northern climates, the water turns to ice, expands, and physically heaves the wall forward. Irrigation leaks can exacerbate this, constantly feeding water into the “retained zone” and never allowing the soil to dry out and settle. You need a 12-inch chimney of clean 57 stone (washed gravel) directly behind the wall to break this pressure.
How much modified gravel do I need for a patio base?
To calculate modified gravel needs, multiply the square footage by the depth in feet (typically 0.5 feet for 6 inches) and divide by 27 to get cubic yards. For a standard retaining wall base, you should always plan for a minimum of 6 inches of compacted 2A modified stone to ensure a stable, non-shifting foundation.
The Step-by-Step Forensic Remediation Process
Fixing a leaning wall requires more than just pushing it back. You have to remove the cause of the failure. This often involves a massive yard cleanup to clear the workspace for excavation equipment. First, we excavate the soil behind the wall to a 1:1 slope to prevent cave-ins. We inspect the base. Is it on virgin soil or uncompacted fill? If the base has settled, the wall must be dismantled. We then install a 4-inch perforated SDR-35 pipe, sloped at a 1% grade to a daylight exit. This ensures water moves out, not out-and-down. After rebuilding, a sod install is usually required to repair the surrounding turf destroyed during the heavy machinery operation. Precision matters. 95% standard proctor density on your compaction is the goal. Use a plate compactor every 2-4 inches of lift.
“Effective drainage systems are essential to prevent the accumulation of hydrostatic pressure, which is the leading cause of structural failure in segmental retaining walls.” – Penn State Agricultural Extension
Material Comparison for Wall Reinforcement
| Material Type | Drainage Rating | Load Capacity | Lifespan |
|---|---|---|---|
| Clean 57 Stone | Excellent | High | 50+ Years |
| Native Clay Fill | Poor | Low (when wet) | 5-10 Years |
| Geogrid Mesh | N/A | Ultra-High | 100 Years |
| SDR-35 Pipe | Critical | N/A | 50+ Years |
Retaining Wall Survival Checklist
- Verify 811 utility markings before any excavation.
- Ensure the base trench is at least 24 inches wide for a 12-inch block.
- Check that the first course of block is buried (1 inch of burial per 8 inches of wall height).
- Use non-woven geotextile fabric to separate stone from soil.
- Install weep holes every 4 to 6 feet if the wall is solid masonry.
- Confirm the “batter” or step-back is consistent at 1 inch per foot of height.
Maintenance and Long-Term Structural Integrity
Once the wall is stabilized, your job isn’t over. You must manage the irrigation zones near the wall to ensure they aren’t oversaturating the backfill. Surface water should be diverted using a swale or French drain at least 3 feet behind the wall’s crest. Keep an eye on your landscaping; large trees planted too close can have roots that exert mechanical pressure, acting like a slow-motion lever against the stone. Perform a seasonal yard cleanup to clear debris from drainage outlets. If those pipes clog, the pressure returns. This is engineering, not gardening. Treat your soil like the structural component it is, and your wall will stand for decades.