
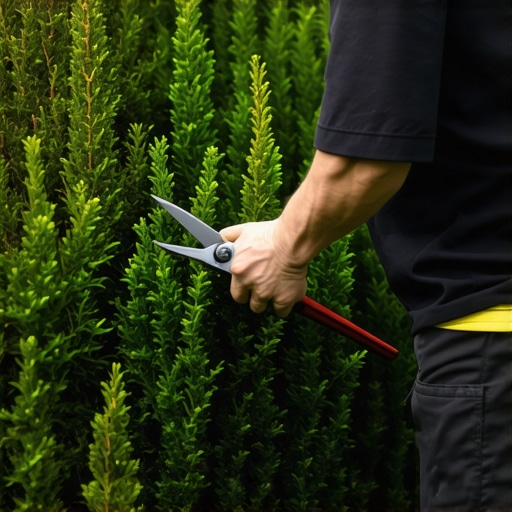
The Forensic Reality of Neglected Boxwoods
Overgrown boxwood trimming requires a structural thinning approach rather than surface shearing to allow light penetration and airflow into the plant interior. This prevents the hollow shell effect where foliage only exists on the outer two inches, eventually leading to branch dieback and fungal pathogens like Calonectria pseudonaviculata. Most homeowners make the mistake of taking a gas-powered hedge trimmer to the exterior, which only compounds the problem of interior suffocation.
I always drill into my new crew members: if you do not fix the soil grading and drainage first, every plant you put in the ground is just expensive compost. I remember an irrigation job where the client wanted me to save a row of 50-year-old English Boxwoods. The previous contractor had installed a sod install right up to the stems and buried the root flares under four inches of heavy mulch. The soil was anaerobic and the boxwoods were literally drowning before we ever touched a pair of shears. You can have the sharpest Felco blades in the world, but if the roots are rotting in a poorly graded landscaping bed, your pruning is just performing an autopsy on a living corpse.
Understanding Boxwood Physiology and the Thinning Mandate
To successfully restore a Buxus specimen, you must understand the concept of latent buds. Boxwoods produce foliage primarily where sunlight hits the stems. When you shear a boxwood into a tight ball, you create a dense canopy that blocks 95 percent of light from reaching the center. Over time, the interior branches become brittle and bare. If you then cut back hard into that dead zone, you are left with a skeleton that may take years to recover, or simply die from the shock.
“Thinning is the most important pruning practice for boxwoods. It involves the removal of a portion of the outer small branches to allow light and air into the center of the plant.” – Virginia Cooperative Extension
The goal of professional yard cleanup is not just aesthetics; it is plant health. We use thinning cuts to remove about 10 to 15 percent of the outer branch tips. This is a surgical process, not a mechanical one. By reaching into the canopy and removing individual stems at different lengths, you create ‘windows’ for the sun. This triggers those latent buds on the interior wood to finally push new growth, filling the plant from the inside out.
How much can you cut back an overgrown boxwood at once?
You should never remove more than one-third of the total foliage mass in a single growing season to avoid starving the root system. For severely overgrown specimens, a multi-year restoration plan is required to safely reduce size while maintaining the plant’s photosynthetic capacity. Pushing a plant beyond this 33 percent threshold often leads to sunscald on the newly exposed interior bark, which can kill the cambium layer.
[IMAGE_PLACEHOLDER]
The Tool Kit and Sanitization Protocol
Professional horticulture is 80 percent preparation and 20 percent execution. You cannot use dull tools on boxwoods. A ragged cut is an open door for Boxwood Blight. Every cut must be clean, meaning your bypass pruners must be sharp enough to slice through a piece of paper without tearing. Furthermore, you must sanitize your tools with a 70 percent isopropyl alcohol solution between every single plant. If one shrub in a landscaping row is infected, you will personally transport that pathogen to every other plant on the property if you skip this step.
| Feature | Shearing (Hedge Trimmers) | Thinning (Hand Pruning) |
|---|---|---|
| Light Penetration | Minimal (Outer 1-2 inches) | Maximum (Deep into canopy) |
| Airflow | Restricted (High fungus risk) | Optimal (Reduces blight risk) |
| Interior Growth | None (Hollow Shell) | Promoted (Full Density) |
| Labor Intensity | Low | High |
Don’t be fooled by the speed of a power trimmer. While it works for a yard cleanup where the client just wants things ‘neat,’ it is a death sentence for long-term boxwood health. If you see a contractor pulling out gas shears for your boxwoods, tell them to put them back in the truck. You want a pro who spends time on their knees, looking into the structure of the wood.
Step-by-Step Restoration: The Forensic Method
- Step 1: The Deadwood Extraction. Before making any aesthetic cuts, remove all dead, diseased, or crossing branches. This opens up the structure and allows you to see the true skeleton of the plant.
- Step 2: The Inner Cleaning. Reach into the center and pull out the accumulation of dead leaves and debris. This ‘duff’ traps moisture against the stems, which is the primary cause of stem cankers and rot.
- Step 3: Creating Light Windows. Use bypass pruners to remove 6-8 inch ‘plugs’ of growth from the outer canopy. Space these out evenly. You want the shrub to look like it hasn’t been touched, yet the interior should be visible.
- Step 4: Soil and Irrigation Check. Ensure your irrigation emitters are not spraying directly onto the foliage. Boxwoods need water at the root zone, not on the leaves. Verify that any recent sod install hasn’t raised the soil level above the root flare.
What is the best time of year to prune boxwoods?
The optimal window for heavy thinning is late winter or very early spring, before the first flush of new growth. This timing allows the plant to use its stored energy to heal cuts and push new interior growth immediately. Avoid pruning in late summer or fall, as this can stimulate tender new growth that will be killed by the first hard frost, leading to tip dieback and winter bronzing.
“Proper drainage is the single most important factor for boxwood survival; they will not tolerate ‘wet feet’ or standing water behind a retaining wall or in heavy clay soil.” – American Boxwood Society Standards
If you are dealing with heavy clay, you might need to incorporate a landscaping drainage solution like a French drain or a raised planting bed. Boxwoods in the Southeast or Mid-Atlantic face high humidity, which makes the thinning process even more critical. Air must move through the plant to dry out the leaves after a rain event. If the center stays damp for more than a few hours, you are inviting Volutella buxi to take hold.
Post-Pruning Maintenance and Nutrition
Once you have thinned the canopy, do not starve the plant. However, do not over-fertilize with high-nitrogen ‘big box’ fertilizers either. This creates weak, succulent growth that is a magnet for leaf miners and psyllids. Instead, apply a slow-release, organic-based fertilizer with a balanced NPK ratio (like 10-10-10) only if a soil test indicates a deficiency. Focus on the soil pH; boxwoods prefer a slightly acidic to neutral range of 6.5 to 7.2. If your soil is too acidic, the plant cannot uptake the nutrients it needs, regardless of how much you feed it.