
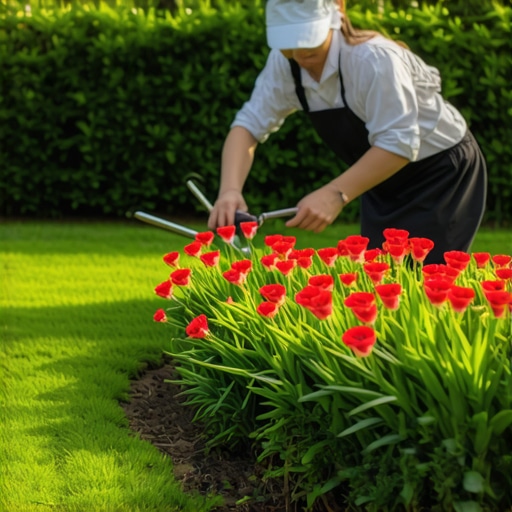
Why Most Garden Edges Fail Within Six Months
A professional garden edge is not a decorative suggestion; it is a structural boundary designed to manage rhizomatous encroachment and hydrostatic soil movement between two distinct biological zones. Most homeowners fail because they treat the edge as a visual line rather than a physical trench that redirects moisture and stops grass stolons in their tracks. If you simply ‘scuff’ the dirt with a string trimmer, you are inviting the lawn to colonize your flower beds by the next rain cycle.
The Apprentice Lesson: Soil Grading First
I always drill into my new crew members: if you don’t fix the soil grading first, every plant you put in the ground is just expensive compost. I remember a job in late July where a homeowner had spent four grand on premium nursery stock, only to have the entire bed wash onto their driveway because they didn’t understand the ‘V-notch’ principle. They thought the mulch would hold the soil back. It won’t. You have to engineer the grade so that water settles in a collection point at the bottom of the edge, away from the root flares of your expensive ornamentals. If the grade is wrong, the edge is worthless. Don’t skip the spade work.
“Maintaining a distinct boundary between turf and ornamentals is critical to prevent nutrient competition and the migration of invasive grass species into the root zones of shrubs.” – Penn State Extension
What is a Victorian Trench Edge?
The Victorian trench edge is a hand-cut, vertical 90-degree drop that serves as a physical barrier against grass roots while facilitating clean yard cleanup and mulch retention. By creating a four-inch deep ‘V’ shape, you effectively air-prune the roots of the grass, preventing them from jumping the gap and invading the nutrient-rich soil of your flower beds. This method is superior to plastic or metal edging because it allows for natural expansion and does not heave during freeze-thaw cycles.
The Engineering of the Perfect Cut
To achieve a professional edge, you must understand the physics of the spade. A standard shovel has a curved blade that creates a rounded, weak edge. You need a half-moon edger or a high-carbon steel flat-head spade. The goal is to drive the blade vertically into the turf at a 90-degree angle to a depth of precisely 4 to 6 inches. This depth is non-negotiable; it must exceed the average root depth of your specific turf species, whether you are dealing with Kentucky Bluegrass or aggressive Bermuda grass.
How deep should a garden edge be?
A garden edge should be four to six inches deep to effectively sever the lateral root systems of common turfgrasses and provide a reservoir for mulch stabilization. Cutting shallower than four inches allows rhizomes to pass underneath the boundary, while cutting deeper than six inches risks damaging irrigation lines or shallow-rooted perennials near the bed margin.
The Materials Matrix: Comparing Edging Methods
| Edging Method | Durability | Installation Difficulty | Root Inhibition | Typical Lifespan |
|---|---|---|---|---|
| Victorian Trench | High | Moderate (Manual) | 95% | Indefinite (Annual Refresh) |
| Steel/Aluminum | Extreme | High (Requires Stakes) | 80% | 25+ Years |
| Plastic Strips | Low | Easy | 40% | 2-4 Years (Heaving) |
| Stone/Paver | High | Moderate | 60% | 10-15 Years |
Step-by-Step: The Professional Edge Protocol
Follow this checklist to ensure your edge survives the season. Don’t take shortcuts with the compaction phase.
- Mark the Line: Use a garden hose or a high-visibility marking paint to establish the radius. Avoid sharp 90-degree turns; wide, sweeping arcs are easier to maintain with a commercial mower.
- The Vertical Cut: Drive the spade straight down. Do not lean the handle back. You want a sheer wall of soil.
- The 45-Degree Back-Cut: Move the spade four inches into the flower bed and cut down at a 45-degree angle toward the base of your vertical cut. This removes a triangular ‘wedge’ of soil.
- Soil Disposal: Do not leave the excavated soil in the bed. This creates a high spot that will wash back into the trench. Remove it or incorporate it into the center of the bed to increase the crown height.
- Compaction: Use the back of your spade to firmly pack the vertical wall. It should be dense enough to resist a thumb-press.
- Mulch Layering: Apply 2-3 inches of hardwood mulch, but keep it one inch below the grass line. If the mulch is flush with the grass, the grass will grow over it.
Irrigation and Sod Install Integration
If you are planning a sod install, the edge must be cut before the sod is laid. We see ‘mow-and-blow’ contractors lay sod right up to a flat bed and then try to cut the edge later. This destroys the root-to-soil contact at the most vulnerable part of the new grass. When installing irrigation, ensure your heads are set back at least six inches from the edge. High-pressure spray hitting the vertical soil wall will cause it to collapse, filling your trench with silt and rendering the edge useless in weeks.
“A retaining wall doesn’t fail because of the stone; it fails because of the water trapped behind it.” – Hardscape Engineering Axiom
Can I install a flower bed edge next to new sod?
Yes, but you must wait at least 14 days for the sod to knit into the native soil before performing a deep trench cut. Performing a Victorian edge on fresh sod can cause the pieces to shift or ‘lip up,’ leading to rapid desiccation of the grass roots and total failure of the border. Always check moisture levels before cutting; the soil should be damp enough to hold a shape but not saturated enough to smear.
The Micro-Climate Factor: Clay vs. Sand
In regions with heavy red clay, your edge will hold its shape like concrete, but it will also trap water. You must ensure the bottom of your trench is slightly pitched toward a lower point in the yard to prevent root rot in your flower beds. In sandy loams, the vertical wall is prone to crumbling. In these environments, I recommend a slightly angled 80-degree cut rather than a true 90-degree vertical to provide structural stability to the sand particles. Soil biology dictates your engineering strategy. Stop fighting the local geology and start working with its specific gravity and shear strength.