
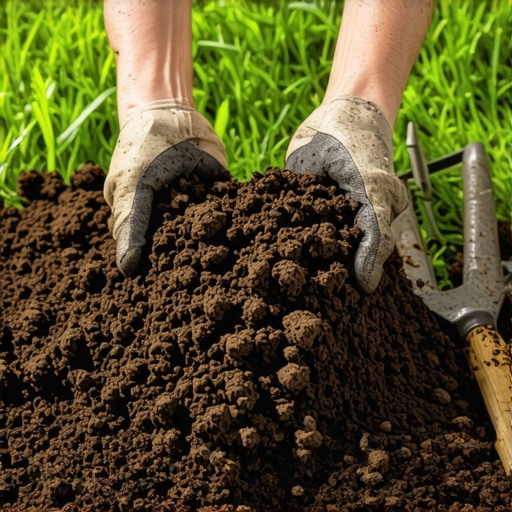
Why Professional Soil Preparation Dictates Sod Survival
Proper soil preparation for sod installation involves more than just clearing the surface; it requires engineering a biological root zone through soil testing, mechanical aeration, and precision grading to ensure capillary action. You must create a environment where the rhizome system can integrate with the native sub-base within 14 days. Failure to address soil density or pH imbalances before the first roll hits the ground leads to hydrophobic conditions and localized dry spots.
I always drill into my new crew members: if you don’t fix the soil grading first, every plant you put in the ground is just expensive compost. I remember a project in the suburbs where a client had spent four grand on premium Kentucky Bluegrass sod, only to lay it over compacted clay that was as hard as a sidewalk. Within three weeks, the edges were browning, and the roots were girdling because they couldn’t penetrate the top half-inch. We had to rip the whole thing up. It was a $7,000 lesson in why the ‘dirt’ matters more than the grass. We found the previous contractor hadn’t even cleared the yard cleanup debris, leaving pockets of rotting wood that were leaching nitrogen from the soil, effectively starving the new turf. We spent two days just on the landscaping foundation before we even thought about bringing the pallets back. If the foundation is flawed, the project is a failure. Period.
The Engineering of Soil: Physical and Chemical Assessment
Before you touch a shovel, you need to understand what is happening at a microscopic level. Soil is a living respiratory system. It needs a balance of 45% minerals, 25% water, 25% air, and 5% organic matter. Most residential lots are ‘dead’ due to construction equipment compaction which eliminates the macropore space necessary for oxygen to reach the roots.
“The long-term success of turfgrass is 90% determined by the physical properties of the top 6 inches of the root zone.” – Penn State Agricultural Extension
Start with a professional soil test. Do not use the $10 kits from a hardware store. Send a sample to a lab to get your Cation Exchange Capacity (CEC) and exact NPK (Nitrogen, Phosphorus, Potassium) levels. Most turfgrasses thrive in a pH range of 6.0 to 7.0. If your soil is too acidic, you will need to incorporate pelletized lime; if it is too alkaline, elemental sulfur is required. This must be tilled into the top 4 to 6 inches. Surface applications won’t cut it when you are about to seal the ground with a layer of sod.
How to test soil pH at home?
While lab tests are superior, a rapid home test involves taking 10-15 core samples from across the landscaping site at a 6-inch depth, mixing them in a clean plastic bucket, and using a digital pH probe calibrated with a buffer solution to get an average reading of the soil acidity or alkalinity.
Mechanical Preparation and Debris Removal
You cannot skip the yard cleanup phase. This means removing every rock larger than a golf ball and every stray piece of construction debris. Buried wood or trash will eventually rot, creating a subterranean void that leads to a sinkhole in your flat lawn. Use a power rake or a Harley rake on a skid steer to pulverize the top layer. You are looking for a ‘flour-like’ consistency in the top three inches. If you are dealing with heavy clay, this is the time to incorporate gypsum or expanded shale to break up the ionic bonds of the clay particles. This increases drainage efficiency and prevents the ‘bathtub effect’ where water sits between the sod and the clay, rotting the roots.
How much topsoil do I need for 1000 square feet?
To add a standard 2-inch layer of screened topsoil over 1000 square feet of sod install area, you will need approximately 6.2 cubic yards of material, accounting for a 15% compaction factor once the water-filled roller is used for final leveling.
Irrigation System Integration
Your irrigation must be fully operational and tested before the soil is finalized. Check for head-to-head coverage. There is a common myth that you can fix irrigation issues after the sod is down. You can’t. Not without cutting into your brand-new turf. Ensure the sprinkler heads are set to the correct finished grade height, which should be about 1/2 inch below the top of the soil to account for the thickness of the sod peat. Use a pressure regulator to ensure your PSI is consistent; misting is a sign of high pressure and leads to water loss through evaporation, which is a death sentence for new sod.
| Amendment Type | Function | Application Rate (per 1k sq ft) |
|---|---|---|
| Pelletized Lime | Raises pH in acidic soils | 20-50 lbs (based on test) |
| Elemental Sulfur | Lowers pH in alkaline soils | 5-10 lbs |
| Starter Fertilizer (10-20-10) | Encourages root development | 5 lbs |
| Humic Acid | Increases nutrient uptake | Variable (liquid/granular) |
The Step-by-Step Soil Prep Checklist
- Clear Site: Remove old grass using a sod cutter set to 1-inch depth.
- Rough Grade: Slope soil away from foundations at a 2% minimum pitch.
- Soil Amendment: Till in organic compost or topsoil to improve soil structure.
- Finish Grade: Use a landscape rake to remove small stones and create a smooth surface.
- Pre-Planting Hydration: Dampen the soil 24 hours before sod install to lower ground temperature.
- Starter Fertilizer: Apply a phosphorus-heavy blend to the bare soil surface.
“A retaining wall doesn’t fail because of the stone; it fails because of the water trapped behind it.” – Hardscape Engineering Axiom
While the quote refers to walls, the principle applies to lawns. Hydrostatic pressure in the soil must be managed. If your site has a low spot, install a French drain or a dry creek bed before laying sod. No amount of soil prep will save grass that is perpetually submerged. It will rot. Deep, infrequent watering is the goal post-installation, but the soil must be capable of holding that moisture without becoming an anaerobic swamp. You want the roots to chase the water down 6 inches into the earth. If you water for 5 minutes every day, the roots stay in the top half-inch. When the first heatwave hits, your lawn will cook. Don’t skip the deep soak.
Final Leveling and Compaction
The last step is the most overlooked: the weighted roller. A common mistake is leaving the soil too fluffy. When you walk on it and leave a footprint deeper than a 1/4 inch, it’s too soft. Use a water-filled roller to firm the surface. The goal is consistent density. If one area is softer than another, the sod will settle unevenly, creating a bumpy lawn that is impossible to mow without scalping. The surface should be firm enough that a 200-pound man leaves only a faint impression. This ensures 100% root-to-soil contact the moment the sod is laid. Air pockets are the enemy of sod installation. If there is air between the root and the soil, the root dies. It is that simple. Eliminate the air, ensure the NPK balance is right, and your sod will take hold in half the time of a ‘mow-and-blow’ hack job.