
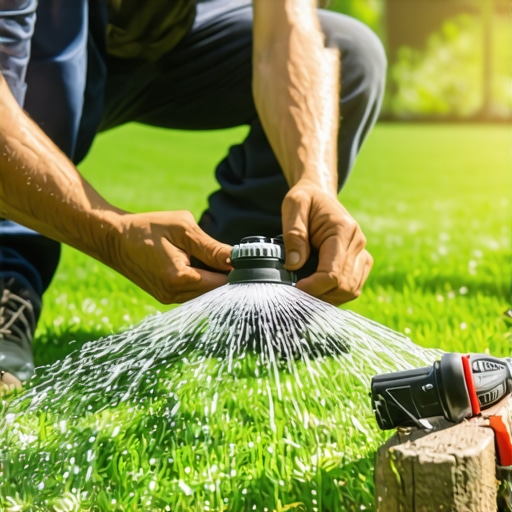
How to Fix a Leaky Sprinkler Head in 5 Minutes (And Why Most DIYers Fail)
The squish under your boot at 6:00 AM is a warning. It is the sound of your utility bill climbing and your expensive Kentucky Bluegrass sod drowning in an anaerobic grave. When you see a puddle forming around a head, or water bubbling up through the turf like a miniature geyser, you are witnessing a failure of hydraulic containment. Irrigation is not just about moving water; it is about controlling 30 to 80 PSI of pressure within a fragile network of PVC and ABS plastic. Ignoring a leak leads to more than a wet foot. It causes soil compaction, nitrogen leaching, and the eventual collapse of your lawn’s root structure. It will rot. Don’t skip the diagnosis phase. If you do not understand why the head failed, you are just throwing money into a mud hole.
The Visual Autopsy: Identifying Irrigation Failure
To identify a leaky sprinkler head, you must observe the zone while it is active and immediately after it shuts off to distinguish between cracked housings, worn riser seals, or low head drainage. Visual indicators include localized moss growth, salt deposits on the plastic, or a head that fails to fully retract. I always drill into my new crew members: if you don’t fix the soil grading first, every plant you put in the ground is just expensive compost. I saw this last week on a sod install in a high-clay area. The previous contractor ignored a weeping valve. By the time I arrived, the brand-new sod was floating on a 3 inch layer of gray, putrid mud because the water had nowhere to go. We had to excavate two tons of saturated muck before we could even address the faulty head. Irrigation is civil engineering on a micro scale. You must respect the grade.
“Low head drainage occurs when the system is installed on a slope, allowing water to drain out of the lowest head after the valve closes, often misidentified as a leak.” – University of Florida IFAS Extension
The Science of the Leak: Pressure vs. Debris
The root cause of a leaking sprinkler head is typically mechanical friction at the riser seal or hydrostatic pressure forcing water through a compromised O-ring. When sand or silt enters the head during a yard cleanup or from a main line break, it acts like sandpaper against the wiper seal. This friction destroys the seal’s ability to create a watertight interface when the riser pops up. If the leak is constant even when the system is off, you aren’t looking at a head problem; you are looking at a weeping valve. The valve diaphragm is likely fouled with a pebble or a sliver of PVC glue. This prevents the valve from seating, keeping the lateral line constantly pressurized. Check the PSI. Most residential heads are rated for 30 to 45 PSI. If your street pressure is hitting 90 PSI without a regulator, you are literally blowing the guts out of your equipment.
How do I stop a sprinkler from leaking when it is off?
To stop a sprinkler leak when the system is off, you must first determine if the issue is low head drainage or a leaking zone valve. If it stops after a few minutes, it is gravity draining the pipe. If it flows indefinitely, the solenoid valve requires a diaphragm replacement. Clean the valve seat meticulously. A single grain of sand will cause a failure.
| Symptom | Probable Cause | Required Action |
|---|---|---|
| Water bubbling at base | Cracked Body or Loose Connection | Excavate and Replace Housing |
| Mist/Fogging at Head | Excessive System Pressure | Install Pressure Regulator |
| Steady flow when OFF | Faulty Zone Valve Diaphragm | Rebuild or Replace Valve |
| Dribbling at Riser | Worn Wiper Seal | Replace Head Internal Assembly |
The 5-Minute Remediation: Step-by-Step Fix
The process for fixing a leaky sprinkler head involves unscrewing the cap, cleaning the internal filter, and replacing the riser assembly if the wiper seal is compromised. Most modern heads, like the Hunter PGP or Rain Bird 5000, allow you to swap the internals without digging up the entire body. This is a crucial distinction. Unless the outer ABS plastic shell is cracked, leave it in the ground. Digging risks hitting the lateral line or introducing more dirt into the system. Use a pair of soft-grip pliers to unscrew the cap. Be careful not to let dirt fall into the open body. Pull the riser assembly out. Look at the seal. If it’s flattened or torn, it’s done. Drop in a new assembly, screw the cap back on tight, and test the zone. It is that simple. Don’t over-tighten. Hand-tight plus a quarter turn is usually enough to seat the O-ring.
- Turn off the water: Ensure the controller is off or the main irrigation shut-off is closed.
- Clear the area: Use a small trowel to remove dirt from around the cap to prevent contamination.
- Extract the guts: Unscrew the top and pull the spring-loaded riser out.
- Inspect the filter: Often, a “leak” is just a clogged filter causing backpressure.
- Replace and Flush: Install the new assembly but run the zone for 30 seconds without the nozzle to flush out debris.
“A retaining wall doesn’t fail because of the stone; it fails because of the water trapped behind it, much like an irrigation leak undermines the structural integrity of your landscape’s base layers.” – Hardscape Engineering Axiom
Do I need to dig up the whole pipe to fix a head?
You do not need to dig up the pipe to fix most sprinkler leaks unless the swing pipe or funny pipe fitting at the base of the head is fractured. Most irrigation repairs are localized to the riser assembly or the nozzle, which can be accessed from the surface. Use a donut-shaped protector to prevent mower damage in the future. This saves the housing from impact stress.
Preventative Maintenance: The Professional Schedule
The longevity of an irrigation system depends on annual pressure testing, seasonal nozzle cleaning, and proper winterization to prevent freeze-thaw cracking of the manifolds. In areas with hard water, calcium carbonate buildup is the silent killer. It seizes the gears in rotors and calcifies the seals. Once a year, you should pull a few heads and soak them in a mild acid solution or simply replace the nozzles. Also, check your spray patterns. If a head is leaning, it is putting uneven stress on the riser. Straighten it. Use a tamper to compact the soil around the head so it doesn’t move. Irrigation isn’t a ‘set it and forget it’ system. It is a living, breathing mechanical network. Treat it like one. If you ignore the small leaks, you will eventually be paying me $10,000 for a full system overhaul. Your choice.