
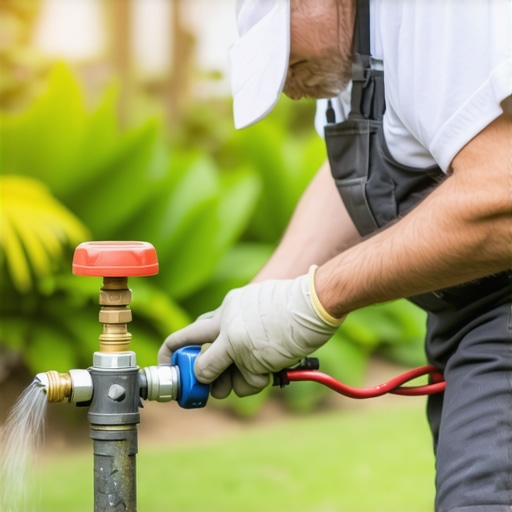
Diagnosing the Silent Failure of an Irrigation Solenoid
To identify a broken sprinkler solenoid, use a multimeter to test the electrical resistance measured in ohms at the controller terminal; a reading of zero indicates a short, while infinity or an open loop confirms a failed electromagnetic coil that cannot actuate the valve plunger. Most 24VAC residential solenoids should register between 20 and 60 ohms to operate correctly under standard static water pressure. A homeowner called me in a panic last August after they completely torched their front lawn—four thousand square feet of premium Kentucky Bluegrass—by applying a high-nitrogen quick-release fertilizer right before a heatwave. They assumed the irrigation system was doing its job. It wasn’t. One single broken solenoid on the primary zone had failed, leaving the new sod install bone dry for ten days. By the time I arrived, the soil microbiology was cooked and the grass was beyond the permanent wilting point. It was a $5,000 mistake caused by a $25 part. This is the reality of irrigation maintenance. You cannot trust the timer; you must trust the resistance readings and the actual flow of water. Most hacks will tell you to just replace the whole valve. That is a waste of time and labor. If the valve body is intact and the diaphragm isn’t torn, you only need to swap the solenoid. It is a five-minute fix that requires zero pipe cutting. You are dealing with an electromagnet that pulls a stainless steel plunger up to allow pilot water to escape from the top of the diaphragm, which then allows the main line pressure to lift the diaphragm and start the zone. When that coil burns out, the physics of the valve stop working. Don’t overcomplicate it. Test the wires, check the wire nuts for corrosion, and replace the coil if the ohms are off.
“A properly functioning solenoid is the bridge between the controller’s low-voltage signal and the hydraulic force required to move a valve diaphragm.” – Principles of Irrigation, 3rd Edition
The Physics of Solenoid Failure and Electrical Resistance
The solenoid is the most vulnerable component of your landscaping infrastructure because it is an electrical component buried in a damp, high-pressure environment. It sits in a valve box that often floods during yard cleanup or heavy rains. This leads to electrolysis at the wire connections if they aren’t protected by waterproof grease caps. A solenoid fails in one of three ways: electrical burnout, mechanical seizing, or plunger obstruction. Electrical burnout happens when a power surge or lightning strike melts the internal copper windings. Mechanical seizing occurs when calcium deposits or mineral scale from hard water coat the plunger. Plunger obstruction is common after a main line break when silt and rocks enter the system and get jammed in the plunger seat. You must understand that the irrigation controller sends 24 volts of alternating current to the valve. This current creates a magnetic field. If the coil is damaged, that field never forms. You can hear a good solenoid. It makes a distinct ‘click’ or ‘thump’ when activated. If you hear a loud buzzing, the solenoid is struggling to pull the plunger against the hydrostatic pressure, usually due to low voltage or a weak coil. If you hear nothing, the electrical path is broken. Check your common wire first. If multiple zones are down, it’s a common wire issue. If only one zone is dead, it’s the hot wire or the solenoid itself. It is a binary reality. It works or it doesn’t. There is no middle ground in hydraulic control.
| Condition | Multimeter Reading (Ohms) | Status | Required Action |
|---|---|---|---|
| Healthy Coil | 20 – 60 Ohms | Functional | None – Check Diaphragm |
| Short Circuit | 0 – 10 Ohms | Failed | Replace Solenoid Immediately |
| Open Circuit | Over 100 / OL | Broken Wire | Check Connections or Replace Coil |
| High Resistance | 80 – 150 Ohms | Failing | Replace before Heatwave |
How much does it cost to replace an irrigation solenoid?
The material cost for a replacement irrigation solenoid typically ranges from $15 to $35 depending on the brand, such as Rain Bird, Hunter, or Toro; however, if you hire a licensed irrigator, the total service call fee will likely range from $150 to $250 including diagnostic labor and system pressure testing. Buying the cheap generic versions from big-box stores is a fool’s errand. Those off-brand solenoids often have thinner copper windings and inferior UV-rated plastic. They will fail in two seasons. Spend the extra ten dollars on the commercial-grade version. Your sod install depends on it. I have seen entire landscaping projects ruined because a contractor used ‘contractor grade’ valves that were actually just liquidated stock with old, brittle seals. Always check the date code on the solenoid housing. If it is more than five years old, it is old stock and should be avoided.
Step-by-Step Restoration of a Non-Functional Valve
Before you touch the valve, shut off the water at the backflow preventer or the main isolation valve. If you unscrew a solenoid under 60 PSI, you are going to get a face full of water and potentially lose the internal plunger spring in the mud. Once the pressure is relieved, disconnect the two wires. Unscrew the old solenoid by turning it counter-clockwise. When you pull it out, inspect the plunger. If the rubber tip is pitted or deformed, that was your problem. It couldn’t seal the port. Look down into the solenoid seat on the valve. Use a clean rag to wipe out any grit. Even a single grain of sand will prevent the new solenoid from seating properly, leading to a weeping valve that creates a muddy hole in your yard. This is where most DIY attempts fail. They put a clean part into a dirty hole. Flushing the valve is mandatory. Turn the water back on slightly while the solenoid is off to blow out any debris from the internal ports. Just a two-second burst is enough. Then, thread the new solenoid in hand-tight. Do not use pliers. You will crack the plastic housing. Reconnect the wires using UL-listed waterproof connectors. If you use standard wire nuts, the copper will oxidize within six months, and you’ll be right back where you started. Corrosion increases resistance, and high resistance kills solenoids. It is a vicious cycle of electrical failure.
- Shut off the water at the main source to prevent hydraulic surge.
- Test the coil with an Ohmmeter to confirm failure.
- Unscrew the solenoid and check the plunger spring.
- Clean the valve seat of all mineral deposits and silt.
- Hand-tighten the new component to avoid thread stripping.
- Use waterproof wire nuts to seal the electrical splice.
- Test the zone manually from the controller to verify flow.
“A retaining wall doesn’t fail because of the stone; it fails because of the water trapped behind it.” – Hardscape Engineering Axiom
What happens if I install the wrong brand of solenoid?
Installing an incompatible solenoid brand on an irrigation valve will lead to thread mismatch or plunger depth issues, resulting in a valve that either constantly leaks or fails to open; always match the solenoid manufacturer and model number to the specific valve body to ensure a proper hermetic seal and magnetic stroke. Even if the threads feel similar, the pitch is often different. Forcing a Hunter solenoid into a Rain Bird valve will cross-thread the bonnet, and then you’ll be digging up the whole valve in the clay soil. That is a four-hour job that could have been avoided. If you can’t find the model number, take a photo and go to a professional irrigation supply house, not a hardware store. The guys at the counter know the difference between a DV series and a PGA series valve. Accuracy matters here. The tolerances inside these valves are measured in thousandths of an inch. A plunger that is 1/16th of an inch too short will never open the valve. A plunger that is too long will never let it close. Either way, your landscaping suffers. Professional yard cleanup starts with a functional irrigation system. If the water doesn’t work, nothing else does.