
The Science of Soil Prep: Why Most Sod Jobs Fail
Prepping clay soil for sod requires more than a rake and a strong back; it demands an understanding of soil physics and the mechanical integration of organic amendments to prevent the dreaded bathtub effect. If you lay sod directly onto compacted clay, you are effectively placing a living organism on a concrete slab. The roots will refuse to penetrate the high-density subsoil, leading to a shallow root system that dies during the first heat wave. This isn’t just landscaping; it is biological engineering.
The Apprentice Lesson: Soil Grading is Non-Negotiable
I always drill into my new crew members: if you don’t fix the soil grading and chemistry first, every piece of sod you put in the ground is just expensive compost. Last year, I watched a ‘mow-and-blow’ contractor throw $8,000 worth of premium Zoysia over un-tilled Georgia red clay. Two months later, the homeowner called me because their yard was a swamp. The water couldn’t penetrate the clay, so it sat at the root interface and rotted the grass from the bottom up. We had to rip it all out. Don’t be that guy. Fix the soil, or don’t bother starting.
“Clay soils are composed of microscopic, plate-like particles that stack tightly, creating high bulk density and low gas exchange.” – Horticultural Science Extension
What Is the Tilling Trick for Clay Soil?
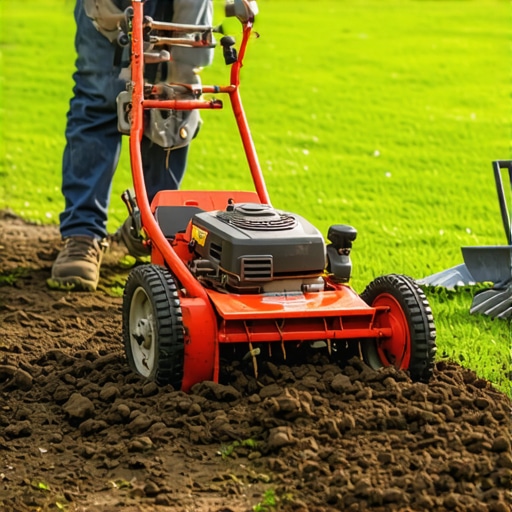
The Tilling Trick involves deep mechanical fracturing of the clay subsoil to a depth of 6 inches while simultaneously incorporating 4 inches of high-quality organic matter to create a transitional root zone. This process changes the soil structure from a massive, anaerobic block into a friable, oxygen-rich environment. By tilling the amendments into the native clay, you eliminate the hard boundary layer that prevents roots from chasing water deep into the ground. It is the only way to ensure long-term survival in heavy soils.
| Material | Function in Clay | Application Rate |
|---|---|---|
| Organic Compost | Increases pore space and microbial activity | 4 Cubic Yards per 1k sq ft |
| Gypsum | Displaces sodium to improve flocculation | 40 lbs per 1k sq ft |
| Pelletized Lime | Balances pH (Target 6.5) | Per soil test results |
| Starter Fertilizer | High phosphorus for root initiation | 5 lbs per 1k sq ft |
The Yard Cleanup and Rough Grade Phase
Before the tiller ever touches the dirt, you need a total yard cleanup. This means removing every rock larger than a golf ball and stripping the existing vegetation. I don’t mean just mowing it short. I mean using a sod cutter to remove the old thatch and weed seeds. Once the slate is clean, check your rough grade. You need at least a 2% slope away from the house foundation to manage hydrostatic pressure and surface runoff. If you skip the rough grade, you will have standing water, and standing water is the death knell for new sod.
How deep should I till clay soil for sod?
You must till to a depth of at least 6 to 8 inches to effectively break up the compaction layer that forms from years of foot traffic or construction equipment. Tilling shallower than 4 inches often results in a ‘perched water table,’ where the top layer stays saturated while the roots never reach the moisture below. Use a rear-tine tiller for this job; front-tine models will just bounce off the clay and leave your shoulders screaming. You want the soil to have the consistency of coarse brown sugar when you are finished.
- Call 811 to mark underground utility lines before tilling.
- Apply amendments (compost, gypsum) on top of the soil before the first pass.
- Make at least two passes: one north-to-south, one east-to-west.
- Check soil moisture; if the clay sticks to the tines in clumps, it is too wet.
- Remove any large clay clods that don’t break down during tilling.
“Successful sod establishment on heavy clay requires a transition zone where organic matter is mechanically integrated into the native subsoil to avoid root-layer interface failure.” – Agronomy Manual Standards
Irrigation and the Final Firming Pass
After tilling and amending, your soil will be too fluffy. If you lay sod on top of it now, you’ll have a lumpy mess within six months. You need to firm the soil using a water-filled roller. The goal is to settle the earth so that when you walk on it, you leave a footprint no deeper than a quarter-inch. This is also the time to check your irrigation coverage. Move your heads to the proper height to match the new soil level. A common mistake is leaving heads too low, resulting in ‘shadowing’ where the grass blocks the water spray, leading to dry spots.
What are the best amendments for heavy clay soil?
The best amendments for heavy clay are aged leaf mold, composted manure, or fine pine bark fines, as these provide the carbon necessary to kickstart soil microbiology. Avoid adding sand to clay unless you are prepared to add it in massive quantities (over 70% by volume); otherwise, you are simply creating a low-grade form of concrete. Focus on organic matter that will continue to break down over time, creating permanent macropores for air and water movement. This is the secret to a lawn that stays green in July without a $500 water bill.
Sod Install: The Finishing Touch
When the sod arrives, it is a race against the clock. Sod is a living, breathing product that generates its own heat through respiration. If it sits on the pallet for more than 24 hours, the center will cook itself. Lay the pieces in a staggered brick pattern to minimize long seams where drying occurs. Ensure each edge is tucked tightly against the next. No gaps. No overlapping. Once laid, roll the sod again to ensure 100% root-to-soil contact. If there is an air pocket, the roots will desiccate and die. It is that simple. Water immediately until the soil underneath is saturated. This is the only time you want the clay to be muddy.