Why Your New Sod is Turning Brown and How to Stop It: A Forensic Guide to Saving Your Turf Investment
The grass feels like dry straw under your palm. You pull on a corner and it lifts up like a cheap rug, showing gray, shriveled roots that haven’t even poked into the native soil. There is a specific smell to dying sod: a sour mix of anaerobic rot and dusty desiccation. It is the smell of a four-figure investment turning into expensive compost. When a client calls me to complain that their new lawn is failing, I don’t look at the blades first. I look at the dirt. I always drill into my new crew members: if you don’t fix the soil grading and ensure total root-to-soil contact, every plant you put in the ground is just a slow-motion funeral. I’ve seen homeowners spend five thousand dollars on premium Kentucky Bluegrass only to watch it go dormant and then die because they skipped the heavy roller or didn’t understand the hydrostatic needs of a cut root system. You cannot just slap sod onto hard-packed clay and expect it to thrive. It will rot. It will fail. You have to understand the biology of the transition.
The Primary Causes of New Sod Browning
Sod browning is typically caused by desiccation, lack of root-to-soil contact, or improper soil chemistry. When the rhizosphere cannot access moisture due to air pockets or hydrophobic soil, the turf blades enter a state of stress, turning yellow and then brittle brown to protect the crown. Rapid intervention is mandatory to prevent permanent crown death.
The most common culprit is the air gap. If the sod is not compressed against the tilled soil, the roots are hanging in a void. Air is an insulator, but for a root, it is a death sentence. I have seen yards where the sod was laid beautifully like a puzzle, but the installer was too lazy to run a water-filled roller over the site. Within 48 hours, the edges curled. Once those edges curl, they lose moisture at triple the rate of the center. This is called the ‘wicking effect.’ You must eliminate the air. Don’t skip the roller. Another factor is the ‘nitrogen burn’ from over-eager homeowners. They see a little yellowing and immediately dump a high-nitrogen ‘starter’ fertilizer on a root system that can’t even process water yet. You are essentially salting the earth. You are dehydrating the plant from the inside out. Use a soil test before you add a single pellet of NPK. Most yards need phosphorus for root growth, not nitrogen for top-growth, during the first fourteen days.
“The establishment of turfgrass from sod requires immediate and consistent soil-to-root contact to facilitate water uptake during the critical first 72 hours.” – Penn State Center for Turfgrass Science
How long does it take for new sod to root?
In ideal conditions with a soil temperature between 55 and 75 degrees Fahrenheit, you should see white ‘staple’ roots beginning to penetrate the top half-inch of soil within 7 to 14 days. If you can still lift the sod easily after three weeks, your soil is either too compacted or your irrigation frequency is shallow and insufficient. Deep rooting requires the soil to be moist but not a swamp. Over-watering can be just as lethal as under-watering. When the soil is saturated for 24 hours a day, the pore spaces fill with water instead of oxygen. Roots need to breathe. Without oxygen, they turn black and slimy. This is Pythium blight territory. It is a death sentence for young turf.
| Sod Variety | Ideal Soil pH | Initial Water Frequency | Mowing Height (First Cut) |
|---|---|---|---|
| Kentucky Bluegrass | 6.0 to 7.0 | 3x Daily (Light) | 3.0 Inches |
| Tall Fescue | 5.5 to 7.0 | 2x Daily (Heavy) | 3.5 Inches |
| Bermuda Grass | 6.0 to 6.5 | 4x Daily (Mist) | 1.5 Inches |
| St. Augustine | 6.0 to 7.5 | 2x Daily (Moderate) | 3.0 Inches |
The Role of Irrigation and Drainage Logic
Irrigation for new sod must focus on maintaining a moist interface between the sod piece and the subsoil without creating anaerobic conditions. Most failures occur because of ‘localized dry spots’ where the irrigation heads don’t overlap properly, leading to 100 percent mortality in specific zones while others drown. You need head-to-head coverage.
I tell my clients to think of new sod as a patient in intensive care. It has had 90 percent of its root system chopped off by a sod cutter. It cannot go out and find water. You have to bring the water to it. But here is the catch: you have to taper off. If you keep the sod soaking wet for three weeks, the roots have no reason to grow downward. They will stay in the top inch of the sod mat. Then, when the first heat wave of July hits, the lawn will scorch because it has no depth. You have to force the roots to chase the moisture down. Deep, infrequent watering is the goal after the first ten days. Also, check your yard cleanup and grading. If you have standing water, your sod will develop ‘root rot’ faster than you can say ‘landscaping.’ I’ve seen entire pallets of sod turn to mush because the installer didn’t fix a low spot in the grade. Hydrostatic pressure builds up, the oxygen is pushed out, and the microbes that eat rotting organic matter move in.
“Poor drainage and anaerobic soil conditions often mirror the symptoms of drought, leading to rapid localized dry spots and eventual crown rot.” – Texas A&M AgriLife Extension
How much water does my new sod actually need?
For the first 10 days, you should provide roughly 0.25 inches of water per session, three times a day. Aim for 6:00 AM, 11:00 AM, and 3:00 PM. Never water at night. Night watering is a formal invitation for fungus to destroy your lawn. After day 10, move to once a day, but double the duration. By day 21, you should be watering three times a week, providing a full inch of water total. Use a rain gauge or a tuna can to measure the output. Don’t guess. Guessing is how you kill grass.
The Critical 72-Hour Sod Survival Checklist
- Immediate Rolling: Use a water-filled roller to press the sod into the soil within 2 hours of installation.
- Edge Sealing: Ensure all seams are tight. Gaps act like chimneys, pulling moisture out of the root zone.
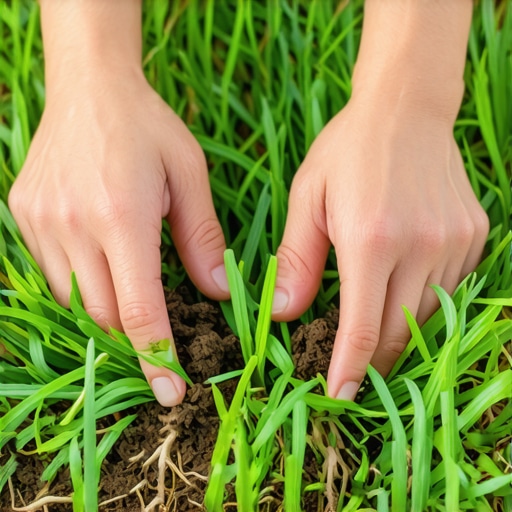
- Moisture Check: Peel back a corner in the sunniest part of the yard. The soil underneath should be damp, not muddy.
- No Foot Traffic: Keep pets and people off the turf for 14 days to prevent soil compaction and root shearing.
- Observe the Color: Blue-gray tint means the grass is thirsty. Yellow means it is drowning or lacks nitrogen. Brittle brown means it is likely dead.
Can you save brown sod?
If the crown—the white, fleshy part at the base of the blades—is still firm and green, the plant is alive. If the crown is shriveled and brown, it is gone. To save it, you must perform a ‘deep soak’ and then immediately top-dress with a thin layer of organic compost to hold moisture. But if the sod has been bone-dry for more than 48 hours in 90-degree heat, you are better off replacing those specific rolls. Don’t waste water on a corpse. Rip it out and find the cause. Was the irrigation head clogged? Was there a rock under the sod preventing root contact? Diagnose before you replace.
Landscaping is not a ‘set it and forget it’ endeavor. It is a biological contract. If you fulfill your end by providing the correct sub-base and moisture levels, the biology will do the rest. If you hire a hack who throws sod over old weeds and hard clay, you are just buying a very expensive, temporary green carpet. Take the time to do the yard cleanup. Fix the irrigation. Test the soil. It is easier to do it right once than to do it twice. Your back and your wallet will thank you. Keep your blades sharp when you finally do mow. Dull blades tear the grass, creating wounds that invite disease. Wait until the grass is 4 inches tall, then take it down to 3. Never remove more than one-third of the blade at once. This is the law of the lawn.
Comments are closed.