The Forensic Autopsy of a Dying Lawn Section
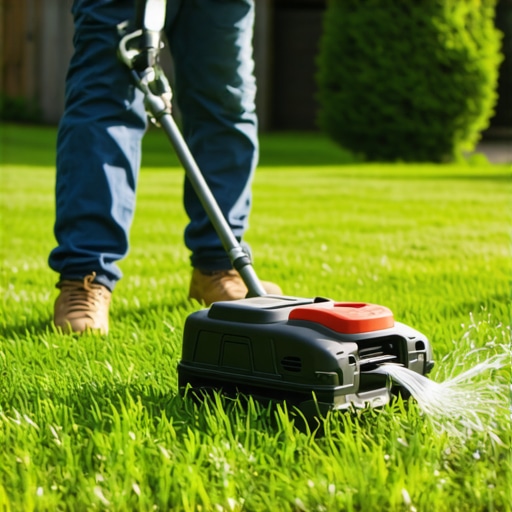
Finding a buried sprinkler head is not about luck; it is about understanding the mechanical failures of a landscape that has been neglected or improperly installed. I always drill into my new crew members: if you don’t fix the soil grading first, every plant you put in the ground is just expensive compost. The same logic applies to irrigation. When a customer calls because they have a ‘mystery brown patch’ in a sea of green, 90 percent of the time, it is a head that has been swallowed by the thatch layer or buried under an inch of sediment from poor drainage. You see the symptom: scorched Kentucky Bluegrass or a boggy spot where the water is bubbling underground but not popping up. The cause is usually a lack of mechanical edging or a contractor who laid sod directly over a riser without cutting out the hole. Don’t be the guy who starts hacking at the dirt with a shovel. You will slice a lateral line or puncture a swing pipe, turning a ten minute fix into a three hour excavation. Stop guessing. Start measuring. [IMAGE_PLACEHOLDER]
The Systematic Search for Hidden Irrigation Components
To find a buried sprinkler head without digging, you must utilize **inductive tracing**, **solenoid chatter devices**, or **mechanical probing** to locate the **hard plastic casing** or **riser assembly** beneath the soil. Identifying the **lateral line path** from the valve box allows you to pinpoint the **hidden nozzle** without destroying the **turfgrass root system** or the **polyethylene piping**. It is a process of elimination based on hydraulic physics.
“Proper irrigation maintenance requires an understanding of both the hydraulic pressure within the lateral lines and the biological needs of the turfgrass root zone.” – Agronomy Manual for Professional Turf Managers
How do I find a sprinkler head that won’t pop up?
Start at the last known working head on the zone. Irrigation systems are typically plumbed in a series or a T-pattern using 1-inch or 3/4-inch PVC or poly pipe. Most lateral lines run in a relatively straight line between heads. Use a 1/4-inch steel probe rod. Gently push it into the soil every 12 inches along the projected path. You are looking for the distinct ‘clack’ of steel hitting high-density polyethylene (HDPE). If the soil is dry and compacted, it will resist the probe. Do this after a light rain or a brief manual cycle of the zone to soften the earth. Remember, the head is usually within 6 to 8 inches of the sidewalk or curb if it is a perimeter zone. If you hit something hard, don’t jam the probe. You could crack the cap of a Hunter PGP or a Rain Bird 5000. Feel for the diameter. A standard rotor head is about 2 to 3 inches wide. Once you find it, use a hand trowel to clear only the grass and thatch. Do not disturb the soil base. If the head is too deep, you need to install a riser extender. It will rot if you leave it buried.
Can a metal detector find plastic sprinkler heads?
Many modern residential heads are 100 percent plastic, meaning a standard metal detector won’t beep. However, many professional-grade rotors contain a stainless steel spring or a metal screw for radius adjustment. High-end locators can pick up these small metal signatures. If you are dealing with an old system, you might get lucky with brass heads. If the detector fails, use a ‘chatter’ tool. This device connects to the solenoid at the valve box and causes the plunger to vibrate rapidly. You can then use a stethoscope or even a piece of rebar held to your ear to listen for the buzzing sound in the ground. It is precise. It is effective. It saves your back.
“A retaining wall doesn’t fail because of the stone; it fails because of the water trapped behind it.” – Hardscape Engineering Axiom
While this quote refers to walls, the principle of hydrostatic pressure applies here. If a head is buried, the water pressure builds up at the blockage, often causing a ‘weeping’ effect where the soil stays saturated long after the zone is off. Look for the mud.
Comparison of Irrigation Locating Methods
| Method | Equipment Needed | Accuracy | Best Use Case |
|---|---|---|---|
| Mechanical Probing | Steel Rod | High | Single lost heads in soft soil |
| Valve Chatter | Solenoid Activator | Excellent | Finding buried valves and manifolds |
| Inductive Tracing | Wire Locator | Very High | Locating broken wires or deep lines |
| Visual Triangulation | Tape Measure | Moderate | Systems with existing blueprints |
Checklist for Post-Find Restoration
- Check the nozzle for grit and sediment infiltration.
- Inspect the internal filter screen; it is likely clogged if the head was buried.
- Install a concrete or plastic donut around the head to prevent future overgrowth.
- Verify the pop-up height; the nozzle must clear the grass blades by at least 2 inches.
- Check the swing pipe for leaks caused by soil compaction or vehicle traffic.
Once you have located the head, you must address the reason it was lost. Soil settles. Thatch builds up. In many cases, the yard was top-dressed with sand or compost, and the heads weren’t raised to match the new grade. This is a common failure in yard cleanup projects. If you are doing a sod install, you must flag every single head first. I tell my crew: if I don’t see a flag, I don’t see a job. Every head should be adjusted so the top of the cap is flush with the soil surface, not the top of the grass. This prevents mower damage while ensuring the water hits the target instead of the dirt. If the head is leaning, the spray pattern will be distorted, leading to uneven distribution uniformity. This is basic civil engineering on a micro scale. Don’t skip the leveling step. Use a compaction plate around the head to ensure it doesn’t sink again after the first heavy rain. Your lawn depends on this 50-PSI system operating without obstruction. Get it right the first time.
Comments are closed.