
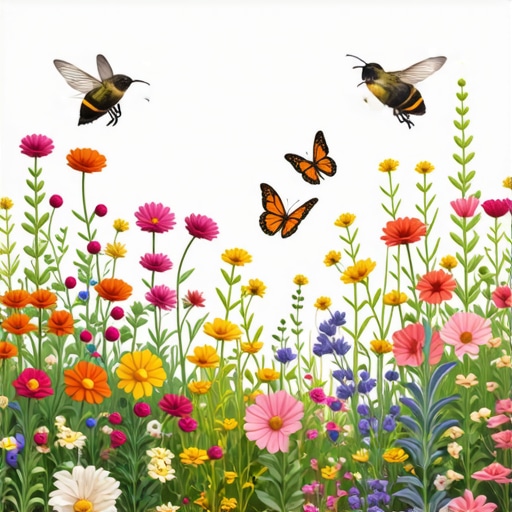
Designing a 2026 Pollinator Garden in 5 Steps: A Professional Guide to High-Functioning Landscapes
Most residential yards are ecological dead zones. I have spent 20 years looking at compacted clay and chemical-dependent turf, and frankly, the industry needs a wake-up call. Designing a pollinator garden is not about scattering a few cheap seeds from a bag; it is a matter of biological engineering. To build a system that survives until 2026 and beyond, you have to look at the soil, the hydrology, and the specific insect-plant relationships that govern your local biome. I always drill into my new crew members: if you do not fix the soil grading first, every plant you put in the ground is just expensive compost. I once saw an apprentice install five hundred dollars worth of native perennials into a low spot without checking the percolation. The first rain turned that garden into a swamp, and the root systems suffocated within forty-eight hours because they could not access oxygen in the waterlogged soil. We do things differently. We build from the ground up.
Step 1: Site Assessment and Sub-Grade Grading Analysis
Site assessment for a pollinator garden requires a professional evaluation of sun exposure, soil pH, and drainage patterns to ensure native plants thrive. Mastering grading prevents hydrostatic pressure issues and ensures that stormwater runoff is directed away from structural foundations and into the root zone of your landscape. Do not skip the 811 utility mark-out before you even think about swinging a pickaxe.
We start by measuring the bulk density of the soil. If your yard has a bulk density higher than 1.6 grams per cubic centimeter, your plants are essentially growing in concrete. You need to fracture that compaction. We look at the O-horizon and A-horizon of the soil profile. Most modern developments have had their topsoil stripped and replaced with two inches of low-grade fill. You cannot grow a high-performance garden on trash soil.
“The success of any perennial system depends entirely on the pore space within the soil matrix and the ability of the rhizosphere to exchange gases.” – Agronomy Manual for Sustainable Landscapes
We use laser levels to check the pitch of the yard. Every garden bed should slope away from the house at a minimum of two percent. This prevents localized flooding that leads to fungal pathogens in the crown of your native plants. If the grading is off, the landscaping project is doomed before the first shovel hits the dirt.
Step 2: Heavy-Duty Yard Cleanup and Invasive Eradication
Yard cleanup for a new pollinator garden involves the systematic removal of invasive species and turfgrass through methods like solarization or sheet mulching. Eliminating the weed seed bank and rhizomatous grasses is essential for establishing a low-maintenance landscape that does not require constant chemical intervention or manual weeding.
You have to be ruthless here. If you leave a single fragment of Bermuda grass or creeping Charlie, it will colonize your new garden in a single season. I despise the use of broad-spectrum herbicides, so we often utilize heavy-duty 6-mil black plastic for solarization or we perform a sod install in reverse by stripping the top three inches of turf with a motorized sod cutter. This is physical work. We are not just raking leaves; we are clearing the biological slate. [IMAGE_PLACEHOLDER_1] After the clearing is done, we inspect the subsoil for remnants of old construction debris. I have found buried bricks, sheets of plywood, and even old oil tanks under what looked like a normal lawn. Clean the site until you have nothing but raw, workable earth. This is the only way to ensure the success of the 2026 bloom cycle.
How much modified gravel do I need for a garden path base?
For a standard three-inch depth base for garden paths, you need approximately one ton of 2A modified gravel per 80 square feet. Compaction is non-negotiable. If you do not use a plate compactor, the path will shift and create trip hazards within two years. We aim for 95 percent Proctor density on all hardscape bases.
Step 3: Engineering the Irrigation and Hydrology System
Irrigation for a pollinator garden must be designed using hydrozoning principles, grouping plants by water requirements to maximize efficiency. Utilizing drip irrigation with pressure-compensating emitters ensures that native species receive deep, infrequent watering that encourages taproot development and drought resilience in the face of changing climates.
Forget those oscillating sprinklers that waste half the water to evaporation. We install Netafim tech or similar professional-grade drip lines. These lines sit under the mulch and deliver water directly to the root flare. For a 2026-ready garden, you need an intelligent controller that adjusts for real-time weather data.
“Native pollinators evolved alongside specific floral morphologies; if you plant hybrids with double-petals, the bees cannot reach the nectaries.” – Penn State Extension Research Bulletin
We calibrate the system to deliver exactly one inch of water per week during the establishment phase. Once the natives are established, usually after the second year, we throttle the system back. The goal is to force the roots to chase the moisture down into the subsoil. This makes the plants much hardier during August heat waves. We also install rain sensors to ensure we are not watering during a storm. It is about precision, not volume.
Step 4: Selecting the 2026 Native Plant Palette
Selecting native plants for a pollinator garden requires a deep understanding of bloom sequences and host plant requirements for specialist bees and lepidoptera. Incorporating a variety of flower shapes and phenological stages ensures that forage is available from early spring through late autumn, supporting the entire ecosystem.
We focus on the “Powerhouse” plants. These are the species that support hundreds of different types of caterpillars and bees. Think Quercus (Oaks), Asclepias (Milkweed), and Solidago (Goldenrod). We avoid “cultivars” that have been bred for flashy colors at the expense of nectar quality. In 2026, the focus is on resilience. We choose plants that can handle the freeze-thaw cycles of our region.
| Plant Category | Benefit | Recommended Species |
|---|---|---|
| Host Plants | Supports Larvae | Asclepias tuberosa, Baptisia australis |
| Late Season Nectar | Migratory Fuel | Symphyotrichum novae-angliae, Solidago rigida |
| Early Spring Forage | Emergence Support | Mertensia virginica, Cercis canadensis |
| Structural Grasses | Nesting Habitats | Schizachyrium scoparium, Sporobolus heterolepis |
We stack the bloom sequence so there is never a gap in forage. If a bee emerges in late April and there is nothing blooming because you only planted summer flowers, that bee dies. We design for the full calendar year.
Step 5: Installation, Mulching, and Year-One Maintenance
The installation of a pollinator garden involves proper root flare exposure and the application of organic mulch to maintain soil moisture and suppress weed growth. Following a strict maintenance schedule during the first year is critical for root establishment and preventing the landscaping from being overtaken by opportunistic invasive species.
When we put a plant in the ground, we do not just dig a hole. We dig a crater twice the size of the root ball and scarify the edges. This prevents “pot-bound” growth where the roots just circle the hole. We never, ever build “mulch volcanoes.” Piling mulch against the bark of a woody plant will rot the cambium layer. It will kill the plant. We keep mulch two inches away from the stems. We use triple-shredded hardwood mulch, not that dyed red trash from the big-box stores. The dyed stuff contains chemicals that can inhibit the mycorrhizal fungi that your plants need to survive.
What is the best month to plant a pollinator garden?
The best months to plant are September and October. This allows the plants to focus on root development during the dormant season without the stress of summer heat. Spring planting is a secondary option, but it requires much more aggressive irrigation management to prevent sapling mortality during the first July heat spike.
Pollinator Garden Installation Checklist
- Verify 811 utility markings are complete and active.
- Perform a percolation test to confirm drainage rates (target 1-3 inches per hour).
- Remove all turfgrass and invasive rhizomes using mechanical or solarization methods.
- Install pressure-regulated drip irrigation lines with 12-inch emitter spacing.
- Plant native species at the correct depth, ensuring root flares are visible.
- Apply 2-3 inches of organic, undyed hardwood mulch.
- Set the irrigation controller for deep, infrequent cycles based on local evapotranspiration rates.
The first year is the hardest. You have to monitor for moisture levels every day. If the soil is dry two inches down, you water. If it is wet, you leave it alone. Do not over-fertilize. Native plants are adapted to local soil conditions; giving them too much nitrogen will result in leggy, weak growth that flops over and becomes susceptible to pests. You want tough plants. You want a garden that functions like a machine. It takes work, but by 2026, you will have an ecosystem that takes care of itself. No more mow-and-blow hacks. Just real biology in action.