
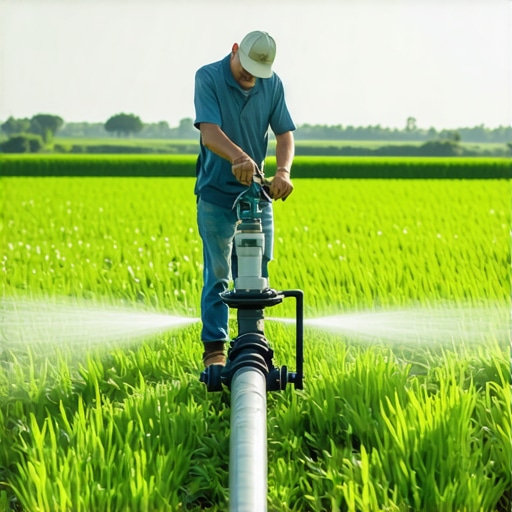
Identifying the Symptoms of Irrigation Pressure Loss
Irrigation pressure loss manifests as shrinking spray patterns, dry patches in high-sun areas, and clicking solenoids that fail to engage the diaphragm. These symptoms often signal a mechanical failure within the zone valve, typically caused by debris or a ruptured internal seal which prevents the system from maintaining the necessary 30 to 50 PSI for proper head pop-up. If your heads are barely weeping water, you are likely looking at a failed diaphragm rather than a broken main line. It is a common diagnostic error that leads to thousands in wasted excavation costs.
A homeowner called me in a panic after they completely torched their front lawn by applying a high-nitrogen synthetic fertilizer during a 95-degree heatwave. The problem was not just the fertilizer; it was their irrigation system. They thought the system was working because the timer was on. In reality, the zone valve had a hairline tear in the rubber diaphragm. While the solenoid clicked, the valve never fully opened. The water volume was so low it couldn’t reach the center of the lawn. The grass didn’t just dry out; it experienced a massive chemical burn because there was not enough water to dilute the nitrogen salts. I spent three days remediating $8,000 worth of dead sod all because of a $10 part they ignored. This is why I tell my crew that a lawn is only as good as the pressure behind the nozzle. If the physics of water delivery fails, the biology of the plant follows suit instantly.
“Irrigation distribution uniformity is compromised the moment system pressure deviates by more than 20% from the manufacturer’s recommended operating range for the specific nozzle orifice.” – ASABE Standards for Turfgrass Irrigation
The Anatomy of an Irrigation Failure: Diagnosing the $10 Culprit
When we talk about irrigation pressure in 2026, we are discussing the equilibrium between the static pressure from the city main and the dynamic pressure within your lateral lines. Most residential systems utilize a globe valve design. Inside this valve is a rubber diaphragm that separates the top chamber from the bottom. The solenoid, a small electromagnetic coil, controls the relief of pressure from that top chamber. When that diaphragm loses its elasticity or develops a microscopic tear, the pressure cannot equalize. This results in a valve that stays partially closed, choking the flow of water to your rotors or spray heads. This bottleneck destroys your distribution uniformity (DU). You see it as brown spots, but I see it as a failure of fluid mechanics.
How much pressure does a residential irrigation system need?
A standard residential irrigation system requires a minimum of 30 PSI at the furthest head to ensure proper spray patterns and head rotation. Most modern gear-driven rotors are designed to operate optimally between 45 and 55 PSI, while misting spray heads perform best at 30 PSI with pressure-regulated stems. High pressure over 60 PSI will cause misting and water drift, while low pressure leads to “doughnut” patterns where the grass near the head stays wet but everything else dies. We use a pitot tube and a pressure gauge to test this at the source and at the terminal head. If the source is 60 PSI and the head is 10 PSI, that valve is your primary suspect.
| Head Type | Optimal PSI | Failure Mode (Low Pressure) | Impact on Sod Install |
|---|---|---|---|
| Fixed Spray | 30 PSI | Incomplete arc coverage | Rapid wilting of leaf blades |
| Rotary Nozzle | 40-45 PSI | Failure to rotate/stall | Uneven moisture distribution |
| Drip Emitters | 15-25 PSI | Clogging/No output | Root zone desiccation |
| Impact Sprinkler | 50+ PSI | Lazy swing arms | Localized flooding at base |
The Forensic Autopsy: Why Valves Fail in 2026
Valves do not just die; they are murdered by environment and neglect. During a yard cleanup, if your crew isn’t careful around the valve box, they can introduce fine silts or organic matter into the system. Even a grain of sand lodged in the bleed port will prevent the valve from seating correctly. Furthermore, the chemical composition of your municipal water—specifically high calcium or magnesium levels—can lead to calcification on the valve seat. This creates a gap where water bypasses the seal, leading to constant leaks or a total loss of pressure when the zone is actually supposed to be running. It is a mechanical stalemate. The rubber diaphragm becomes brittle over time, especially in regions with high freeze-thaw cycles, losing its ability to flex. When that happens, the system is dead in the water.
Can I replace an irrigation valve myself?
Yes, replacing an irrigation valve is a straightforward task if you have basic plumbing tools and understand how to shut off the main water supply. The most efficient method is the “top-swap,” where you replace the internal components (diaphragm, spring, and solenoid) while leaving the heavy PVC housing in the ground. This avoids the need for cutting and solvent-welding pipe, which is where most DIYers create future leaks. However, if the valve body is cracked due to hydrostatic pressure or improper winterization, a full excavation and replumbing of the manifold will be necessary to restore system integrity.
“A retaining wall doesn’t fail because of the stone; it fails because of the water trapped behind it, much like an irrigation system fails not because of the pipe, but because of the pressure regulation at the valve.” – Hardscape Engineering Axiom
The Step-by-Step Valve Swap: A Foreman’s Guide
To execute a successful valve remediation, follow this technical protocol. First, locate the valve box. It is usually buried under two inches of mulch because some landscaper was too lazy to clear it. Clear the debris. Shut off the main water supply to the irrigation system. Do not skip this. If you open a valve under 60 PSI of static pressure, you will get a face full of silt and likely lose the internal spring in the grass. Unscrew the solenoid and the bonnet screws. In most modern Hunter or Rain Bird valves, these are captive screws, but keep a magnet handy anyway. Lift the bonnet and inspect the diaphragm. You are looking for a tear, a warp, or a piece of grit. Clean the valve seat with a clean rag. Any debris here will ruin the new seal. Install the new diaphragm, replace the spring, and tighten the bonnet in a cross-pattern to ensure even tension. Hand-tighten the solenoid. Turn the water back on slowly. If you hammer the system with a sudden surge of pressure, you risk blowing a fitting further down the line. It is a game of patience. Check the heads. You should see an immediate 15-20% increase in throw distance.
- Step 1: Main water shut-off and system depressurization.
- Step 2: Debris clearance around the manifold to prevent contamination.
- Step 3: Removal of the solenoid and bonnet assembly.
- Step 4: Inspection of the valve seat and discharge port.
- Step 5: Installation of the replacement diaphragm kit.
- Step 6: Re-assembly and torque check of bonnet screws.
- Step 7: Slow-repressurization and zone testing.
Long-term Maintenance: Preventing Systemic Yard Failure
Once you’ve swapped the valve, don’t think you’re done. A new sod install requires consistent, high-volume irrigation for the first 14 to 21 days. If that valve fails again, your investment is gone. I recommend a monthly system check. Manually trigger each zone. Look at the heads. Are they all popping up at the same time? If one zone is sluggish, that valve is already on its way out. Also, ensure your yard cleanup includes checking the valve boxes for root intrusion. I’ve seen willow roots wrap around a valve and crush the PVC housing. It’s a slow-motion disaster. Keep your boxes clear, your filters clean, and your PSI monitored. If you treat your irrigation like a precision engine rather than a garden hose, your landscape will survive the 2026 heat. Skip the cheap fixes. Buy a quality diaphragm. It will save your lawn. It is that simple.