
The Forensic Autopsy of a Dying Water Feature
Fixing pond leaks with sodium bentonite clay involves identifying structural failures and applying a high-swelling volcanic clay that expands 15-20 times its dry volume to create an impermeable seal. This method is the primary solution for landscaping professionals dealing with porous soils or damaged liners where traditional patches fail.
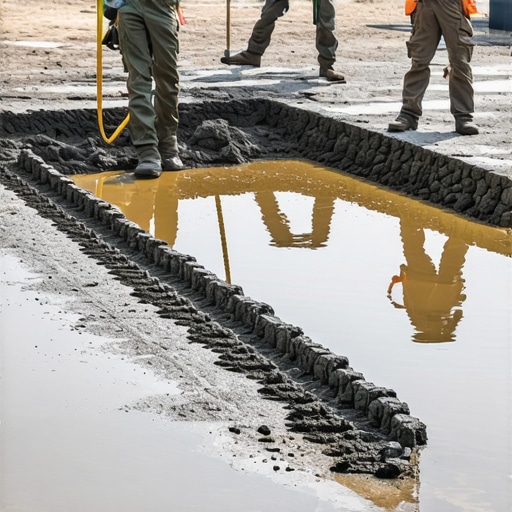
I recently got called out to tear up a $30,000 pond that was sinking because the previous contractor thought a standard EPDM liner over limestone was enough. Within eighteen months, the sharp edge of a subterranean rock pushed through the liner due to the weight of the water. The homeowner was losing six inches of water a day. Most people would just try to patch the hole, but once the subgrade is compromised, you have a structural emergency, not a cosmetic one. We stripped the stone, pulled the liner, and found a void the size of a manhole. That is when we brought in the sodium bentonite. It is not a quick fix; it is a geological intervention.
“A pond doesn’t fail because of the water; it fails because the soil structure cannot counteract the hydrostatic pressure exerted by the water column.” – Civil Engineering Soil Mechanics Manual
How to Tell if Your Pond is Leaking or Just Evaporating?
Before you spend a dime on sod install or heavy clay, you must perform a bucket test to rule out environmental factors. Fill a bucket with pond water and set it on a shelf in the pond so the water levels are equal. Wait 24 hours. If the pond level drops significantly more than the bucket level, you have a leak. It is physics. If they drop the same, it is just the sun and wind doing their work.
The Science of Sodium Bentonite Sealing
Sodium bentonite is a 200-mesh, high-swelling clay that acts as a natural sealant by creating a dense, colloidal gel when hydrated. In irrigation and pond management, it is valued for its ability to fill interstitial spaces in sandy or silty soils, achieving a hydraulic conductivity as low as 1 x 10^-7 cm/sec.
This material is often misunderstood. It is not just dirt. It is a mineral with a high cation exchange capacity (CEC). When the water hits it, the clay platelets expand. If they are confined by a layer of soil on top, they cannot expand upward, so they expand outward into every crack and crevice. It creates a gasket. If you don’t have enough confinement pressure, the bentonite will just turn into a slurry and wash away. You need at least 4 to 6 inches of soil cover. No exceptions. Don’t skip this.
How much sodium bentonite do I need for a pond?
The application rate depends entirely on your soil’s texture and the severity of the leak. In heavy clay soils, you might only need 2 pounds per square foot. In sandy or gravelly soils, you are looking at 5 to 8 pounds per square foot to ensure a total seal. Over-applying is better than under-applying. You do not want to do this twice.
| Soil Type | Bentonite (Lbs/Sq Ft) | Compaction Method | Success Rate |
|---|---|---|---|
| Heavy Clay | 2.0 – 3.0 | Plate Compactor | High |
| Silty Loam | 3.5 – 5.0 | Sheep’s Foot Roller | High |
| Sandy Soil | 6.0 – 8.0 | Heavy Excavator Track | Moderate-High |
| Fractured Rock | 10.0+ | Grouting/Slurry injection | Variable |
The Installation Protocol: The Blanket Method
The Blanket Method involves excavating the pond bottom, spreading a uniform layer of pure bentonite, and سپس covering it with a protective layer of native soil. This creates a hydrostatic barrier that prevents water from escaping into the subgrade, making it the gold standard for yard cleanup and long-term pond stability.
First, you have to clear the site. I mean really clear it. No roots, no sticks, no organic debris. If a tree root rots under your bentonite layer in three years, it will leave a hollow pipe that water will find. Once the pond is excavated to the subgrade, we use a drop spreader for uniform application. We are looking for a thickness of about 1/4 to 1/2 inch of pure clay. Then, we bring in the cover soil. This soil must be free of rocks larger than one inch. If you drop a big rock on your bentonite blanket, you just created a point of failure before you even turned on the hose.
Why is compaction the most important step?
Without compaction, you have a loose pile of dust. You need to hit at least 95% Standard Proctor density. We use a sheep’s foot roller for large acreage ponds and a vibrating plate compactor for residential landscaping features. You want that soil so tight that a screwdriver won’t penetrate it more than half an inch. If the soil is too dry, it won’t compact. If it’s too wet, it will pump and rut. You need that ‘sweet spot’ of moisture—just enough that it holds a shape when you squeeze it in your hand.
“Effective pond sealing with clay requires a minimum of 6 inches of compacted soil cover to provide the necessary confining pressure for bentonite hydration.” – USDA Natural Resources Conservation Service (NRCS)
- Step 1: Drain the pond and let the bottom dry until it can support machinery.
- Step 2: Remove all vegetation, large rocks, and organic muck.
- Step 3: Grade the area to a smooth finish, ensuring 3:1 slopes on the banks.
- Step 4: Apply sodium bentonite at the calculated rate based on soil tests.
- Step 5: Disk the clay into the top 4 inches of soil if using the mixed method.
- Step 6: Compact in 2-inch lifts using a mechanical tamper.
- Step 7: Add the protective soil layer and compact again.
- Step 8: Fill the pond slowly to prevent erosion of the new seal.
The Mixed-Blanket Hybrid: For High-Flow Areas
In areas where you have irrigation intake pipes or heavy aeration bubbles, the blanket method isn’t enough. The water movement will eventually scour the soil cover and expose the clay. In these zones, we mix the bentonite directly into the soil to a depth of 6 inches using a power tiller. It creates a thick, monolithic slab of low-permeability material. It’s essentially building a bowl out of un-fired brick. It will not move. It will rot if you don’t do it right, but if compacted, it is a permanent fix. Do not trust a contractor who says they can just ‘sprinkle it on the water.’ That is a myth for small leaks only. For a real fix, you get dirty.
Can I fix a leak without draining the pond?
The ‘sprinkle’ or ‘pond tossing’ method only works for pinhole leaks in very specific conditions. You drop granular bentonite into the water, and the suction of the leak pulls the clay into the hole. It is a gamble. 90% of the time, the clay settles in the wrong spot or gets eaten by fish. If you want a 20-year solution, you drain the pond. No shortcuts.
Post-Sealing Management and Maintenance
Once the sodium bentonite is installed and the pond is filled, your job isn’t done. You need to monitor the banks for slumping. If you have a sod install planned around the perimeter, ensure the roots aren’t a species like Willow or Bamboo that will seek out the water through the clay liner. Keep your water level consistent. If the clay dries out completely during a drought, it can crack. While bentonite is ‘self-healing’ to a degree, deep desiccation cracks are a nightmare to re-seal. Keep it wet. Keep it stable. Your 2026 pond depends on the engineering you do today. It is about biology, geology, and doing the job right the first time.