
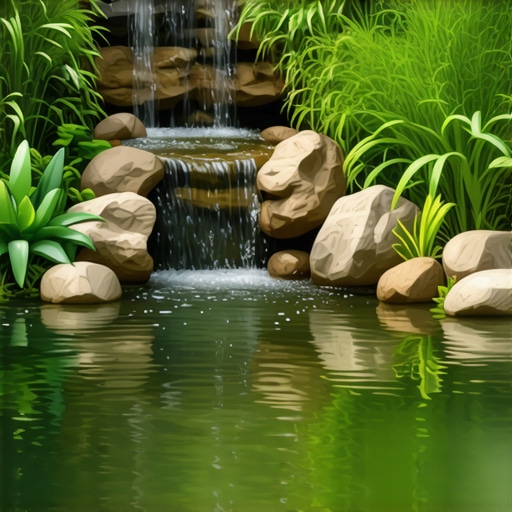
The Engineering Logic of a Closed-Loop Aquatic System
To build a small garden pond that stays clear, you must integrate biological filtration, UV sterilization, and proper aquatic plant density while maintaining a recirculating flow rate that turns the total volume over once per hour to prevent stagnation and nitrate buildup. Most homeowners view a pond as a hole in the dirt; a professional views it as a hydraulic pressure vessel. If you ignore the physics of water displacement and the chemistry of the nitrogen cycle, you are not building a water feature; you are building a high-maintenance mosquito nursery. Every drop of water in a backyard system must be managed through mechanical and biological stages to remain transparent.
The Hardscape Autopsy: Why Most Ponds Fail
I recently got called out to tear up a $30,000 patio and pond combo that was sinking because the previous contractor failed to account for hydrostatic pressure and soil saturation. They had installed a beautiful stone veneer over a substandard 20-mil PVC liner without any underlayment. Within six months, the soil shifted, the liner punctured, and the water leaked into the base material of the adjacent patio. The entire structure was compromised. It was a $30,000 lesson in why you never skip the engineering phase. If you don’t fix the soil grading and compaction first, every plant or stone you put in the ground is just expensive trash. Landscaping is 90% what you don’t see—the base, the drainage, and the infrastructure.
Phase 1: Site Analysis and Soil Mechanics
Before you touch a shovel, you need to understand where the water goes when the pond overflows. This isn’t just about the pond; it’s about yard cleanup and landscaping integrity. You must identify the high and low points of your property using a transit level. If your pond is at the bottom of a slope, every rainstorm will wash mulch, fertilizers, and silt into your water, spiking the nutrient levels and turning it into pea soup. You need to create a berm or a French drain to divert surface runoff away from the pond perimeter.
“A retaining wall doesn’t fail because of the stone; it fails because of the water trapped behind it.” – Hardscape Engineering Axiom
The same logic applies to ponds. If ground water builds up under your liner, it can cause ‘hippoing,’ where the liner floats up like a giant bubble. You need a stable, compacted subgrade. If you have heavy clay, you’re looking at different expansion rates than sandy loam. Do not skip calling 811. Hitting a gas line or an irrigation main while digging a 3-foot deep hole is a fast way to end your project and your bank account.
Phase 2: The Materials Breakdown
Stop buying pond kits from big-box stores. They are designed for price points, not longevity. A professional-grade pond requires specific materials that can withstand UV exposure and the weight of boulders. Use 45-mil EPDM (Ethylene Propylene Diene Monomer) rubber liners. They are flexible, durable, and fish-safe. PVC liners will get brittle and crack within three years. It is a waste of labor.
| Material | Lifespan | Pros | Cons |
|---|---|---|---|
| PVC Liner | 2-5 Years | Cheap, Light | Low UV resistance, cracks easily |
| 45-Mil EPDM | 20+ Years | Very Flexible, UV Stable | Heavy, requires underlayment |
| RPE (Reinforced Polyethylene) | 40+ Years | Incredible Strength | Stiff, harder to fold in small ponds |
Don’t ignore the underlayment. You need a non-woven geotextile fabric to protect the liner from sharp rocks and root intrusion. Some people use old carpet. Don’t do that. It rots and smells like a swamp. Use the right gear for the job.
How deep should a small garden pond be?
A garden pond should be at least 24 to 36 inches deep to maintain thermal stability and protect aquatic life from predators. In regions with freeze-thaw cycles, a minimum depth of 3 feet ensures the bottom doesn’t freeze solid, which is critical for the survival of beneficial bacteria and any fish. Shallower ponds heat up too fast in the summer, which crashes the oxygen levels and triggers massive algae blooms.
Phase 3: The Biological Engine (Filtration)
Clear water is the result of a healthy nitrogen cycle. Fish waste and decaying organic matter turn into ammonia. Nitrosomonas bacteria convert ammonia to nitrites. Then, Nitrobacter bacteria convert nitrites into nitrates. Plants then consume the nitrates. If this cycle breaks, the water turns green. You need two types of filters: a Skimmer (mechanical) and a Biofalls (biological).
- Mechanical Skimmer: Pulls floating debris like leaves and pollen off the surface before they sink and rot.
- Biological Filter: Provides massive surface area (bio-balls or lava rocks) for bacteria to colonize.
- UV Clarifier: Uses ultraviolet light to flocculate microscopic algae so they can be trapped by the filter.
- Aeration: An air stone or waterfall is mandatory. High oxygen levels support bacterial growth.
“Pond water quality is a balance of nutrient loading and microbial processing. Mechanical filtration must be sized for the total biological load, not just the water volume.” – Agronomy Manual Standards
What is the best pump for a small pond?
The best pump for a 500-gallon pond is a 1,000 GPH (gallons per hour) solids-handling submersible pump. You want to cycle the entire volume of the pond through the filter at least twice every hour. Always oversize your pump slightly because ‘head pressure’—the vertical distance the pump has to push the water—will reduce the actual flow rate. Do not use a clean-water sump pump; it will burn out within a month.
Phase 4: Installation Protocol
Excavate in tiers. This isn’t just for aesthetics; it’s for structural integrity. Create ‘shelves’ at 12 inches and 24 inches. These shelves provide a place for marginal plants and prevent the vertical walls from collapsing inward. Once the hole is dug, remove every sharp stone. Lay your underlayment, then the liner. Do not stretch the liner. Let it slack. As the water fills, the weight will push the liner into the contours of the soil. If it’s too tight, it will tear.
When sod install occurs around the pond, ensure there is a capillary break. You don’t want your grass sucking water out of the pond, and you don’t want the pond overflowing into the root zone of your new turf, which causes root rot. Use a stone collar to hide the liner edges. This protects the EPDM from UV degradation and gives the pond a natural finish. Use different sizes of river rock and boulders to create a ‘crushed stone’ look. Avoid using limestone if you want to keep your pH stable; it can leach and cause alkalinity spikes.
Maintenance and Long-Term Clarity
Clear water is not a one-time event; it is a state of being. You must perform a yard cleanup around the pond weekly. Remove dead lily pads and string algae by hand. Don’t use copper-based algaecides. They kill the algae fast, but the sudden rot consumes all the oxygen and kills your beneficial bacteria. It’s a death spiral. Instead, use beneficial bacteria doses weekly and maintain your aquatic plant coverage at 50% of the surface area. Plants like Anacharis and Hornwort are nutrient sponges. They will outcompete the algae for food. If you follow these engineering steps, your pond will stay clear. It won’t be easy, but it will be right.”, “image”: {“imagePrompt”: “A technical cross-section diagram of a professionally installed garden pond showing the 45-mil EPDM liner, geotextile underlayment, tiered soil shelves, a mechanical skimmer on one side, and a biological waterfall filter on the other. Boulders and river rocks are layered over the liner edges.”, “imageTitle”: “Garden Pond Engineering Cross-Section”, “imageAlt”: “Diagram of a professional garden pond installation including liner, underlayment, and filtration systems.”}, “categoryId”: 0, “postTime”: “”}