
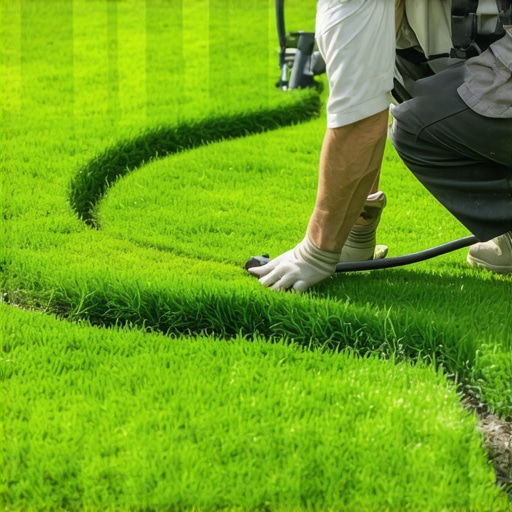
The Engineering of a Perfect Edge: Why Curves Make or Break Your Lawn
To achieve a professional finish when cutting sod around curves, you must ensure a compacted, graded soil base and use a sharp half-moon edger or a dedicated sod knife to follow the natural contour of the landscape bed. Precision in the cut prevents air pockets that lead to root desiccation and edge browning. I always drill into my new crew members: if you don’t fix the soil grading first, every plant you put in the ground is just expensive compost. I’ve seen $50,000 landscapes look like absolute trash because the contractor couldn’t handle a simple radius. They leave gaps. They let the edges dry out. They don’t understand that the edge of a sod piece is its most vulnerable point. It is where the vascular system of the grass is exposed to the air. If you don’t seal that edge against the soil, the plant dies. Period.
The Physics of the Layout: Designing the Radius
Before a single blade of grass touches the soil, you need a template. Professional landscaping requires more than just eyeballing a line. We use heavy-duty garden hoses or thick 1-inch ropes to layout curves. Why? Because the human eye is surprisingly good at spotting a hitch in a radius. A garden hose provides a natural, fluid line that follows the laws of physics. If the hose kinks, your mower will struggle. If the curve is too tight, you’ll be hand-trimming for the next decade.
“Proper turfgrass establishment begins with a uniform grade. Any deviation in the sub-base will result in localized dry spots and poor root-to-soil contact, especially at the perimeter of the installation.” – Penn State Center for Turfgrass Science
What is the best tool for cutting sod?
The best tool for cutting sod is a fixed-blade sod knife with a serrated edge or a half-moon edger for long, sweeping curves. Avoid using a standard utility knife; the blades are too thin and snap under the lateral pressure of the soil. When we are on a job site, we use a sharpened spade for the initial rough cut and a specialized linoleum knife for the detail work. The goal is a clean, vertical slice. You are not just cutting grass; you are cutting a 2-inch thick mat of roots, thatch, and soil. If you tear it, you create air pockets. Those pockets kill roots. I see guys using dull shovels all the time. It’s lazy. It’s hack work. A sharp blade means a clean wound for the plant, which means faster healing and faster knitting into the subsoil.
The Professional Tool Matrix
| Tool Type | Primary Use Case | Professional Tip |
|---|---|---|
| Half-Moon Edger | Long, sweeping radii | Maintain a 90-degree angle to the soil surface. |
| Serrated Sod Knife | Tight corners and detail work | Cut from the bottom up if the sod is too thick. |
| Marking Paint | Defining the layout | Use ‘inverted’ cans to avoid overspray on hardscapes. |
| Lawn Roller | Post-cut compaction | Fill with water to 75% capacity for optimal PSI. |
The Step-by-Step Execution: The Overlap and Slice Technique
The biggest mistake homeowners make during a sod install is trying to cut the piece to fit before laying it. That is backward. You lay the sod over the edge of the bed or the previous row. You let the excess hang over. This is called the Overlap Method. Once the piece is positioned, you use your edger to slice through the top piece and into the soil. This ensures there is zero gap. Zero. If you have a gap the size of a nickel, you have a failure point.
- Layout: Use a hose to mark your curve.
- Positioning: Lay the sod rolls across the line, overlapping the garden bed by 6 inches.
- The Cut: Follow the hose line with your sod knife, keeping the blade vertical.
- Removal: Lift the excess ‘scrap’ and discard it.
- Tucking: Use the back of a rake to slightly tuck the new edge into the soil.
Hydrostatic Pressure and Edge Drying
Edges dry out faster because they have more surface area exposed to the air. This is basic thermodynamics. In a standard yard cleanup or new install, the perimeter of the sod is where you’ll see the first signs of stress. This is often exacerbated by poor irrigation coverage. Most sprinkler heads are set to ‘throw’ over the edge, but the actual physical edge of the sod often gets missed by the primary spray pattern.
“Perimeter desiccation is the leading cause of sod failure in residential landscapes. Contractors must ensure that irrigation systems provide head-to-head coverage that extends at least 12 inches beyond the sodded area.” – Irrigation Association Standards
How much does it cost to install sod per square foot?
Professional sod install typically costs between $1.50 and $4.50 per square foot, depending on the site prep required and the type of grass. This price includes landscaping labor, soil amendments, and the sod itself. If someone quotes you less, they are likely skipping the soil prep. They aren’t checking the pH. They aren’t grading for drainage. They are just throwing green side up and leaving. Don’t fall for it. You’ll spend more on irrigation and replacement than you saved on the initial install. Soil prep is 80% of the cost for a reason. We spend hours with a Harley rake and a transit level before a single pallet arrives.
The Critical Role of Soil pH and Compaction
You can cut the most beautiful curve in the world, but if your soil pH is sitting at a 5.2, that sod will be dead by August. Turfgrass generally thrives in a 6.5 to 7.0 range. When we do a sod install, we test the soil. If it’s too acidic, we’re putting down lime. If it’s too alkaline, we’re looking at elemental sulfur. Compaction is the other silent killer. If your soil is as hard as a parking lot, the roots won’t penetrate. They’ll grow horizontally in the thatch layer, making the lawn completely dependent on daily watering. You want those roots to chase the water down 6 inches into the ground. We use a power harley rake to chew up the top 4 inches of soil. It creates a ‘fluffy’ bed that we then lightly firm up with a roller. It’s a delicate balance. Too loose and the sod sinks; too hard and the roots choke.
The Post-Install 14-Day Protocol
The first two weeks are a surgical recovery period. No foot traffic. No dogs. No mowing. You need to keep the soil beneath the sod consistently moist, but not a swamp. We look for ‘spicules’—tiny white root hairs poking out of the bottom of the sod. Once you see those, you’re winning. If you pull up a corner and it’s bone dry, you’re failing. This is where your irrigation system must be dialed in. We tell clients to water for 20 minutes at 5 AM and again at 2 PM. Avoid evening watering; you’ll just invite fungal pathogens like Pythium or Brown Patch. It’s about the biology of the plant. It needs the water for transpiration during the heat of the day, not for sitting in a puddle at night. The edge you cut so carefully? That’s where you check first. If the edge is shrinking away from the garden bed, you aren’t watering enough. Shrinkage is the first sign of cell collapse. Keep it tight. Keep it wet. Watch it grow.