
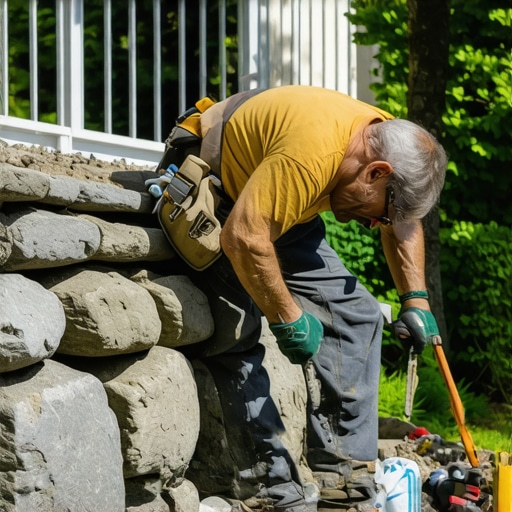
Diagnosing the Structural Failure of Your Retaining Wall
To fix a sagging stone retaining wall, you must address hydrostatic pressure and base instability by excavating the backfill, installing a perforated drain pipe, and replacing heavy soils with 3/4-inch clean angular stone for proper drainage. A sagging wall is not a cosmetic issue; it is a symptom of structural gravity being fought—and lost—by poor engineering. I recently got called out to tear up a $30,000 patio that was sinking because the previous contractor used ‘dirt’ as backfill instead of clean aggregate. Within two years, the freeze-thaw cycles turned that dirt into a hydraulic jack, pushing the wall out and collapsing the patio surface. It was a mess. I had to tell the homeowner that the ‘savings’ they got from the original low-bidder just cost them double in remediation. This is why I tell my crew: if you don’t fix the soil grading first, every plant you put in the ground is just expensive compost. You cannot ignore the physics of water and weight. When a wall sags, it is usually because the base was too shallow or the water behind the wall had nowhere to go. It will rot the integrity of your entire landscaping plan. Use a laser level. Don’t guess. If the wall is leaning more than 5 degrees, it’s not just sagging; it’s failing. You need to pull the stones and start from the footer. Anything else is just a band-aid on a gunshot wound.
“A retaining wall doesn’t fail because of the stone; it fails because of the water trapped behind it.” – Hardscape Engineering Axiom
The Forensic Autopsy of a Sinking Wall
Before you lift a single stone, you need to understand soil mechanics and why your specific wall moved. Most DIYers think the wall holds up the hill. It doesn’t. The wall is there to keep the soil’s angle of repose from shifting. If you have heavy clay soil, it retains water like a sponge. Water weighs 62.4 pounds per cubic foot. When that water can’t drain, it creates hydrostatic pressure that exerts thousands of pounds of force against your stone. This is often exacerbated by poor irrigation placement or a yard cleanup that removed natural slope vegetation, increasing runoff. Look at the stones. Are they tilting forward from the bottom or the top? Bottom failure means the base was too thin. Top failure means the drainage failed. It will move again if you don’t fix the core.
“The primary cause of retaining wall failure is the lack of adequate drainage, which allows water to saturate the soil and increase the pressure against the structure tenfold.” – University of Minnesota Extension Service
How much modified gravel do I need for a wall base?
Calculating the correct amount of modified gravel is critical to preventing future sagging. You need a minimum of 6 inches of compacted 2A modified stone for the base, plus 12 inches of clean stone behind the wall. To calculate, multiply the length of the wall by the width of the trench (usually 18-24 inches) by the depth, then divide by 27 to get cubic yards. Order 10% extra. Compaction is the goal. You want 95% Standard Proctor Density. If you can’t achieve that with a hand tamper, rent a plate compactor. Your arms aren’t strong enough to settle stone correctly. Don’t skip this.
The Remediation Process: A Step-by-Step Build
| Material | Drainage Rating | Compaction Ease | Best Use Case |
|---|---|---|---|
| 3/4″ Clean Stone | Excellent | High (Self-compacting) | Behind the wall (Drainage) |
| Modified Gravel (2A/CR6) | Moderate | Very High | Under the wall (Base) |
| Pea Gravel | Poor | Low | Decorative only |
| Topsoil | Zero | None | Finish grade only |
To begin the fix, you must excavate the area behind the sagging section. Go back at least 24 inches. Step 1: Remove the stones and set them aside by weight. Step 2: Dig out the old, saturated soil. Step 3: Line the trench with non-woven geotextile fabric. This is non-negotiable. It keeps the fine soil particles from clogging your drainage stone. Step 4: Lay 4-inch perforated SDR-35 pipe at the bottom of the trench, sloped at a 1% grade to a daylight exit point. Step 5: Re-level the base using modified gravel. Compact every 2-inch lift. Step 6: Set your first course of stone—the ‘toe’—below grade. This is your anchor. If the first row is wrong, the whole wall is junk. As you stack, backfill with clean stone, not soil. Step 7: Fold the fabric over the top of the drainage stone before adding your final layer of topsoil and a fresh sod install. This ‘burrito wrap’ method ensures the drainage stays clean for decades. It will last. If you use dirt as backfill, you are just building a future pile of rubble.
Can I use old soil as backfill for a stone wall?
The short answer is no. Old soil, especially if it was the reason the wall failed, is contaminated with fines and holds too much moisture. Professional landscaping standards require angular clean aggregate. Soil expands when it freezes; clean stone provides voids for that expansion and a clear path for water to reach the drain pipe. Reusing soil is the mark of a hack. Throw it in the garden or use it to fill a low spot in the yard during your next yard cleanup. But keep it away from your wall.
Checklist for a Permanent Wall Fix
- Rent a gas-powered plate compactor (Don’t use a hand tamper for large walls).
- Purchase non-woven geotextile fabric (Avoid the cheap ‘weed barrier’ from big-box stores).
- Verify 811 / Dig Safe has marked all underground utilities.
- Ensure the perforated pipe is holes-down to allow water to rise into the pipe.
- Check local municipal codes for walls over 3 or 4 feet; you might need an engineer’s seal.
Once the structure is sound, focus on the finish. Your sod install should be graded away from the wall at a minimum of 2%. This ensures surface water doesn’t even get a chance to stress your new drainage system. Watch the wall after the first heavy rain. You should see water exiting the daylight end of your drain pipe. That is the sound of success. It means the hydrostatic pressure is being managed, not stored. If your pipe is dry and the wall is wet, you’ve got a blockage. Check it immediately. Maintenance is simpler when the engineering is right. Keep the weep holes clear. Don’t let large trees grow within 5 feet of the wall, as root pressure can move even the best-laid stone. Respect the biology of the yard and the physics of the stone. Done right, you won’t touch this wall again for thirty years. Done wrong, I’ll see you next spring for the autopsy.