
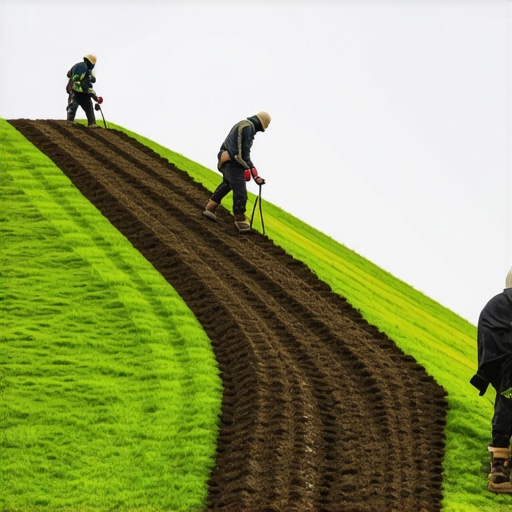
The Physics of Slope Stabilization: Why Your Sod Slides
To stop sod from sliding on a steep hill, you must use biodegradable sod staples, install turf in a staggered brick pattern, and ensure 90% soil-to-root contact through mechanical rolling. Proper landscaping and yard cleanup remove debris that creates air pockets, preventing gravity-induced slippage.
I always drill into my new crew members: if you don’t fix the soil grading first, every plant you put in the ground is just expensive compost. I have seen countless apprentices think they can just throw a roll of Kentucky Bluegrass on a 35 degree incline and walk away. Gravity does not care about your weekend plans. Without mechanical anchoring and precise soil preparation, that $2,000 pallet of sod will be a heap of rotting organic matter at the bottom of the drainage swale after the first thunderstorm. We are talking about engineering a living carpet that must resist shear forces while simultaneously establishing a biological bond with the subgrade. If you miss a single step in the compaction or staking process, you are essentially installing a slip-and-slide made of dirt.
The Ground-Up Build: Pre-Installation Engineering
Successful sod install projects on hills start weeks before the first roll arrives. You need to assess the bulk density of the soil. If the ground is as hard as concrete, the roots will never penetrate, and the entire layer will delaminate. Conversely, if it is too loose, the soil itself will wash out from under the grass. We target a soil pH between 6.2 and 7.0 for optimal nutrient uptake. This is not about aesthetics. This is about chemistry. High acidity locks out phosphorus, which is the literal fuel for root development. You need those roots to dive deep and fast to anchor the system naturally.
“Rooting depth and strength are the primary biological factors in resisting soil erosion on slopes exceeding a 3:1 gradient.” – Agronomy Extension Manual
During the yard cleanup phase, we strip every weed and rock larger than a marble. Air pockets are the enemy. When water gets trapped in a void between the sod and the earth, it creates hydrostatic pressure. That pressure lifts the sod, breaks the friction bond, and down it goes. We use a landscape rake to create horizontal grooves across the face of the hill. These mini-terraces act as micro-catches for water and root tips. It increases the surface area for the irrigation to soak in rather than sheeting off the top.
How much modified gravel do I need for a patio base?
While this guide focuses on turf, many hill projects involve hardscaping where you need 6 inches of compacted 2A modified gravel for a stable base. For sod, we focus on the soil base rather than gravel. You must ensure the grade slopes away from the foundation at a minimum of 2 percent. We use a transit level to verify this. Guessing with your eyes is how you end up with a flooded basement or a collapsed retaining wall. The civil engineering aspect of landscaping cannot be ignored just because the final product is green.
The Anatomy of the Staggered Install
When the sod arrives, it needs to be in the ground within 24 hours. The internal temperature of a pallet of sod can hit 120 degrees Fahrenheit in the sun. This leads to protein denaturation and certain death. We start at the bottom of the hill and work our way up. This allows each subsequent row to rest against the one below it, using gravity as a compressive force rather than a destructive one. Every seam must be tight. No gaps. We stagger the vertical seams just like a bricklayer builds a wall. This prevents water from forming a straight channel down the hill, which would quickly turn into a gully.
| Material Choice | Effectiveness on Slope | Biodegradability |
|---|---|---|
| Plastic U-Staples | High | None (Remains in soil) |
| Wooden Stakes | Medium | 100% (Rots after 2 years) |
| Biodegradable Resin Pegs | Very High | 90% (Breaks down in 18 months) |
| Metal Landscape Pins | High | None (Rusts over time) |
| Jute Netting Underlay | Excellent | 100% (Natural fibers) |
We use 6-inch biodegradable stakes. We drive them at a 45-degree angle pointing uphill. This counteracts the downward pull of the sod’s weight. For every piece of sod, we use at least three stakes: one in the center and one at each leading corner. On slopes steeper than 40 degrees, we double that count. It sounds like overkill until you see a hill survive a three-inch downpour. The stakes only need to hold for about four to six weeks. By then, the roots should have knitted into the subsoil, providing a natural reinforcement mesh.
How do I stop water from washing out my new sod?
The secret is irrigation timing and volume control. You cannot blast a new hill with a high-pressure oscillating sprinkler. You will wash the soil out from the seams before the roots can take hold. We use low-flow impact sprinklers or specialized drip lines. You want deep, infrequent cycles that force the roots to chase the moisture down into the earth. If you keep the top half-inch wet all day, the roots will stay lazy and shallow. That makes the sod weak and prone to sliding later in the season. We aim for 1 inch of water per week, delivered in two or three heavy sessions, depending on the evapotranspiration rate of your local climate.
Post-Installation Maintenance and Security
Once the sod is down and staked, we roll it. This is the part most DIYers skip because a water-filled roller is heavy and dangerous on a hill. But without rolling, you have air pockets. Air pockets kill roots. We use a half-filled roller to press the sod into the scarified soil. This creates the mechanical bond needed for capillary action to draw water from the soil into the turf. If you can pull up a corner of the sod with two fingers, you haven’t rolled it enough. It should feel like it is part of the earth.
“A retaining wall doesn’t fail because of the stone; it fails because of the water trapped behind it.” – Hardscape Engineering Axiom
This principle applies to sod too. If your hill is too steep, you might need a French drain at the top to intercept surface runoff from the rest of the yard. We often install a gravel trench wrapped in geotextile fabric to catch that water and move it around the hill. This protects the new sod install from being hammered by water it wasn’t designed to handle. Think of it as a bypass valve for your landscape.
- Check for seam separation every 48 hours for the first two weeks.
- Ensure stakes are still flush with the soil to prevent mower damage.
- Monitor for