Prep 2026 Clay Soil for Sod: The Tilling Trick
I always drill into my new crew members: if you don’t fix the soil grading first, every plant you put in the ground is just expensive compost. Last season, I walked onto a job site where a ‘budget’ crew had laid 5,000 square feet of high-end fescue directly onto unamended, compacted red clay. It looked great for exactly twelve days. By week three, the roots were suffocating in a bathtub of stagnant water because the clay was so dense it had zero vertical drainage. They didn’t understand the microscopic reality of soil structure, and it cost the homeowner a full replacement. If you want a lawn that survives the 2026 season, you have to treat the dirt like an engineering project before the first roll of sod ever touches the site.
Why Clay Soil Kills New Sod Installs
Clay soil creates a physical barrier to root penetration and oxygen exchange, often leading to anaerobic conditions that rot new sod from the bottom up. To prevent sod failure, you must break the surface tension and compaction through deep cultivation and chemical balancing to ensure pore space for water and air.
Clay is composed of microscopic, flat particles that stack together like sheets of paper. When these sheets are compacted by construction equipment or heavy foot traffic, they form a nearly impenetrable plate. This is fine if you are building a dam, but it is a death sentence for turf. The ’tilling trick’ isn’t just about fluffing the dirt; it is about changing the soil’s physical chemistry. We are aiming for a ‘flocculated’ state where those flat particles clump into crumbs, creating ‘macropores’ for drainage and ‘micropores’ for water retention. Without this, your sod is essentially sitting on a concrete slab. You need to understand that clay has a high Cation Exchange Capacity (CEC), meaning it holds onto nutrients well, but if the roots can’t breathe, those nutrients are useless. We see this often in new subdivisions where the topsoil was stripped away during grading, leaving nothing but raw subsoil clay that needs massive intervention before a sod install.
“Soil compaction is the most common cause of failure in urban landscapes. A compacted soil has reduced pore space, which limits the movement of air and water to the roots.” – Penn State Center for Turfgrass Science
How deep should I till clay soil for sod?
For a professional-grade sod install, you must till to a minimum depth of 6 to 8 inches. Surface scratching—only going 1 or 2 inches deep—is a waste of fuel. Deep tilling allows the soil horizons to blend and prevents the formation of a hardpan layer that would otherwise stop roots from chasing water into the deeper profile during the heat of summer. If you stop at two inches, the roots will hit the clay wall and grow sideways, making the lawn highly susceptible to drought stress and fungal pathogens.
The 2026 Soil Amendment Strategy
Amending clay soil requires a massive volume of organic matter—specifically compost or well-rotted manure—to physically separate clay particles and introduce beneficial microbes. You cannot just add sand to clay; doing so without enough organic material creates a substance similar to low-grade concrete, which destroys hydraulic conductivity.
The goal for 2026 is soil resilience. We are seeing more extreme weather cycles: flash droughts followed by heavy deluges. A soil with 5% organic matter can hold significantly more water than raw clay while still draining the excess. When we prep a yard, we aren’t just doing a yard cleanup; we are performing a structural overhaul. I recommend a heavy application of pelletized gypsum in areas with high sodium-clay content to help break ionic bonds, followed by at least 3 inches of high-quality compost tilled into the top 6 inches of the native soil. This creates a transitional zone. Never create a sharp line between ‘good’ soil and ‘bad’ clay; the roots will refuse to cross that boundary. You need a gradient. This is where the engineering meets the biology.
| Amendment Type | Function in Clay | Application Rate (per 1000 sq ft) | Pro Tip |
|---|---|---|---|
| Certified Compost | Increases pore space & microbial life | 3-4 Cubic Yards | Must be weed-seed free |
| Pelletized Gypsum | Displaces sodium, improves structure | 40-50 lbs | Only works on specific clay types |
| Coarse Sand | Physical drainage (use with caution) | 2-3 Tons | Must be sharp sand, not play sand |
| Starter Fertilizer | Initial NPK boost for root knit | 5 lbs (18-24-12) | Focus on high Phosphorus |
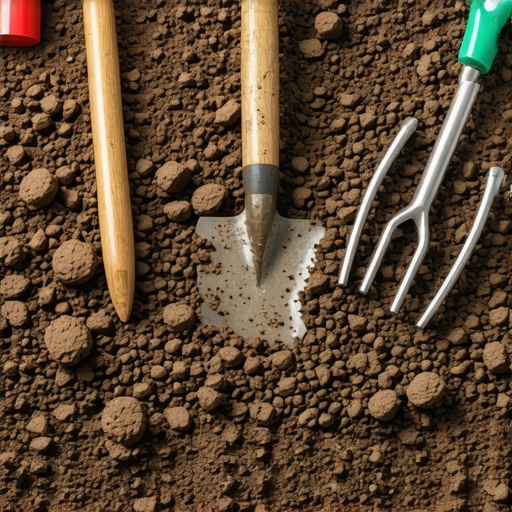
Execution: The Tilling Trick Step-by-Step
The secret to the ’tilling trick’ is the moisture content of the soil at the time of the landscaping work. If the clay is too dry, you’ll just bounce off the top like a basketball. If it’s too wet, you’ll create ‘clods’ that turn into rocks when they dry. You want the soil to crumble when squeezed, not smear. Once the moisture is right, you clear the area of all debris—this is the yard cleanup phase. Then, you mark your irrigation lines and call 811. Nothing ruins a day like tilling through a 1-inch lateral line or a fiber optic cable. Don’t skip the utility check. It’s a rookie move that costs thousands.
- Step 1: Rough Grade: Clear all rocks larger than 2 inches and remove existing weed mats.
- Step 2: Utility Marking: Call 811 to locate gas, water, and electric.
- Step 3: Amendment Spread: Layer your compost and gypsum evenly across the entire footprint.
- Step 4: Primary Till: Use a rear-tine tiller (not a front-tine ‘toy’) to grind the amendments into the clay.
- Step 5: Cross-Tilling: Till a second time perpendicular to the first pass to ensure a homogenous mix.
- Step 6: Fine Grade: Use a landscaping rake to level the site, ensuring a 1% slope away from the foundation.
- Step 7: Compaction Reset: Use a water-filled roller to lightly firm the soil; you want to remove air pockets without re-compacting the clay.
“Successful sod establishment on heavy soils depends entirely on the preparation of a uniform, uncompacted seedbed that allows for rapid vascular connectivity between the sod and the native soil.” – Texas A&M Agrilife Extension
How do I know if my clay is ready for sod?
Perform the ‘Footprint Test.’ Walk across the tilled and raked area. Your boot should sink in exactly 1/2 inch. If you sink 3 inches, the soil is too loose and will settle unevenly, creating a ‘lumpy’ lawn. If you leave no footprint at all, the clay is still too compacted for the delicate sod roots to penetrate. Adjust your rolling and raking until you hit that 1/2 inch sweet spot. This is the precision required for a professional landscaping result.
The Irrigation Mandate for New Sod
In clay soil, irrigation management is a balancing act. Because clay holds water so effectively, it is incredibly easy to over-saturate the site and cause damping off or root rot. However, the first 14 days after a sod install are critical. The sod has no root connection to the ground yet; it is living entirely off the moisture in its thin layer of harvested soil. You must keep that layer moist, but the clay underneath must not become a swamp. This usually means watering 3 to 4 times a day in short bursts (5-10 minutes) rather than one long soak. Once the roots knit—which you check by gently tugging on a corner of the sod—you must immediately transition to deep, infrequent watering. This forces the roots to dive deep into your newly tilled 6-inch horizon to find moisture, creating a drought-tolerant lawn. If you keep light-watering, the roots will stay in the top inch, and the 2026 summer heat will kill the lawn in 48 hours if your irrigation system fails. Use a rain gauge. You want exactly 1 inch of water per week, delivered in two heavy sessions. Don’t guess. Measure.