
Stopping Brown Edges on New Sod with This Watering Tactic
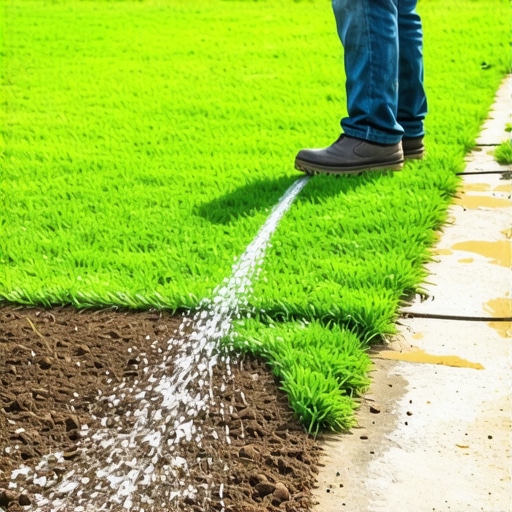
The sight of a freshly installed lawn turning crispy at the seams is the nightmare of every homeowner and the hallmark of a failed sod install. You see the straw-colored perimeter of every individual slab, creating a grid pattern that screams neglect or incompetence. This is not a matter of the grass dying. It is a matter of the edges drying out faster than the core due to increased surface area exposure. When you lay sod, you are essentially performing a massive organ transplant on your yard. If the edges lose turgor pressure, the entire system begins to fail. It starts at the seam. It ends with a dead lawn. Stop thinking about watering as a chore and start thinking about it as life support for a biological engine. [image]
Why New Sod Edges Turn Brown
Brown edges on new sod are caused by localized desiccation at the seams where the soil of the slab is exposed to air, leading to rapid moisture loss. This happens when air pockets exist under the sod or when watering schedules fail to compensate for the high evapotranspiration rates at the slab boundaries. To prevent this, you must seal the seams and maintain 100 percent soil-to-root contact through strategic saturation and rolling. Most guys ignore the edges. They pay for it in the second week when the grass goes dormant or dies.
The Forensic Autopsy of a $12,000 Failed Sod Project
I recently got called out to a site where a homeowner had spent twelve grand on premium Zoysia sod, only to watch it turn into a checkerboard of dead straw within ten days. The previous contractor had done what most hacks do: they threw the sod down on top of compacted red clay, gave it a light sprinkle, and walked away. When I got there, I pulled up a corner of a brown slab. The soil underneath was bone dry. The edges of the sod had curled upward, creating an air gap that acted like a convection oven, baking the roots from the bottom up. They hadn’t used a roller, and they hadn’t adjusted their irrigation for the heat island effect near the concrete driveway. It was a total loss. This is why soil prep and the first 48 hours of watering are non-negotiable. If you don’t fix the grading and ensure the seams are tucked, you are just throwing money into a chipper. The physics of the situation are simple: no contact equals no life. The roots cannot jump across an air gap to find moisture.
The Science of Turfgrass Desiccation
When you cut sod at the farm, you are removing 80 to 90 percent of the plant’s root system. The remaining root mass is housed in about an inch of soil. This thin layer is incredibly vulnerable to temperature fluctuations. The edges of the sod slab have more surface area exposed to the air than the center. This means the water evaporates from the sides of the slab, not just the top. This is a basic principle of thermodynamics. As the water leaves, the soil shrinks. As the soil shrinks, the gap between slabs widens. This creates a vicious cycle where more air gets in, drying it out even faster. You must break this cycle by keeping the seams swollen with water.
“The primary cause of failure in newly established turfgrass is the inability of the root system to keep pace with the transpiration rate of the leaf tissue during the first fourteen days.” – Agronomy Extension Standards
How much water does new sod actually need?
New sod requires approximately 1 to 1.5 inches of water per day, divided into multiple short cycles, to keep the root zone saturated without causing anaerobic conditions in the subsoil. You are not trying to grow the grass yet. You are trying to keep it from drying out while the roots initiate. The goal is to keep the soil at the base of the sod slab consistently muddy for the first 7 to 10 days. If you can walk on it without sinking, it is probably too dry in the first week. We call this the ‘squish factor.’ If it doesn’t squish, it’s not enough. Check it at 2 PM when the sun is at its peak. That is when the desiccation is most aggressive.
| Temperature Range | Watering Frequency | Duration per Zone | Goal |
|---|---|---|---|
| 70-80 Degrees F | 2 Times Daily | 15-20 Minutes | Maintain Moisture |
| 80-90 Degrees F | 3 Times Daily | 20-25 Minutes | Prevent Edge Burn |
| 90+ Degrees F | 4-5 Times Daily | 15 Minutes | Cooling & Hydration |
The ‘Deep Seam Hydration’ Tactic
The specific tactic to stop brown edges is what I call Deep Seam Hydration. This involves three critical steps. First, during the sod install, you must hand-tuck every seam. No gaps. If you see dirt between slabs, you’ve failed. Second, you must use a water-filled lawn roller. This is the part DIYers skip because it’s heavy and annoying. But that roller forces the sod into the mud, eliminating the air pockets that cause browning. Third, you must ‘cycle and soak.’ Instead of one long watering that runs off into the gutter, you set your irrigation to run for 10 minutes, wait an hour, and run for another 10. This allows the water to penetrate the dense thatch layer and reach the soil. This is how you manage the hydrostatic pressure within the soil profile. You are forcing the water to move laterally through the seams. It works. Period.
Can I overwater new sod?
Yes, you can overwater new sod if the subgrade has poor drainage or if you continue the heavy saturation phase past the first three weeks. Overwatering leads to Pythium blight and root rot, which will also turn the grass brown, but the texture will be slimy rather than crispy. If you see mushrooms popping up, you are at the limit. If the ground feels like a sponge and the grass is pulling away from the soil easily after two weeks, back off the frequency but maintain the volume. You want the roots to start searching for water deeper in the soil profile once they have established a foothold. This transition is where most people fail. They go from watering 5 times a day to once a week overnight. The plant can’t handle the shock. Scale back gradually.
“Successful turf establishment is 10% product and 90% water management and soil preparation.” – ICPI Hardscape and Landscape Manual
The Essential Sod Install Checklist
- Soil Test: Check pH levels and NPK balance before laying a single slab.
- Subgrade Prep: Scarify the soil to a depth of 4 inches to allow root penetration.
- Eliminate Gaps: Ensure all seams are tight and staggered like bricks in a wall.
- Roll It: Use a 200-pound water roller immediately after installation.
- Edge Saturation: Pay extra attention to slabs adjacent to concrete or asphalt.
- Audit Irrigation: Use catch cups to ensure your irrigation system is actually delivering the volume you think it is.
Fixing the Grading and Yard Cleanup
Before you even think about sod install, the yard cleanup and grading must be surgical. If you have low spots, water will pool and rot the sod. If you have high spots, the mower will scalp the edges of the new slabs, killing them instantly. You need a 1 to 2 percent slope away from the house. If you are dealing with heavy clay, you must incorporate organic matter or gypsum to break up the surface tension. Most people skip this and then wonder why their grass has the root system of a hairpiece. Roots don’t grow into rock. They grow into pore space. If you don’t create that space during the yard cleanup phase, you are wasting your time. Landscaping is not a surface-level job. It is a sub-surface engineering project. Use a landscape rake. Level it until it’s perfect. Then level it again. This is the difference between a lawn that lasts 20 years and one that dies in 20 days.
The Long-Term Irrigation Strategy
Once the first 14 days are over and you can’t pull the sod up by hand, you need to transition to deep, infrequent watering. This is the ‘Infrequent Heavy Soak’ phase. You want the top inch of soil to dry out slightly, which forces the roots to grow downward to find moisture. This builds a resilient, drought-tolerant lawn. Stop the ‘sprinkling’ every morning. It encourages shallow roots and fungal growth. One inch of water, once or twice a week, is the gold standard for established turf. Keep your mower blades sharp. Dull blades tear the grass, leading to more moisture loss and browning. If you treat your lawn like a biological system instead of a rug, it will reward you. If you treat it like a rug, it will burn like one. Focus on the soil. Focus on the seams. Don’t be a hack. “