
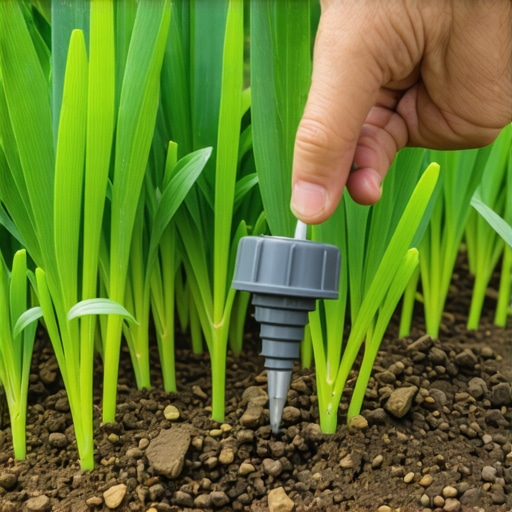
The sight of a dying $600 Japanese Maple in a professionally installed landscape is the ultimate indicator of a failure in mechanical engineering. When you walk onto a job site and see a localized brown spot in a fresh sod install, your first instinct should not be to reach for the fertilizer. You look at the hydraulics. A clogged emitter is not just a nuisance; it is a systemic failure of the irrigation design. I recently got called out to tear up a $30,000 patio that was sinking because the previous contractor buried a drip manifold under three inches of compacted modified gravel with no access. The emitters had calcified, the lines backed up, and the resulting hydrostatic pressure blew a fitting, saturating the base and liquefying the subgrade. That is what happens when you treat landscaping as an aesthetic hobby rather than an engineering discipline. If you do not understand the micron rating of your filtration or the PSI requirements of your emitters, you are just playing in the dirt. This guide identifies the forensic reality of why these components fail and the most effective, science-based methods to restore flow without compromising the integrity of the system.
The Easiest Way to Fix a Clogged Drip Irrigation Emitter
To fix a clogged drip irrigation emitter, you must first identify if the blockage is mineral-based or organic debris. The most efficient professional method involves manually flushing the lateral lines, soaking the individual emitter components in a mild citric acid solution, and 100% verifying filtration integrity to prevent immediate re-clogging. It is critical to avoid sticking wires into the orifice, as this destroys the delicate pressure-compensating diaphragm. Most ‘hacks’ you find online will simply ruin the emitter’s ability to regulate flow.
“Filtration is the heart of any micro-irrigation system; without it, the narrow tortuous paths of emission devices will inevitably succumb to physical, chemical, or biological clogging agents.” – Texas A&M AgriLife Extension
The Anatomy of a Clog: Why Emitters Fail
An emitter does not just stop working. It is strangled over time. In a professional irrigation setup, we deal with three primary enemies: physical debris, chemical precipitates, and biological films. Physical debris usually enters the system during a yard cleanup or when a pipe is cut for repair. If you do not flush the line after a repair, that PVC shard or grain of sand travels straight to the smallest orifice. Chemical precipitates, like calcium carbonate, occur when hard water evaporates at the emitter tip, leaving behind a stone-like crust. Biological films are the most insidious. These are colonies of iron-oxidizing bacteria or algae that create a mucilaginous slime. This slime acts like a magnet for fine silts, creating a plug that no amount of water pressure can dislodge. You need to know which one you are fighting before you start. [IMAGE_PLACEHOLDER] If the clog is white and crusty, it is mineral. If it is brown and slimy, it is biological. If it is a hard grain of sand, it is a filtration failure. One of the most common errors I see with my new crew members is trying to ‘blow out’ a mineral clog with air. You cannot compress a rock. You have to dissolve it.
Phase 1: The Pressure Test and Lateral Flush
Before you start pulling apart emitters, you must check the manifold pressure. Most drip systems require between 15 and 30 PSI. If your pressure is too low, the pressure-compensating (PC) diaphragm inside the emitter will not seat correctly, often leading to a ‘weeping’ effect that looks like a clog but is actually a lack of force. Once pressure is confirmed, go to the end of the line. Every landscaping professional knows that the end of a drip run is a sediment trap. Open the flush valve or remove the end cap. Run the system for 60 seconds. You will see a ‘slug’ of dark, murky water exit the pipe. This is the accumulated ‘fines’ that have bypassed your filter. If you do not do this, any emitter you clean will just clog again in ten minutes. It is a waste of time. Do not skip this.
Phase 2: The Acid Soak for Mineral Calcification
If you are dealing with hard water, the emitter’s ‘tortuous path’—the internal labyrinth designed to create friction—is likely filled with calcium. Do not use a needle to poke the hole. This is the fastest way to turn a 0.5 GPH emitter into a 5.0 GPH flood. Instead, remove the emitter if it is a take-apart model, or simply submerge the end of the line in a bucket of 5% citric acid or a professional-grade phosphoric acid solution. Acetic acid (vinegar) can work, but it is often too weak for heavy scale. Let it sit for 30 minutes. The acid reacts with the calcium carbonate, turning the solid blockage into a soluble gas and liquid. Rinse it thoroughly. It will work like new. This is the only way to preserve the internal diaphragm’s calibration. High-end sod install projects often use these emitters for perimeter watering; if you ruin the calibration, you will over-saturate the edge and cause root rot.
Professional Material Comparison for Clog Resistance
Choosing the right hardware from the start reduces the frequency of yard cleanup and maintenance. Not all emitters are created equal. Use the following table to understand what you are installing.
| Emitter Type | Mechanism | Clog Resistance | Primary Failure Mode |
|---|---|---|---|
| Pressure Compensating (PC) | Silicone Diaphragm | High | Diaphragm Fatigue |
| Non-PC (Tortuous Path) | Labyrinth Friction | Medium | Fine Silt Accumulation |
| Flag Emitter | Screw-top manual | Low | Manual user error |
| In-line Emitter Tubing | Internal Emitter | Very High | Root Intrusion |
“A retaining wall doesn’t fail because of the stone; it fails because of the water trapped behind it. Similarly, a drip system fails not because of the emitter, but because of the quality of the water delivered to it.” – Hardscape Engineering Axiom
How much modified gravel do I need for a patio base?
While this seems unrelated to irrigation, the answer is critical for drainage. You need a minimum of 6 inches of compacted 2A modified stone for a pedestrian patio. If you bury landscaping drip lines beneath this without a protective sleeve or access point, any future clog will require you to excavate the entire structure. Always use 1-inch PVC sleeves for drip lines passing under hardscapes. It makes maintenance a ten-minute job instead of a four-day disaster.
Can you clean clogged drip emitters with vinegar?
Yes, but with caveats. Vinegar is a 5% acetic acid solution. It is effective for light surface scaling. However, for deep clogs within the internal labyrinth of an emitter, it lacks the ‘bite’ required to dissolve thick calcium bridges. Professionals use citric acid because it is safer for the soil pH and more aggressive on minerals. If you use vinegar, you must ensure the emitter is fully submerged for at least 12 hours. It is slow. I do not have 12 hours on a job site. I have 30 minutes.
The Preventative Maintenance Checklist
If you want to stop cleaning emitters and start enjoying your yard, follow this professional maintenance schedule. This is what we bill the high-end estates for.
- Monthly: Inspect the filter screen. If it is slimy, you have biological growth. Clean it with a stiff brush and bleach.
- Quarterly: Open the end-caps and flush the lateral lines. This removes the ‘fines’ before they can settle in the emitters.
- Annually: Perform a ‘shock’ treatment if you use well water. Use a concentrated acid flush to clear the entire line.
- Spring Startup: Check the PSI at the beginning and end of the run. A drop of more than 5 PSI indicates a leak or a major blockage.
The Engineering Reality of Soil Interaction
In heavy clay soils, common in many regions, a clogged emitter creates a ‘dry chimney’ effect. The surrounding soil may look wet from other emitters, but the root ball of the specific plant is trapped in a hard, hydrophobic pocket of clay. When you finally fix the emitter, the water may not even penetrate the soil; it will simply run off the top. After fixing a clog, you must manually ‘break’ the soil tension by hand-watering the area with a wetting agent. This ensures the irrigation water actually reaches the rhizosphere. Don’t assume that because the water is dripping again, the plant is saved. You have to verify the saturation depth. Dig a small 4-inch hole. If it is dry an inch down, your work is not done. It will die if you don’t saturate it. Precision is the difference between a contractor and a guy with a truck.