
The Heavy Roller Trick for Getting Sod to Root in 48 Hours
I always drill into my new crew members: if you don’t fix the soil grading first, every plant you put in the ground is just expensive compost. I have seen hundreds of thousands of dollars in nursery stock and premium turfgrass wasted because some ‘mow-and-blow’ contractor thought they could just lay green side up and walk away. Last season, we took over a site where a homeowner had spent $12,000 on high-end Zoysia sod, only for it to turn into a crunchy, brown mat within ten days. The culprit? Air. They didn’t roll it. They didn’t prep the subgrade. They just laid it on hard-packed clay like they were putting down a rug. That is not landscaping; that is professional negligence.
Why Sod Fails Within 72 Hours
Initial sod failure is almost always caused by a lack of root-to-soil contact, which creates an insulating layer of air that desiccates the rhizomes and stoloniferous tissue. When sod is harvested, it loses over 90% of its root system, leaving it in a state of biological shock where every millisecond of moisture access counts. Without mechanical compression to force the sod’s underside into the scarified topsoil, the grass will starve for water even if the surface is soaking wet.
“Successful establishment of turfgrass sod depends entirely on the elimination of air pockets at the soil-root interface, which prevents the drying out of new roots.” – Texas A&M AgriLife Extension
How much pressure do you need for a sod roller?
For standard residential sod install projects, you need a water-filled roller that provides approximately 200 to 300 pounds of weight. This pressure is sufficient to collapse the air gaps between the cut sod slabs and the tilled earth without causing excessive soil compaction that would otherwise restrict oxygen flow to the microbial life in the rhizosphere.
The 48-Hour Rooting Secret: The Heavy Roller Logic
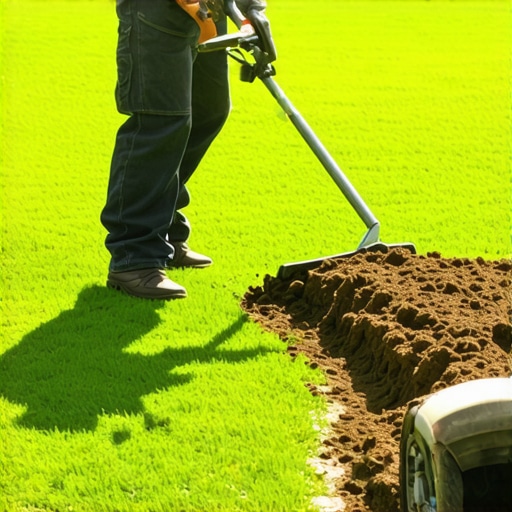
The heavy roller trick works by initiating immediate capillary action between the moisture in the subsoil and the thirsty root hairs of the new sod. By applying uniform pressure across the entire surface area, you ensure that the roots are physically pressed into the cation exchange sites of the soil, allowing for the rapid uptake of phosphorus and nitrogen needed for cellular division. [image_placeholder_1]
It is a matter of physics. If there is a 1-millimeter gap between the sod and the dirt, the roots have to grow through the air to find food. Roots cannot grow through air; they dry out and die. By rolling, you remove that gap. Within 48 hours, the roots begin to ‘knit’ or anchor. If you try to lift a corner of the sod two days after a proper rolling and watering, you should feel significant resistance. That is the sound of success. If it lifts easily, you failed the prep stage.
| Sod Variety | Soil Type Preference | Optimal Roll Weight (lbs) | Rooting Time (High Prep) |
|---|---|---|---|
| Bermuda (TifTuf) | Sandy Loam / Clay | 250 | 36 – 48 Hours |
| Tall Fescue | Well-Drained Loam | 200 | 48 – 72 Hours |
| St. Augustine | Sandy / Peat Mix | 300 | 48 Hours |
| Zoysia (Zeon) | Loam / Silt | 250 | 48 Hours |
The Science of Soil Grading and Site Preparation
Before a single pallet of grass arrives, the yard cleanup and grading process must be surgical. You need to achieve a rough grade that slopes away from the foundation at a minimum of 2% to manage hydrostatic pressure and prevent pooling. We use a box blade or a Harley rake to break up the top 4 inches of soil. If your soil is heavy clay, you must amend it with organic compost or expanded shale to improve pore space.
Check the pH levels. Most turfgrasses thrive in a range between 6.0 and 7.0. If you are sitting at a 5.2 pH, your sod is going to struggle regardless of how much you roll it. I tell my guys: the soil is the engine, the grass is just the paint job. You don’t put a Ferrari body on a lawnmower engine. Get the chemistry right first. This means a starter fertilizer high in phosphorus (the ‘P’ in N-P-K) must be raked into the top inch of soil to stimulate root elongation immediately upon contact.
Irrigation Logistics: The Delicate Balance of Saturation
Proper irrigation during the first 48 hours is not about flooding the yard; it is about maintaining a saturated state in the top 2 inches of soil without creating anaerobic conditions. You need to perform a head-to-head coverage audit. If one sprinkler head isn’t overlapping with the next, you will have ‘donuts’ or brown spots. This is non-negotiable. Don’t guess. Measure your output using catch cans to ensure you are hitting 0.5 inches of water per session during the establishment phase.
“Compaction from heavy equipment can reduce soil infiltration rates by up to 80%, leading to runoff and poor root penetration.” – Penn State Center for Turfgrass Science
Does rolling sod damage the soil structure?
Rolling sod only damages soil structure if the ground is oversaturated or if you use a roller that is too heavy for the soil texture. When performed on moist but not muddy soil, the roller only affects the surface macro-pores, leaving the deeper soil structure intact for long-term nutrient cycling and drainage. Do not roll when the ground is a slurry.
The 48-Hour Success Checklist
- Mechanical Debris Removal: Clear all rocks larger than 1 inch. Rocks create heat sinks that burn roots.
- Subgrade Scarification: Ensure the top 2 inches of soil are loose and friable, not packed hard like a highway.
- Edge Tucking: Hand-tuck the seams of the sod to prevent edge desiccation.
- Immediate Rolling: Roll the sod within 30 minutes of laying the first pallet. Do not wait until the end of the day.
- Saturation Check: Pull back a corner. The bottom of the sod and the top inch of soil should be muddy.
Yard Cleanup and Pre-Install Engineering
A professional landscaping job starts with the removal of every weed and old clump of grass. We use a non-selective herbicide 14 days prior to the sod install to ensure the old seed bank is dead. Then we scalp the area. If you lay sod over old grass, the decomposing organic matter creates methane gas and heat, which will literally cook the new roots from the bottom up. It is a slow death. It smells like rot. And it is entirely avoidable.
We also look at the irrigation lines. If you have a leak in a lateral line under your new sod, the hydrostatic pressure will create a bubble. You will see the sod literally floating on a pillow of water. We pressure test every system at 60 PSI before the first piece of turf hits the ground. No exceptions. If you skip the pressure test, you are gambling with the client’s money and your reputation.
Long-term Maintenance and the Settling Period
After the first 48 hours of heavy rolling and watering, you transition into the ‘tapering phase.’ You cannot keep the soil saturated forever, or you will invite Pythium blight and other fungal pathogens. By day three, you should reduce watering to twice daily. By day ten, you should be at once daily. The goal is to force the roots to go deeper into the soil profile to find moisture. If you keep the surface wet, the roots stay lazy and shallow. Shallow roots mean the lawn will die the first time the temperature hits 95 degrees.
Don’t mow for at least 14 days. Let the grass reach a height of 4 or 5 inches. This allows the plant to maximize photosynthesis and send more carbohydrates down to the root system. When you do mow, use a sharp blade. A dull blade tears the grass, creating a jagged edge that loses moisture and invites disease. Landscaping is a game of inches and tiny details. If you follow the roller trick and the soil prep protocols, you won’t just have a green yard; you will have a biological system that thrives for decades.