
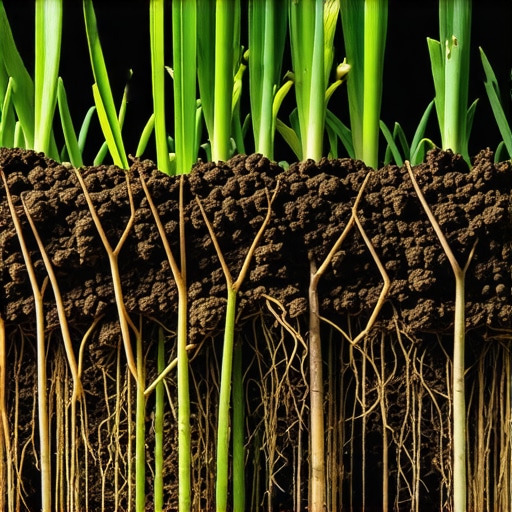
Why Your Calendar Is the Enemy of Your Lawn
Stop looking at the date on your phone and start looking at the thermometer in the dirt. Most homeowners fail at landscaping because they treat the ground like a static floor rather than a biological engine. I recently got a frantic call from a homeowner who had spent $2,000 on premium Kentucky Bluegrass seed, only to watch it rot in the ground. They followed the back of the bag’s ‘planting dates’ perfectly, but they ignored the record-breaking cold snap that kept the soil at a stagnant 42°F. Seed isn’t magic; it is a biological vessel waiting for a specific thermal trigger. If that trigger doesn’t hit, the seed sits, stays damp, and eventually succumbs to pythium blight or hungry birds. Your sod install or seeding project lives or dies by the thermal mass of your soil.
The Critical Thermal Windows for Germination
Soil temperature dictates grass seed germination by activating enzymatic processes within the embryo, requiring a sustained range of 50°F to 65°F for cool-season grasses and 70°F to 90°F for warm-season varieties. While air temperature fluctuates wildly, soil has high thermal inertia, meaning it takes weeks of consistent weather to shift the temperature of the root zone significantly. This lag is exactly why your neighbors who seed in the ‘perfect’ 70-degree air of early spring often fail—the ground is still a refrigerator. To succeed, you must measure the temperature at a 2-inch depth for three consecutive days. This is the only way to ensure the metabolic processes required for cell division in the coleoptile are active.
“Soil temperature is a more reliable indicator of plant growth stages than calendar dates because it reflects the actual energy available for metabolic activity.” – Penn State Extension
How much does soil temperature affect germination speed?
The rate of grass seed development is directly proportional to the accumulation of growing degree days within the soil matrix, where every degree below the species-specific threshold adds days to the risk of seed mortality. If you plant in 50-degree soil, a Tall Fescue might take 14 days to emerge. In 65-degree soil, that same seed can pop in 7 days. This week of difference is the ‘danger zone’ where yard cleanup debris, fungal pathogens, and washout from poor irrigation can destroy your investment. You want the seed out of the ground and establishing a root system as fast as possible to win the race against weeds like crabgrass, which also wait for specific thermal triggers to germinate.
| Grass Species | Minimum Soil Temp | Optimal Soil Temp | Days to Germination |
|---|---|---|---|
| Kentucky Bluegrass | 50°F | 60-75°F | 14-28 Days |
| Tall Fescue | 50°F | 60-70°F | 7-12 Days |
| Perennial Ryegrass | 50°F | 60-70°F | 5-10 Days |
| Bermuda Grass | 65°F | 75-90°F | 10-21 Days |
At what soil temperature does grass seed stop growing?
Cool-season grasses enter a state of dormancy or significantly reduced metabolic activity when soil temperatures exceed 85°F or drop below 45°F, effectively halting the maturation process of new seedlings. This is why late-summer seeding is a gamble. If the soil is too hot, the tender new shoots will literally cook. Conversely, if you wait too late in the fall and the soil drops below 40°F, the plant will stop growing before it has stored enough carbohydrates in the crown to survive the winter freeze. It is a razor-thin margin. You aren’t just planting; you are timing a biological launch sequence. Don’t skip the testing phase. Buy a $10 soil thermometer. It’s the cheapest insurance policy in landscaping.
The Infrastructure of a Successful Ground-Up Build
Before a single seed hits the dirt, you have to address the engineering of the yard. I see guys throwing seed over compacted red clay and wondering why their irrigation runoff looks like a mudslide. 80% of a professional sod install happens before the grass arrives. This starts with yard cleanup that goes beyond raking leaves. You need to strip the thatch layer—that spongy mat of dead organic matter—because seed-to-soil contact is non-negotiable. If the seed is suspended in thatch, it will germinate, dry out, and die within 48 hours.
“Proper irrigation during the establishment phase requires maintaining moisture in the top 0.5 inches of soil without causing anaerobic conditions or structural erosion.” – Texas A&M AgriLife
The Pre-Seeding Checklist
- Core Aeration: Pull 3-inch plugs to relieve compaction and allow oxygen to reach the microbes.
- Soil Testing: Check your pH. If you are below 6.0, your NPK uptake will be throttled.
- Grading: Ensure a 2% slope away from foundations to prevent hydrostatic pressure buildup.
- Utility Marking: Call 811 before you trench for any new irrigation lines.
- Debris Removal: Remove stones larger than a walnut; they create heat pockets that scorch tender roots.
Once the ground is prepped, the focus shifts to irrigation hydraulics. New seed needs ‘mist, not flood.’ You are trying to maintain a consistent moisture film around the seed coat to facilitate osmosis. If you see puddling, you’ve failed. You are suffocating the soil and inviting anaerobic bacteria. In my crew, we set controllers to run four times a day for 5 minutes each. This keeps the surface damp without saturating the base. As the roots dive deeper, you shift the strategy: deep and infrequent. You want those roots to chase the water down 6 inches into the profile. That is how you build a drought-tolerant lawn that doesn’t go dormant the second the sun comes out.
Managing the ‘Settling In’ Period
The first 30 days are the most critical. This is where most DIYers mess up by mowing too early or applying high-nitrogen ‘quick-green’ fertilizers. Your new grass is a baby; don’t feed it like an athlete. Use a starter fertilizer with a higher Phosphorus (the middle number on the bag) to encourage root branching rather than top-growth. And for the love of your lawn, keep the mower in the garage until the grass hits 4 inches. When you finally do mow, ensure the blades are razor-sharp. Dull blades tear the grass tissue, creating a jagged wound that leaks moisture and invites disease. One clean cut at a 3-inch height is the goal. No shorter. You need that leaf surface area to maximize photosynthesis and drive energy back into the root system. It is a game of patience and precision. If you can’t commit to the thermometer and the moisture schedule, you’re just throwing money into a hole in the dirt. Real landscaping isn’t about the green you see today; it’s about the biological foundation you build for next year.