Most homeowners view sod as a finished product, like a roll of carpet you install and forget. That mindset is a $10,000 disaster waiting to happen. In my 20 years of landscaping, I have seen more money wasted on dead grass than on failed hardscapes, and it almost always comes down to a fundamental misunderstanding of soil physics and root biology. New sod is a living transplant, a biological system that has been brutally severed from its primary nutrient and water source at the turf farm. Without a precision-engineered 21-day watering schedule, those roots will never knit into your local soil. Success is not about volume; it is about frequency, timing, and monitoring the soil-to-root interface.
The Critical First 21 Days: Why Planning Beats Luck
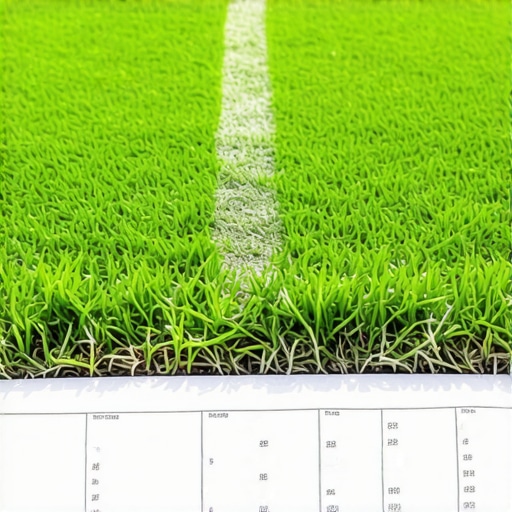
The first three weeks after a sod install determine the lifespan of your lawn for the next decade. During this window, you are managing evapotranspiration rates and soil moisture tension to ensure the root crown remains hydrated while the rhizomes push downward into the prepared subgrade. A homeowner called me in a panic after they completely torched their front lawn by applying a heavy granular fertilizer during a 90-degree heatwave on day four. They literally chemically cooked the delicate root hairs before they could even seek moisture. It was a $7,000 funeral for a lawn. This failure highlights the necessity of a strictly water-focused initial phase. If your yard cleanup did not involve stripping the old thatch and tilling in organic amendments, your watering job just got twice as hard because you are fighting poor soil structure. [IMAGE_PLACEHOLDER]
“Proper irrigation management during the first 14 days is the single most influential factor in turfgrass survival post-harvest.” – Penn State Center for Turfgrass Science
The Pro 3-Week Watering Schedule
This schedule transitions your turf from life support to independent growth by manipulating root depth through controlled moisture stress. You must adjust based on your soil’s percolation rate and local evapotranspiration (ET) data. If you have heavy clay, you face hydrostatic pressure issues; if you have sand, you face leaching. Use this table to understand how your local geology affects your watering requirements.
| Soil Composition | Drainage Characteristics | Watering Adjustment |
|---|---|---|
| Heavy Red Clay | Low infiltration, high runoff | Short, pulsed cycles (5 mins on, 30 mins off) |
| Sandy Loam | High infiltration, low retention | Longer duration, higher frequency |
| Compacted Silt | Poor oxygen exchange | Aeration required before sod install |
Week 1: The Saturation Phase (Days 1-7)
During week one, your goal is to keep the sod and the top 2 inches of soil consistently moist, but not anaerobic. Roots cannot breathe in standing water. You should be watering 4 to 6 times per day for 5-10 minutes per zone. This prevents the edges of the sod rolls from shrinking. If you see gaps opening between the pieces of sod, you are failing. The ground should feel like a wrung-out sponge. Do not walk on the grass during this time. Your footprints will create depressions that collect water and cause localized dry spots or rot. Check the corners. Wind often dries out the perimeter faster than the center.
Week 2: The Weaning Phase (Days 8-14)
In the second week, you must force the roots to work by reducing the frequency of watering while increasing the duration. Cut back to twice a day—once in the early morning and once in the late afternoon. This is when the root hairs begin to penetrate the native soil. If you continue watering 6 times a day, the roots will stay in the sod layer because they have no reason to go deeper. This is called root laziness. By day 10, try to lift a corner of the sod. If it resists, you have root-to-soil knitting. This is a victory. It will rot if you keep it submerged now.
Week 3: The Hardening Phase (Days 15-21)
By week three, your lawn should be transitioning to a standard irrigation schedule of 1 inch of water per week, delivered in deep, infrequent sessions. Water once a day, or every other day, depending on the heat. You are now training the roots to chase the moisture gradient deep into the ground. This builds drought resistance. This is also the time to perform your first mow. Set your deck to the highest setting. Never remove more than one-third of the grass blade. Scalping new sod is a death sentence for the crown.
“A retaining wall doesn’t fail because of the stone; it fails because of the water trapped behind it; similarly, a lawn doesn’t fail because of the grass, but because of the soil’s inability to manage the water provided.” – Hardscape and Drainage Engineering Axiom
How much water does new sod need?
New sod requires approximately 0.25 to 0.50 inches of water per day during the first week, split into multiple short cycles. This keeps the interface between the sod and the subsoil hydrated without causing nutrient leaching or fungal pathogens like Pythium blight. Use a tuna can or rain gauge to measure your sprinkler output accurately. Every system is different.
Can you overwater new sod?
Yes, overwatering new sod creates anaerobic soil conditions where oxygen is pushed out, leading to root rot and anaerobic decay. If the soil feels mushy or smells like sulfur, you are drowning the plant. Roots need pore space for gas exchange. Without oxygen, the roots will turn black and slimy, and the sod will peel up like a wet rug. Stop the water immediately if this occurs.
The Professional Installation Checklist
- Pre-Install Soil Test: Check your pH levels; turf prefers 6.0 to 7.0.
- Grade Correction: Ensure a 2% slope away from foundations to prevent pooling.
- Irrigation Audit: Check for clogged nozzles or mismatched precipitation rates.
- Rolling the Sod: Use a water-filled roller to eliminate air pockets between roots and soil.
- Utility Marking: Always call 811 before trenching for new irrigation lines.
Proper landscaping is not a mystery; it is a series of engineering decisions. If you follow this 3-week protocol, you are not just growing grass; you are building an ecosystem. Skip the cheap fertilizers and the “mow-and-blow” advice. Focus on the soil, the water, and the timing. Your lawn will thank you with a decade of health.