The Visual Autopsy of a Dying Boxwood
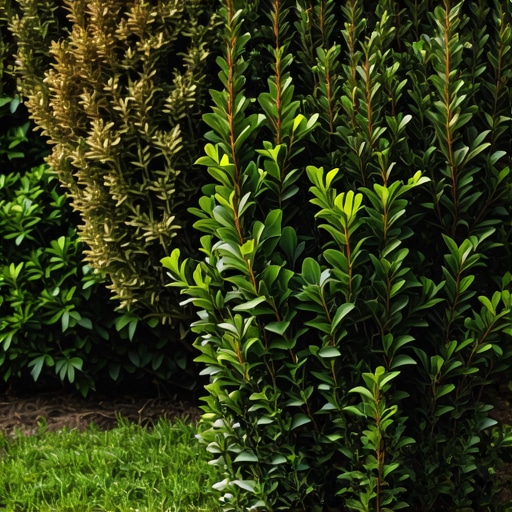
When you see your boxwoods browning from the center, you are witnessing a systemic failure of the plant’s vascular system. Boxwood blight and Phytophthora root rot are the primary drivers of this internal decay, often exacerbated by poor drainage and incorrect irrigation. This is not a surface-level cosmetic issue. It is a biological emergency that often starts months before the first yellow leaf appears on the exterior. I always drill into my new crew members: if you don’t fix the soil grading first, every plant you put in the ground is just expensive compost. I have seen countless homeowners waste thousands on high-end landscaping only to watch it rot because they ignored the hydrostatic pressure of the soil. Grading is the bedrock of horticulture. Without a 2% slope away from the root zone, you are essentially drowning your investment in a subterranean bathtub.
The Biological Culprits: Blight and Beyond
Boxwood blight, caused by the fungal pathogen Cylindrocladium buxicola, is the most aggressive threat to your hedges. This fungus thrives in the humid, stagnant microclimates created by dense foliage and overhead irrigation. It starts as dark leaf spots and rapidly progresses to black stem cankers that choke off nutrient flow. If you are doing a yard cleanup and find sticky white spores on the underside of leaves, you are dealing with a breakout.
“Boxwood blight spores are heavy and sticky; they do not travel far by wind but are easily spread by contaminated tools, clothing, and splashing water.” – Penn State Agricultural Extension
This is why your yard cleanup must involve sanitizing shears with a 10% bleach solution between every single bush. Failure to do so turns your maintenance routine into a delivery system for pathogens. The fungus penetrates the leaf cuticle directly, meaning it does not need a wound to infect. It is a perfect predator for a dense boxwood hedge.
How do I know if my boxwood has blight?
To identify boxwood blight, look for rapid defoliation starting from the lower interior branches and moving upward. Check for black streaks or cankers on the green stems and circular brown spots with dark borders on the foliage. If the leaves turn straw-colored and drop quickly, it is likely blight. Volutella blight is another common issue, but it usually leaves the leaves attached to the stem for a longer period. Both require aggressive intervention. You cannot spray your way out of a drainage problem. You must address the environment. Many contractors will try to sell you a sod install right up to the base of the boxwood. This is a mistake. Grass competes for nitrogen and the frequent watering required for new sod will create the exact humid conditions that fungi love.
The Soil Mechanics of Buxus Health
| Boxwood Variety | Disease Resistance | Optimal Soil pH | Drainage Requirement |
|---|---|---|---|
| English (Buxus sempervirens ‘Suffruticosa’) | Very Low | 6.5 – 7.2 | Extreme / High |
| American (Buxus sempervirens) | Moderate | 6.8 – 7.5 | High |
| Littleleaf (Buxus microphylla) | High | 6.5 – 7.0 | Moderate |
| NewGen Hybrids | Very High | 6.5 – 7.5 | Moderate |
Soil compaction is the silent killer. When we talk about landscaping, we are talking about soil porosity. Boxwoods have shallow, fibrous root systems that require high oxygen levels. In heavy clay soils, these roots suffocate. This leads to opportunistic infections like Phytophthora.
“Phytophthora root rot is favored by high soil moisture and warm temperatures; it is a water mold that literally swims through the soil to infect root tips.” – Texas A&M Agrilife Extension
If your soil feels like plasticine when wet, you need to incorporate expanded shale or coarse organic matter before planting. Do not just dig a hole; create a soil profile. A sod install adjacent to boxwood beds often leads to over-compaction from heavy mowers. This compaction reduces the gas exchange capacity of the soil, leading to root tip dieback and internal browning.
Irrigation Engineering: The Drip Line Standard
Overhead watering is the fastest way to kill a boxwood. It creates a film of water on the interior leaves that stays trapped for hours, providing the perfect germination chamber for fungal spores. High-end irrigation systems for boxwood hedges should always utilize pressure-compensated drip emitters placed at the soil level. These emitters deliver water directly to the root zone without wetting the foliage. Each plant needs approximately 1 inch of water per week, delivered in one or two deep sessions. This forces the roots to grow deeper into the soil profile to find moisture, rather than staying at the surface where they are vulnerable to heat and drought. If you see your landscaping crew aiming spray heads at your boxwoods, fire them. They are killing your plants.
How much water do boxwoods need?
Established boxwoods require approximately one inch of water per week delivered through deep, infrequent irrigation to promote healthy root architecture. During the first two years after a sod install or plant installation, you may need to check the soil moisture daily, ensuring the top 2 inches stay moist but not saturated. Use a soil probe. If the probe comes up muddy, stop watering. If it is hard to push in, you are too dry. It is a simple measurement that saves thousands in replacement costs. We use tensiometers on high-end jobs to measure the exact suction pressure the roots are under. You can do the same with a $20 moisture meter from a garden center.
The Spring Yard Cleanup Checklist
- Remove all fallen leaf litter from the interior of the plant to increase airflow.
- Thin out 10% of the interior branches using bypass pruners to allow sunlight to reach the center.
- Apply a 2-inch layer of hardwood mulch, keeping it 3 inches away from the main trunk to avoid root flare rot.
- Test soil pH and adjust to 6.5-7.2 using pelletized lime if necessary.
- Sanitize all tools with 70% isopropyl alcohol or a bleach solution after every plant.
Proper yard cleanup is not just about aesthetics. It is about sanitation. Those fallen leaves harbor spores that will re-infect the plant during the first spring rain. If you leave the debris, you are leaving a biological time bomb. I have seen hedges that were cured of blight only to have it return because the landscaping company didn’t bag the clippings. Take the debris off-site. Do not compost it. The heat of a standard home compost pile is not enough to kill these pathogens. They will survive and find their way back into your garden beds. Professionalism in this industry means understanding the lifecycle of the pests we fight. Anything less is just guesswork.