
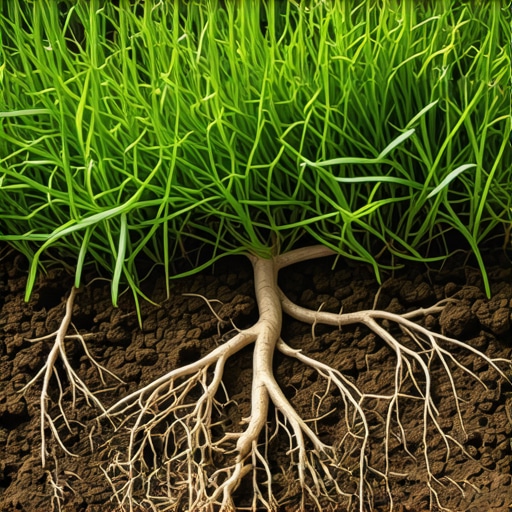
The Anatomy of a Failed Sod Installation
I always drill into my new crew members: if you don’t fix the soil grading first, every plant you put in the ground is just expensive compost. I recently stood on a lawn in the heat of July where the homeowner could literally pick up 500 square feet of sod like a loose rug. It was a $4,000 disaster. The culprit? Air-bridging. The previous contractor had skipped the yard cleanup and left the old, dead thatch layer beneath the new rolls. They didn’t roll the sod, and they certainly didn’t check the soil-to-root contact. When you lay sod, you are performing a biological transplant. If those roots don’t hit mineral soil within 48 hours, the plant begins to enter a state of permanent wilting. It won’t just look bad. It will die.
Understanding the Failure of Sod-to-Soil Contact
Sod peels because of air pockets, poor soil preparation, or improper rolling, which prevents the roots from penetrating the native soil. Without direct contact, the grass blades rely solely on the thin layer of peat or soil they were grown in, leading to rapid desiccation and death. This is often exacerbated by uneven grading where the sod bridges over low spots. You cannot simply lay grass over hard-packed clay and expect a miracle. The roots need a path of least resistance.
“Successful turfgrass establishment depends on maximizing the surface area of root-to-soil contact to facilitate immediate water uptake and nutrient exchange.” – Penn State Center for Turfgrass Science
The Mechanics of Sub-Grade Preparation
Professional sub-grade preparation involves clearing all organic debris, grading to a 1-2 percent slope for drainage, and tilling the soil to a 4 to 6 inch depth to break compaction. This ensures the roots encounter loose, aerated soil immediately upon installation, facilitating deep hydraulic anchoring. If your soil is compacted at a PSI higher than 300, roots will deflect sideways rather than diving deep. This is why yard cleanup is not just about aesthetics; it is about engineering a root-penetrable environment. Removing every rock larger than two inches and every clump of old crabgrass is mandatory. If you skip this, you create microscopic voids. Those voids fill with air. Air kills roots.
How much water does new sod actually need?
New sod requires approximately 1 inch of water daily for the first 14 days, split into two or three light applications to keep the interface moist. You are not watering the grass; you are watering the soil-sod boundary. Once the roots knit into the soil, you must transition to deep, infrequent watering to force the roots to chase moisture downward into the profile.
Why is my sod turning brown and lifting?
Lifting is a sign of hydrophobic soil or extreme compaction. If the native soil is too hard, the water sits in the sod layer, the roots rot, and the entire piece separates from the ground. If you can slide your hand under a piece of sod three days after installation, your roller wasn’t heavy enough or your grade is uneven. Fix it now. Do not wait.
[image_placeholder]
The Physics of the Sod Roller
The use of a water-filled sod roller is the most neglected step in DIY landscaping. A 200-pound roller exerts the specific downward pressure needed to eliminate air pockets without over-compacting the soil. When the sod is laid, it sits on top of the soil like a sponge on a table. Rolling it creates the capillary bridge necessary for water to move from the native soil into the root zone. Without this pressure, the roots sit in an air gap, dry out, and the sod peels. It is a simple mechanical failure with a biological consequence. You must roll the entire area in two directions: north-to-south and east-to-west. Watch for the edges. That is where most peeling begins.
| Action Item | Technical Specification | Impact on Root Contact |
|---|---|---|
| Soil Tilling | 4-6 inches depth | Reduces bulk density for root penetration |
| Grading | 1 percent minimum slope | Prevents anaerobic root rot at the interface |
| Rolling | 200-300 lb water roller | Eliminates air pockets and air-bridging |
| Fertilization | High Phosphorus (Starter) | Stimulates immediate lateral root branching |
Managing Irrigation and Hydrostatic Pressure
Irrigation for new sod is a delicate balance of saturation and oxygenation. If you over-saturate, you create a muddy slurry that lacks oxygen, causing the roots to drown. If you under-water, the edges of the sod shrink. When sod shrinks, it leaves gaps. Those gaps expose the soil to the sun, further drying out the root zone.
“Improper base preparation and lack of moisture management are the primary causes of premature hardscape and softscape failure in residential zones.” – ICPI Tech Manual
You must monitor the soil moisture at a depth of 3 inches, not just the surface. Use a soil probe. If the native soil is bone dry while the sod is soaking wet, the roots will never migrate downward. They have no reason to leave the wet sponge for the dry desert.
The Professional Sod Installation Checklist
- Perform a 72-hour weed kill-off using a non-selective herbicide before any soil work.
- Remove all dead organic matter to prevent a fungal ‘mat’ from forming between layers.
- Test soil pH: aim for 6.2 to 7.0 for most cool-season grasses.
- Apply a starter fertilizer with a 1-2-1 NPK ratio to the bare soil, not on top of the grass.
- Lay sod in a brick-work pattern to minimize long seams that can catch wind and dry out.
- Roll the entire area immediately after laying, before the first watering.
- Check the ‘tug test’ daily: if the sod resists being lifted, the roots are knitting.
The Microbiological Reality of 2026 Turf
We are seeing more aggressive fungal pathogens in recent years. If you leave a layer of old grass under your new sod, you are creating a petri dish for Pythium and Rhizoctonia. These fungi thrive in the warm, wet, anaerobic environment created by poorly prepped sod. When people talk about ‘bad sod,’ they usually mean a bad install. The sod was likely healthy when it left the farm. It died because you didn’t provide the microbiological bridge to the local soil. Use a humic acid supplement during the first watering. This helps break down the tension of the soil and encourages the roots to establish a symbiotic relationship with local mycorrhizae. This isn’t just about ‘greening up’; it’s about structural integrity. In three years, you want a lawn you can’t pull up with a tractor, let alone your hands. Get the contact right on day one. There are no shortcuts in the dirt.