
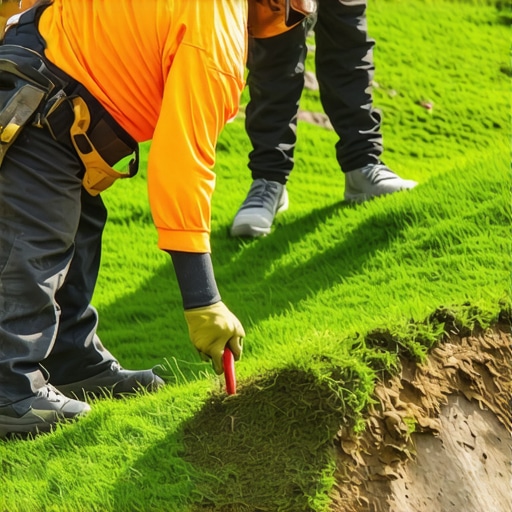
The Forensic Autopsy of a Sliding Lawn
I recently got called out to a job site on a hillside property where a homeowner had spent nearly fifteen thousand dollars on premium TifTway 419 Bermuda sod, only to watch it literally peel off the clay substrate like a wet carpet after the first heavy thunderstorm. The visual was a disaster: rolls of expensive turf were bunched up at the bottom of the grade, exposing a raw, gouged hillside of slick red clay. This was not an act of God. It was a failure of engineering. Most people treat sod like a rug you just roll out, but on a steep grade, you are dealing with civil engineering principles like shear strength, hydrostatic pressure, and the angle of repose. If you do not respect the physics of the slope, the biology of the grass will never have a chance to take hold. You cannot simply lay grass on a hill and hope for the best. You have to anchor it into the local ecology through proper yard cleanup, soil prep, and mechanical stabilization. Let us break down the forensic failure of most sloped installs.
Mistake 1: Ignoring Substrate Preparation and Soil Compaction
To prevent sod from sliding on a steep hill, you must create a textured, nutrient-rich interface that allows for immediate capillary action between the new root zone and the existing subsoil. Most hacks just scrape the weeds away and throw the sod down. This creates a slip plane where water sits between the sod and the hard-packed earth, effectively lubricating the hill for a total washout. You need to perform a deep yard cleanup that removes every stick, rock, and weed, followed by a light tilling to break the surface tension of the soil.
“Successful establishment on slopes requires immediate contact between the sod and the soil to prevent air pockets that desiccate roots and to minimize the risk of surface water lifting the turf layer.” – University of Minnesota Extension
The science of soil prep on a hill is about balancing pore space with stability. If the soil is too compacted, the roots cannot penetrate. If it is too loose, the entire hill will slump. We aim for a compaction rate that allows a penetrometer to slide in with moderate resistance but does not feel like concrete. We often use a heavy-duty garden rake to create horizontal grooves across the slope before the sod goes down. These grooves act as mini-terraces, catching water and giving the roots a place to grab. If you are dealing with heavy clay, you must incorporate gypsum or organic compost to improve the Cation Exchange Capacity (CEC), ensuring the grass has the chemical fuel it needs to grow roots fast. Speed is life on a hill. The faster the roots knit into the subsoil, the safer your investment is.
How do you keep sod from sliding down a hill?
To keep sod from sliding, you must vertically anchor the turf rolls using biodegradable sod staples or wooden stakes and ensure all seams are staggered in a brickwork pattern. This layout prevents long, continuous vertical channels from forming, which would otherwise allow water to gain velocity and erode the soil underneath the grass.
Mistake 2: Parallel Seaming and the Failure to Stake
One of the most common errors I see is laying sod rolls parallel to the direction of the slope. This creates long, straight seams that act as gutters. During a rain event, water gathers in these seams, gains velocity, and begins to excavate the soil beneath the sod. This is called rill erosion, and it is the primary killer of sloped landscaping. You must lay your sod perpendicular to the slope. Think of it like laying bricks on a wall. Every seam should be offset. This forces water to take a zig-zag path down the hill, slowing it down and allowing it to soak into the ground rather than washing it away.
Then there is the issue of gravity. Even with staggered seams, a heavy roll of sod on a 30-degree incline wants to move downward. You must use sod staples. Not just one or two, but at least three to five per roll, depending on the steepness. I prefer 6-inch U-shaped steel staples or biodegradable stakes for eco-conscious clients. You drive them through the sod and deep into the subsoil. This provides the mechanical shear strength needed to hold the turf in place while the biological anchoring (the roots) takes over. I have seen crews skip this step because it is tedious. Those are the same crews that get sued when the lawn ends up in the neighbor’s driveway.
Should I stake sod on a slope?
Yes, you must stake sod on any slope exceeding a one-to-three (1:3) rise-to-run ratio to prevent gravitational creep and hydraulic lifting. Staking ensures that the root-to-soil contact remains constant even when the turf is saturated with water, which significantly increases the weight of each roll.
Mistake 3: Poor Irrigation Management and Hydrostatic Pressure
Watering a hill is not the same as watering a flat yard. If you run your irrigation for thirty minutes straight on a slope, the top five feet of the hill will be bone dry while the bottom of the hill becomes a swamp. This is due to gravity-fed runoff. To grow a healthy lawn on an incline, you must use the Cycle and Soak method. This involves running the irrigation for short bursts, say five to eight minutes, and then waiting an hour for that water to penetrate the soil before the next cycle begins. This prevents the surface from becoming oversaturated and sliding.
“A sloped landscape does not fail because of the grass species; it fails because of the water trapped behind or under the root zone, creating hydrostatic pressure that overcomes the soil’s internal friction.” – Agronomy Technical Manual
Furthermore, many homeowners fail to realize that new sod on a hill needs deep, infrequent watering after the first two weeks to force the roots to chase the water down into the earth. If you only provide light, frequent mists, the roots will stay in the top half-inch of the sod. This results in a weak lawn that will go dormant or die during the first heatwave. We want roots that are six to eight inches deep. Deep roots are the ultimate anchors. They act like a million tiny rebar rods holding the hillside together. If your irrigation system is not calibrated for the slope, you are essentially just lubricating a landslide.
Slope Stability Comparison Table
The following table illustrates how different soil types and slope gradients dictate the intensity of the sod installation requirements.
| Slope Gradient | Soil Type | Erosion Risk | Required Anchoring |
|---|---|---|---|
| 1:4 (Mild) | Sandy Loam | Low | Staggered Seams Only |
| 1:3 (Moderate) | Silt/Clay | Medium | 2 Staples per Roll |
| 1:2 (Steep) | Heavy Clay | High | 5 Staples + Soil Tacking |
| >1:2 (Extreme) | All Types | Extreme | Terracing or Geogrid |
The Professional Hill-Sodding Checklist
Before you even think about ordering a pallet of sod for your hill, you need to go through this checklist. If you skip a single step, you are gambling with your budget.
- Pre-Install Yard Cleanup: Remove all organic debris, old turf, and loose rocks that could create air pockets.
- Soil Analysis: Test for pH levels. Most turf prefers a pH between 6.0 and 7.0. Adjust with lime or sulfur as needed.
- Horizontal Scarification: Use a rake or tiller to create horizontal grooves across the slope to catch water and roots.
- Perpendicular Layout: Always lay the sod across the slope, never up and down.
- Staggered Seams: Ensure no two vertical seams align, creating a brick-like pattern.
- Staking: Use 6-inch staples at the corners and center of every roll.
- Rolling: Use a weighted lawn roller (half-filled with water) to press the sod into the soil, eliminating air pockets.
- Irrigation Calibration: Set your timers for Cycle and Soak to prevent runoff.
The Technical Reality of Root Development
While the internet tells you to water every day, turf grass actually needs deep, infrequent watering, exactly 1 inch per week, to force roots to chase the water down. On a hill, this is even more critical. You are fighting gravity. If the water only sits on the surface, the roots have no reason to dive deep. We want those roots to penetrate the subsoil to create a cohesive mat. This is the difference between a landscape that lasts twenty years and one that fails in twenty days. Don’t be the person who hires a mow-and-blow crew to do a master landscaper’s job. Landscaping on a hill is a matter of biology and engineering working in tandem. It is not just about looks; it is about keeping the earth where it belongs. It will rot if you leave air pockets. It will slide if you don’t stake it. Do it right the first time or don’t do it at all. “