The sound of a leaking irrigation valve is the sound of money draining into the subsoil. It starts as a faint hiss inside the valve box and ends with a saturated, anaerobic mess that kills your turf and spikes your utility bill. Most homeowners, and quite frankly, most ‘mow-and-blow’ laborers, see a leaking valve and immediately reach for a shovel to excavate the entire manifold. That is a waste of time and professional resources. Most solenoid-level leaks are not caused by a catastrophic failure of the valve body or a cracked lateral line. Instead, they are the result of a compromised O-ring—a tiny circle of synthetic rubber that handles the critical task of sealing the solenoid to the valve bonnet. When this seal fails, the hydrostatic pressure within the valve overcomes the physical barrier, leading to a constant weep. Repairing this requires surgical precision, not heavy machinery.
Why Irrigation Valves Leak at the Solenoid
Irrigation valve leaks at the solenoid typically occur because the O-ring has suffered from compression set, chemical degradation, or sediment abrasion. To fix this, you must depressurize the mainline, unscrew the solenoid, and replace the failing elastomer seal with a matching Buna-N or EPDM O-ring. This maintains the structural integrity of the seal against 50 to 80 PSI of water pressure.
I always drill into my new crew members: if you don’t fix the soil grading first, every plant you put in the ground is just expensive compost. The same logic applies to irrigation. You can’t just slap a part on; you have to understand the physics of why it failed. Last season, I had an apprentice who spent three hours trying to ‘tighten’ a leaking solenoid on a commercial 2-inch plastic valve. By the time I got there, he had stripped the threads on the valve bonnet because he didn’t realize the O-ring had flattened out and lost its elasticity. He was trying to use torque to fix a problem that required chemistry. That O-ring was ten years old; it had been baked by the summer heat and frozen by the winter ground until it was as brittle as a potato chip. We replaced that 50-cent ring, and the leak stopped instantly. It was a lesson in engineering: the seal does the work, not the threads.
“A properly functioning irrigation system is the foundation of landscape longevity; even a minor leak of one gallon per hour can result in over 700 gallons of wasted water per month.” – Texas A&M AgriLife Extension
The Forensic Anatomy of an Irrigation Valve
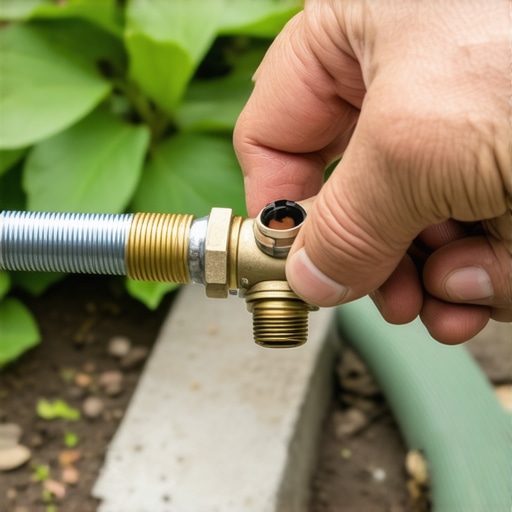
Before you start pulling parts, you need to understand what is happening inside that plastic housing. The solenoid is essentially an electromagnet that lifts a plunger to open a weep hole, which in turn allows the diaphragm to lift. The O-ring sits at the base of this solenoid. It is the only thing standing between the pressurized water in the valve and your valve box. If that ring is nicked by a grain of sand during a yard cleanup or a messy sod install, the seal is broken. The water will follow the path of least resistance, which is usually right out of the top of the valve.
| Component | Material | Common Failure Mode | Technical Solution |
|---|---|---|---|
| Solenoid O-Ring | Buna-N / EPDM | Compression Set / Dry Rot | Replace with identical ID/OD ring |
| Valve Diaphragm | Reinforced Rubber | Pinhole Tears / Sediment Clogs | Flush valve body and replace diaphragm |
| Solenoid Plunger | Stainless Steel / Rubber Tip | Calcification / Spring Fatigue | Soak in descaler or replace solenoid |
| Valve Bonnet | Glass-filled Nylon | Stress Cracks / Stripped Threads | Replace entire valve top assembly |
How much water does a small irrigation leak waste?
A small leak at the solenoid O-ring can waste 15 to 30 gallons of water per day depending on your static water pressure. Over a 30-day billing cycle, this can lead to nearly 900 gallons of wasted water, which often pools around the manifold and causes root rot in nearby turf or shrubs.
How do I know if the O-ring is the problem?
Identify the leak by looking for water bubbling specifically from the base of the solenoid rather than the seams of the valve body. If you can hand-tighten the solenoid and the leak persists or changes in intensity, the O-ring is likely compressed, cracked, or missing its factory lubricant. This is a common issue after a major yard cleanup where debris enters the valve box.
Step-by-Step O-Ring Replacement Protocol
Precision is mandatory here. Do not use pliers on the solenoid unless absolutely necessary, as you risk cracking the plastic housing. Follow this sequence to ensure a professional-grade repair.
- Shut off the Main Water Supply: Locate the backflow preventer or the main irrigation shut-off valve. If you skip this, you will get a face full of pressurized water the moment you unscrew the solenoid.
- Clean the Valve Area: Use a brush to clear away dirt and mulch. This prevents contaminants from falling into the valve body, which is critical if you’ve recently done a sod install or heavy landscaping.
- Remove the Solenoid: Twist the solenoid counter-clockwise. Be careful not to strain the waterproof wire connectors (grease caps).
- Inspect the O-Ring: The ring may be stuck to the solenoid or seated in a groove on the valve bonnet. Remove it and check for flattened sides or cracks.
- Match the Size: Not all O-rings are equal. You need the exact inner diameter (ID) and thickness. Using the wrong size will cause the seal to blow out under pressure.
- Lubricate and Install: Apply a thin coat of silicone-based O-ring lubricant. Do not use petroleum jelly, as it will degrade the rubber over time.
- Hand-Tighten: Screw the solenoid back in until it is snug. Over-tightening is the primary cause of cracked valve bonnets.
“Structural failures in plastic irrigation components are often the result of localized stress concentrations caused by over-torqueing threaded connections.” – ICPI Technical Manual
The Engineering Reality of Soil and Water
In my 20 years of experience, I’ve seen that irrigation maintenance is often neglected until the lawn is brown. When we perform a sod install, the first thing we check is the valve manifold. If those O-rings are failing, the new sod will either drown or starve for water because the pressure is dropping at the leak point. This is especially true in areas with high mineral content in the water. Calcium and magnesium deposits act like sandpaper on rubber O-rings. Every time the solenoid vibrates during activation, those minerals grind away at the seal. It is a slow, microscopic death for the component. Don’t be the contractor who ignores the small stuff. A 50-cent O-ring is the difference between a high-performing landscape and a muddy failure. Fix the seal. Save the water. Protect the engineering of the system.