Installing 2026 Sod on Slopes: Pinning Tactics That Work
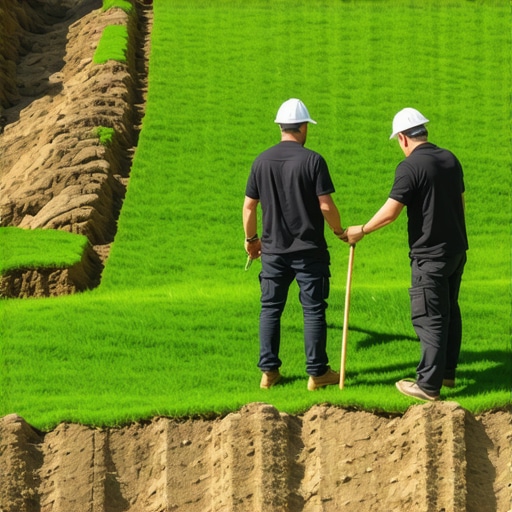
Installing sod on a flat suburban lot is a weekend project; installing sod on a 2:1 or 3:1 slope is a high-stakes civil engineering task. If you treat a hillside like a flat lawn, gravity and hydrostatic pressure will win every single time. Most ‘mow-and-blow’ outfits will simply lay the rolls, throw a few plastic stakes in, and collect a check. Three weeks later, after a heavy rain, that $5,000 investment is a crumpled heap of dead grass at the bottom of the hill. We do things differently. We look at the shear strength of the soil, the moisture-holding capacity of the subgrade, and the mechanical fastening required to bridge the gap between the root zone and the earth.
The Physics of Slope Stability: Why Conventional Sodding Fails
Sod installation on slopes requires mechanical stabilization using 6-inch 11-gauge steel sod staples and staggered joint patterns to counteract gravitational shear. Success depends on the friction coefficient between the sod’s soil backing and the prepared subgrade, supplemented by pinning patterns that vary based on the degree of the incline. It will fail if you skip the math.
I always drill into my new crew members: if you don’t fix the soil grading first, every plant you put in the ground is just expensive compost. I remember a job back in ’08 where a homeowner tried to ‘save’ a failing 35-degree clay bank by throwing fescue rolls over it without any prep. When I arrived, the entire hillside had sloughed off like wet skin. The problem wasn’t the grass; it was the fact that the soil was compacted to the point of being hydrophobic. Water didn’t soak in; it acted as a lubricant between the sod and the hill. We had to excavate, incorporate 4 inches of organic compost to break the clay’s surface tension, and use a ‘J-hook’ pinning strategy to lock it down. It hasn’t moved an inch in fifteen years. You have to respect the physics of water and weight.
“A retaining wall doesn’t fail because of the stone; it fails because of the water trapped behind it.” – Hardscape Engineering Axiom
The Ground-Up Build: Site Preparation and Soil Engineering
Preparation for 2026-grade sod begins with a thorough yard cleanup that goes beyond removing debris. You are looking for ‘micro-rills’—small channels carved by previous rain. These must be filled and compacted. If you leave a rill under your sod, water will find it, accelerate, and wash out the soil from under the roots. We use a 200-pound water-filled roller to ensure the subgrade is firm but not glazed. If the soil is too smooth, the roots have nothing to bite into. We use a Harley rake to create a ‘tracked’ surface that acts like a series of tiny terraces for the root hairs.
How do I keep sod from sliding down a hill?
To keep sod from sliding, you must install the rolls perpendicular to the slope and stagger the seams in a brickwork pattern. This prevents water from creating a straight ‘runway’ down the seams. Each roll must then be secured with steel staples placed at the top edge and through the center to anchor the matting into the subsoil. Don’t use plastic stakes; they lack the shear strength of 11-gauge steel.
| Slope Ratio | Degrees | Pinning Density (Per Sq. Yard) | Recommended Staple Length |
|---|---|---|---|
| 4:1 (Gentle) | 14° | 2-3 Staples | 6-inch Steel |
| 3:1 (Moderate) | 18° | 4-5 Staples | 6-inch Steel |
| 2:1 (Steep) | 26° | 8-10 Staples | 8-inch Steel |
The Blueprint: Precision Pinning and Installation Tactics
When the sod arrives, it must be moist. If the edges are drying out, the ‘knitting’ process is already compromised. On a slope, we start at the bottom and work our way up. This allows the weight of the higher rolls to compress the lower rolls against the ‘toe’ of the hill, creating a natural anchor. However, the pinning is where the real work happens. You aren’t just ‘tacking’ the grass; you are ‘stitching’ it into the earth. We use a ‘staggered diamond’ pattern. For a 2:1 slope, we place a staple every 6 inches along the top edge of each roll and one in the center. The staple must be driven flush so it doesn’t interfere with future mowing, but not so deep that it crushes the crown of the grass plant. If you crush the crown, the grass dies, the roots rot, and the staple loses its anchor. It is a delicate balance of force and finesse.
“The establishment of turfgrass on steep grades is dependent upon the immediate contact between the sod and the soil, coupled with a moisture regime that prevents desiccation of the exposed root system.” – Penn State Center for Turfgrass Science
How many sod staples do I need per roll?
For standard 10-square-foot rolls on a moderate slope, you need a minimum of 5 to 7 staples per roll. On steeper 2:1 grades, this requirement increases to 10 staples per roll to account for the increased gravitational pull and the weight of water during irrigation cycles. Always over-order your staples by 20% to account for hitting rocks or underground debris.
Irrigation Management: The Cycle-and-Soak Protocol
Your irrigation strategy on a slope must be fundamentally different from a flat lawn. On a flat surface, you can run a zone for 20 minutes. On a slope, if you run a zone for 20 minutes, 15 minutes of that water is simply running off the surface and pooling at the bottom. This creates a ‘swamp’ at the base and a ‘desert’ at the top. We utilize the ‘Cycle-and-Soak’ method. We set the irrigation controller to run for 5 minutes, wait for 30 minutes to allow the water to move via capillary action into the root zone, and then repeat the cycle four times. This forces the roots to chase the moisture deeper into the hill, which is what ultimately stabilizes the slope. A hill stabilized by 6-inch deep roots is permanent; a hill held by staples alone is temporary. Don’t skip the deep watering.
The 2026 Slope Sodding Checklist
- Mechanical Cleanup: Remove all rocks larger than 1 inch and any organic debris that could rot and create voids.
- Soil Testing: Ensure the pH is between 6.0 and 7.0. On slopes, lime and phosphorus move quickly, so incorporate them into the top 2 inches of soil before laying sod.
- Trenching the Top: Dig a shallow ‘tuck’ trench at the very top of the hill to bury the top edge of the first row of sod. This prevents water from getting *under* the top roll.
- Perpendicular Laying: Always lay rolls across the slope, never up and down.
- Staggered Seams: Offset the vertical seams like bricks in a wall.
- The Pinning Matrix: Use 11-gauge steel staples in a diamond pattern.
- The Roll: Use a lightweight roller after pinning to ensure ‘intimate contact’ between the sod and the dirt.
The 2026 standard for landscaping involves more than just aesthetics; it involves longevity. With increasing weather volatility, your slope stabilization must be over-engineered. We no longer rely on the ‘hope and a prayer’ method. We rely on the physical bond between the grass and the grade. If you follow these pinning tactics, your hillside will be a structural asset rather than a maintenance liability. Do it right the first time, or don’t do it at all.
“