The Engineering Reality of Underwater Illumination Maintenance
To maintain 2026 water feature lights without draining the system, you must focus on mechanical lens cleaning, O-ring lubrication, and dielectric grease application. Utilizing long-reach pond tools and specialized calcium-dissolving agents ensures that IP68-rated fixtures remain operational without disrupting the aquatic biological balance or wasting thousands of gallons of treated water. Neglecting this leads to thermal failure. It is avoidable.
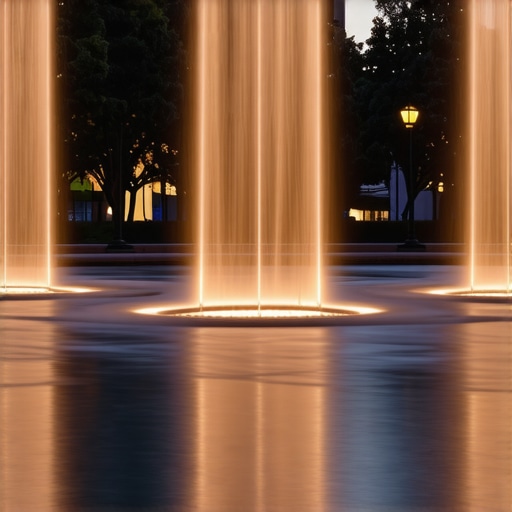
I recently got called out to tear up a $30,000 patio that was sinking because the previous contractor failed to account for hydrostatic pressure and used cheap, non-breathable landscape fabric under the base. That same job had a massive stone waterfall where every single light had burnt out within six months. Why? Because the ‘pro’ installer didn’t understand that underwater lights generate heat that must be dissipated by the surrounding water. When algae and calcium carbonate build up on the lens, they act as an insulator. The LED diode cooks itself. You don’t need to drain the pond to fix this, but you do need to understand the physics of what is happening under the surface.
“A retaining wall doesn’t fail because of the stone; it fails because of the water trapped behind it.” – Hardscape Engineering Axiom
How much light output is lost to algae buildup?
Algae and biofilm can reduce lumen output by up to 60% within a single season of landscaping neglect. This isn’t just an aesthetic issue. When the light cannot project its energy, that energy turns into internal heat. In a 2026 water feature, we are often dealing with high-output 12V or 24V LED systems. If you have recently completed a sod install nearby, the phosphorus runoff often triggers an algae bloom that coats your light lenses in a thick, green carpet. This carpet traps heat. You need to clear it or replace the fixture soon.
How do I clean pond light lenses without draining the basin?
You use a telescopic pond brush and a mild citric acid solution applied via a specialized applicator. Avoid the urge to use a pressure washer near the lights. High-pressure water can bypass even the best IP68 seals, forcing moisture into the housing and causing an immediate short. During a standard yard cleanup, I see guys blasting away at lights and then wondering why the GFI trips. It is a rookie move. Use a soft-bristled brush. Scrub in a circular motion. If the calcium is stubborn, a 10% vinegar solution is your best friend. It breaks the bond without killing your fish.
| Component | Maintenance Frequency | Action Required | Potential Failure Point |
|---|---|---|---|
| Lens Surface | Every 90 Days | Scrub with soft brush | Thermal Diodic Failure |
| Cable Entry Point | Bi-Annually | Inspect for abrasion | Copper Oxidation/Wicking |
| Transformer/Hub | Annually | Check terminal torque | Arcing/Voltage Drop |
| Fixture Positioning | As Needed | Re-align for beam angle | Glare/Light Pollution |
The Technical Deep Dive: IP68 Ratings and Hydrostatic Pressure
An IP68 rating does not mean the light is invincible. It means it is rated for continuous immersion at a specific depth, usually 1.5 to 3 meters. As the water temperature fluctuates, the air inside the fixture expands and contracts. This creates a vacuum effect. If your seals are dry or cracked, they will suck in water. This is why we use dielectric grease. Before you even think about irrigation winterization, you should be checking the seals on your water features. Wet-servicing lights involves pulling the fixture to the surface—most professional installs leave 5-10 feet of extra ‘service loop’ cord coiled behind the rockwork for this exact reason. If your contractor didn’t leave a service loop, they weren’t a pro.
- Locate the service loop behind the stone.
- Gently pull the fixture to the surface.
- Check the O-ring for dry rot.
- Apply a thin coat of silicone-based lubricant.
- Re-seat the lens cover with hand-tight precision.
“Excessive nutrient loading from turfgrass runoff is the primary driver of biofilm accumulation on submerged infrastructure.” – Journal of Aquatic Engineering
Managing the Power Supply: Voltage Drop and Resistance
Maintenance isn’t just about cleaning the glass. You need to check the voltage at the hub. If you have 12 volts at the transformer but only 9.5 at the light, your wires are struggling. This resistance generates heat in the ground. During a yard cleanup, check for any exposed wires that might have been nicked by a string trimmer. A nicked wire wicks water up the copper strands like a straw. Once that water hits the diode, it is game over. Ensure all connections are housed in a dry-box or use heat-shrink waterproof connectors. Do not use wire nuts. They are for indoor residential work, not for professional landscaping.
When you are doing a sod install, ensure the grading carries water away from your lighting transformers. I have seen $2,000 stainless steel transformers rotted out because they were sitting in a low spot. Grade for drainage first. Always. It is the golden rule of the trade. If you don’t fix the soil grading first, every plant you put in the ground is just expensive compost. The same applies to your lights. If they are buried in mud, they will fail. Clean the debris. Maintain the seals. Keep the water out. It is that simple, and that difficult.