Laying Sod in Shade? Use These 3 Survival Tactics
I always drill into my new crew members: if you don’t fix the soil grading first, every plant you put in the ground is just expensive compost. This applies double when you are working in the shadows. I have seen hundreds of homeowners throw thousands of dollars at premium shade-tolerant sod only to watch it turn into a slimy, brown mess within two months. They blame the grass. They blame the nursery. They never blame the biology. When you lay sod in a low-light environment, you are fighting a war against the plant’s natural photosynthetic limits. You cannot win that war with ‘hope.’ You win it with engineering and soil chemistry. If the grade is off by even an inch, water will pool, and the lack of sunlight means that water will not evaporate. It sits. It rots the delicate crown of the new turf. It creates a fungal playground. My crew knows that if we don’t spend three days on soil prep, we don’t spend one minute laying the sod. It is a binary choice: do it right or watch it die.
The Shade Paradox: Why Most Shade Sod Fails
Standard shade sod fails because of a critical sunlight deficit and poor gas exchange in compacted soil. To survive, turfgrass needs a minimum of four hours of direct light or eight hours of dappled light to maintain its carbohydrate reserves and support root development during the establishment phase. Most contractors ignore the micro-climate physics and treat shaded areas exactly like full-sun areas, which leads to immediate etiolation and death.
“A turfgrass plant in the shade is physiologically different from one in the sun; it has thinner leaves, longer internodes, and a lower carbohydrate reserve, making it highly susceptible to stress and disease.” – Turfgrass Physiology Manual
Survival Tactic 1: Select the Right Cultivar for Low Light
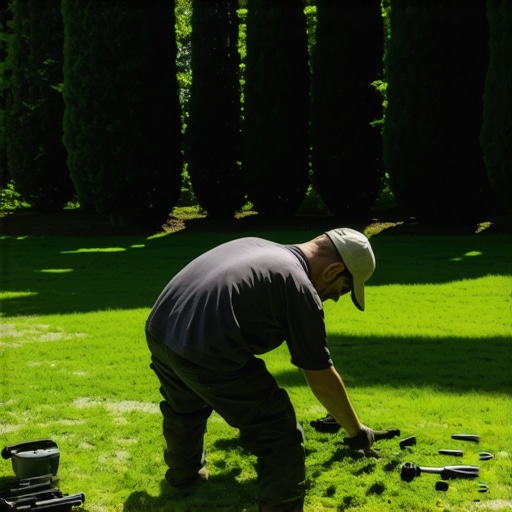
Selecting the correct cultivar involves analyzing the specific light spectrum and heat tolerance of your micro-biome. Not all shade-tolerant grasses are equal; Fine Fescue and St. Augustine (Palmetto or Seville) are the gold standards for low-light survival due to their unique cellular structure. If you choose a standard Kentucky Bluegrass or a common Bermuda for a shaded backyard, the plant will literally starve to death regardless of how much fertilizer you apply. You must match the species to the USDA Hardiness Zone and the specific canopy density of your trees. [image_placeholder]
| Grass Type | Shade Tolerance | Drought Resistance | Best Mowing Height |
|---|---|---|---|
| Fine Fescue | Very High | High | 3.0 – 4.0 inches |
| Palmetto St. Augustine | High | Moderate | 3.5 – 4.0 inches |
| Tall Fescue | Moderate | High | 3.5 – 4.5 inches |
| Zoysia (Zeon) | Moderate | Low | 1.5 – 2.5 inches |
The choice of grass is the foundation. Fine fescue varieties, including creeping red, chewings, and hard fescue, are the most shade-tolerant cool-season grasses. They have needle-like blades that reduce the surface area for transpiration but are highly efficient at capturing low-intensity light. For warm-season climates, St. Augustine is the king. Specifically, the Palmetto and Seville cultivars have been bred to thrive in as little as four hours of sunlight. Don’t let a big-box store employee talk you into a ‘sun and shade’ mix. Those mixes are usually 80% sun-loving rye grass that will die off in the first heat wave, leaving your shaded area patchy and ugly. You need a 100% pure stand of the correct cultivar for your specific shade density.
Survival Tactic 2: Soil Modification and pH Balancing
Soil modification for shaded sod requires aggressive aeration and the mechanical incorporation of organic matter to lower bulk density. Shaded soil stays cooler and wetter for longer periods, which can lead to anaerobic conditions that kill off the beneficial microbes required for nitrogen cycling. You must test the soil pH and adjust it to between 6.0 and 7.0 to ensure nutrient availability. I often find that shaded areas under large oaks are overly acidic due to leaf litter, which locks up phosphorus and prevents root anchoring. We use a heavy-duty core aerator to pull three-inch plugs, then top-dress with a compost-sand mix. This improves the percolation rate. If the water can’t move through the soil, the roots can’t breathe. It is that simple.
“Successful turf establishment in low-light environments is dependent upon maximizing soil oxygen levels and maintaining a pH balance that favors root elongation over leaf growth.” – Penn State Agricultural Extension
How much modified gravel do I need for a patio base?
While we are talking about sod, many homeowners combine this with hardscaping. For a stable patio base, you need a minimum of 4 to 6 inches of compacted modified gravel (typically 21A or 3/4-inch minus). This base must be compacted in two-inch lifts using a plate compactor to reach at least 95% Proctor density. Without this, the ground will heave during freeze-thaw cycles. Proper base prep prevents the sinking that leads to drainage issues in your shaded lawn.
Survival Tactic 3: The Sunlight Deficit Irrigation and Mowing Strategy
The sunlight deficit strategy dictates that you must mow shaded grass 1 inch higher than sun-drenched turf to maximize leaf surface area. Because the plant is receiving less energy from the sun, it needs a larger ‘solar panel’ (the leaf blade) to produce the sugars required for survival. Furthermore, irrigation must be calibrated to provide deep, infrequent watering cycles that occur only in the early morning to prevent foliar diseases like powdery mildew or brown patch. If you water a shaded lawn at night, you are basically asking for a fungal infection. We set irrigation controllers in shade zones to run for 30% less time than sun zones but with a higher frequency of ‘soak’ cycles to prevent runoff. This forces the roots to dive deep into the soil profile to find moisture, rather than staying shallow and weak at the surface.
Is it better to plant shade sod in spring or fall?
For cool-season grasses like Fine Fescue, early fall is the absolute best time for a sod install. The soil temperatures are still warm enough to encourage root growth, but the air temperatures are cooling down, reducing the evapotranspiration stress on the new carpet. Additionally, deciduous trees begin to lose their leaves in late fall, providing a temporary window of increased sunlight that allows the new sod to establish a carbohydrate reserve before the winter dormancy period. Spring is a secondary option, but you will fight more weed pressure from pre-emergent failures and crabgrass competition.
The Essential Shade Sod Installation Checklist
- Tree Canopy Thinning: Hire an arborist to thin the canopy by 15 to 20 percent to increase light penetration.
- Soil Testing: Perform a professional soil test to determine N-P-K levels and pH balance before ordering sod.
- Grade Correction: Ensure a 2% slope away from structures to prevent water stagnation in the shade zone.
- Sharp Mower Blades: Always use sharp blades; dull blades tear the grass, creating entry points for disease in low-light areas.
- Zero Traffic: Keep all foot and pet traffic off new shade sod for at least 21 days to allow root anchoring.
Remember, shade-grown turf is fragile. It is not the place for a high-traffic dog run or a kid’s soccer goal. If you treat it like a golf course fairway, it will fail. You have to respect the biology of the plant. If you follow these tactics, you can have a functional green space in the shadows. If you skip the prep, you are just throwing money into a dark hole. Your yard cleanup shouldn’t involve hauling away dead sod every two years. Do it right once. That is the only way a professional works. Stop looking for shortcuts. There are no shortcuts in the dirt. It takes work. It takes measurement. It takes a refusal to accept mediocre results.