
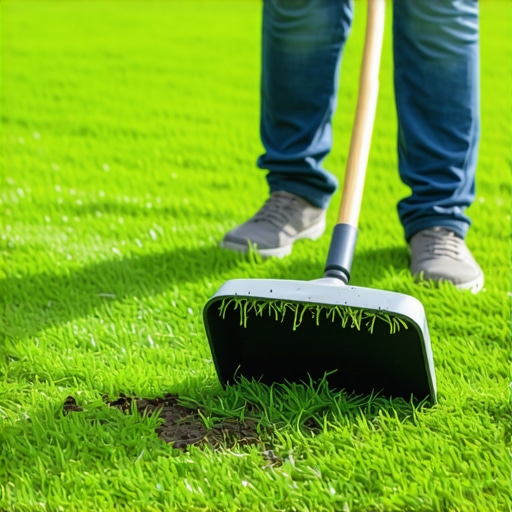
Mastering the Sod Plugger for Precision Lawn Repair
To patch a hole in your lawn using a sod plugger, you must extract a uniform 3-inch cylinder of turf from a healthy donor site and transplant it into a precisely excavated hole in the damaged area. This method ensures genetic consistency across your turf and establishes a mature root system faster than seed, provided you maintain 100 percent soil-to-root contact. It is the only way to fix localized dead spots without risking the ‘patchwork quilt’ look of mismatched cultivars.
I always drill into my new crew members: if you don’t fix the soil grading first, every plant you put in the ground is just expensive compost. I have watched too many rookies slam a plug into a hole that is either too shallow, causing the plug to desiccate, or too deep, leading to root rot. We are not just moving grass; we are performing a biological transplant. You have to treat the soil as the patient’s circulatory system. If the soil is compacted or the pH is off, that plug is dead on arrival. Most ‘mow-and-blow’ guys will just throw some cheap fescue seed on a Bermuda lawn and walk away. That is professional malpractice. We use a sod plugger because it respects the architecture of the turf. It preserves the stolons and rhizomes that are necessary for the patch to actually knit into the surrounding lawn. If you want a lawn that looks like a single, seamless carpet of green, you have to work with the grass’s natural growth habit, not against it.
The Engineering of the Sod Plugger Tool
A professional-grade sod plugger is a specialized piece of manual equipment designed to exert high downward pressure to cut through dense root mats. Unlike a spade, which creates irregular edges, a plugger uses a circular, tapered steel bit. This taper is critical because it creates a slightly wider top than bottom, ensuring the plug wedges firmly into the recipient hole. This mechanical wedge effect is what prevents the plug from shifting during heavy irrigation or foot traffic. Cheap big-box versions often use thin-walled aluminum that flexes under pressure; stay away from those. You need heavy-gauge powder-coated steel that can bite through clay without bending.
“Soil compaction is the primary reason for the failure of turfgrass establishment. When bulk density exceeds 1.6 g/cm3, root penetration is severely restricted, regardless of the quality of the sod or seed used.” – Penn State Extension: Center for Turfgrass Science
Preparing the Donor Site and the Damaged Area
Before you even touch the tool, you need to conduct a yard cleanup of the target area. Remove any dead thatch, rocks, or debris that could interfere with the plugger’s cutting edge. If the soil is bone-dry, you are going to struggle. Water the area 24 hours in advance to reach a ‘field capacity’ state where the soil is moist but not muddy. This moisture acts as a lubricant for the metal and keeps the soil core intact during extraction. If the soil crumbles as you pull it out, it is too dry. If it drips, it is too wet. Precision in soil moisture is the hallmark of a veteran landscaper.
| Repair Method | Root Establishment Time | Visual Consistency | Equipment Required |
|---|---|---|---|
| Sod Plugging | 14-21 Days | 100% Match | Sod Plugger, Hand Trowel |
| Patch Seeding | 45-60 Days | 60-80% Match | Seed, Peat Moss, Spreader |
| Full Sod Strips | 21-30 Days | 90% Match | Sod Knife, Roller, Pick |
Step-by-Step: The Surgical Extraction and Replacement Process
- Step 1: Identify a healthy, inconspicuous donor area, such as a corner or along a fence line.
- Step 2: Position the plugger vertically and step onto the foot bar, using your full body weight to drive the bit 3 to 4 inches deep.
- Step 3: Twist the handle 90 degrees to shear the roots at the bottom of the core.
- Step 4: Pull the tool straight up and eject the plug using the manual plunger.
- Step 5: Repeat the process in the damaged area to create a receiving hole.
- Step 6: Insert the healthy plug into the hole. It should sit approximately 0.5 inches higher than the surrounding soil to allow for settling.
- Step 7: Step firmly on the plug with your heel to eliminate air pockets.
How long does it take for sod plugs to spread?
Depending on the turf species, sod plugs typically begin spreading via stolons (above-ground runners) or rhizomes (underground stems) within 14 to 28 days. Warm-season grasses like Bermuda or St. Augustine spread faster in temperatures above 80 degrees Fahrenheit, while cool-season grasses may take longer to knit. Proper nitrogen levels are essential during this phase to stimulate lateral growth rather than just vertical height.
When is the best time of year to use a sod plugger?
The optimal window for sod plugging is during the active growth phase of your specific grass type. For warm-season grasses, this is late spring to early summer. For cool-season grasses like Kentucky Bluegrass, early autumn is preferred. Avoid plugging during dormancy or extreme mid-summer heat, as the transplant shock and high evapotranspiration rates will likely kill the plug before the roots can bridge the soil gap.
“Successful turfgrass establishment requires that the rate of root growth exceeds the rate of moisture loss from the leaf blade. Maintaining a saturated root-zone interface is the only way to prevent desiccation during the first seven days post-install.” – Texas A&M Agrilife Research
Irrigation and Post-Op Care for New Plugs
Once the plugs are in, your irrigation schedule becomes your most important tool. You are not watering the whole lawn; you are watering the plugs. For the first week, they need light misting twice a day. Do not flood them. If you see the plug turning a straw-brown color, the roots have disconnected from the soil. Use a liquid starter fertilizer with a high phosphorus count (the middle number on the NPK bag) to encourage rapid root elongation. Avoid any weed-and-feed products for at least six weeks, as the pre-emergent chemicals will inhibit the new roots from expanding into the surrounding soil. Most homeowners fail because they treat the new plug like the rest of the established lawn. It is a baby; treat it like one.
Common Pitfalls: Why Your Plugs Are Heaving or Dying
If you find your plugs popping up out of the ground after a few weeks, you likely have an issue with hydrostatic pressure or poor compaction. If the soil beneath the plug is too loose, water will pool under the core and literally float it out of the hole. Conversely, if you have heavy clay soil and didn’t loosen the walls of the hole with a trowel, the roots may become ‘pot-bound,’ circling the hole instead of penetrating the surrounding earth. This is known as root girdling. Always score the sides of the hole if you are working in heavy clay. It takes an extra five seconds, but it makes the difference between a repair that lasts and one that dies in a month. Precision matters. Details matter. Don’t be a hack. “